Building My Own Garage Shelving Is Going To Make My Wrenching Life So Much Easier
The garage is the absolute soul of the automotive hobby. It's the place where the beers are cold, the benchracing is impressive, the project cars are hellish, and the camaraderie cures all that ails you. Having a comfortable and useful garage is almost as important as the cars you keep in it. As near as I can tell, this garage was installed almost 90 years ago, and after all that time I decided that it needed some upgrades. The best place to start for such a thing is with useful storage.
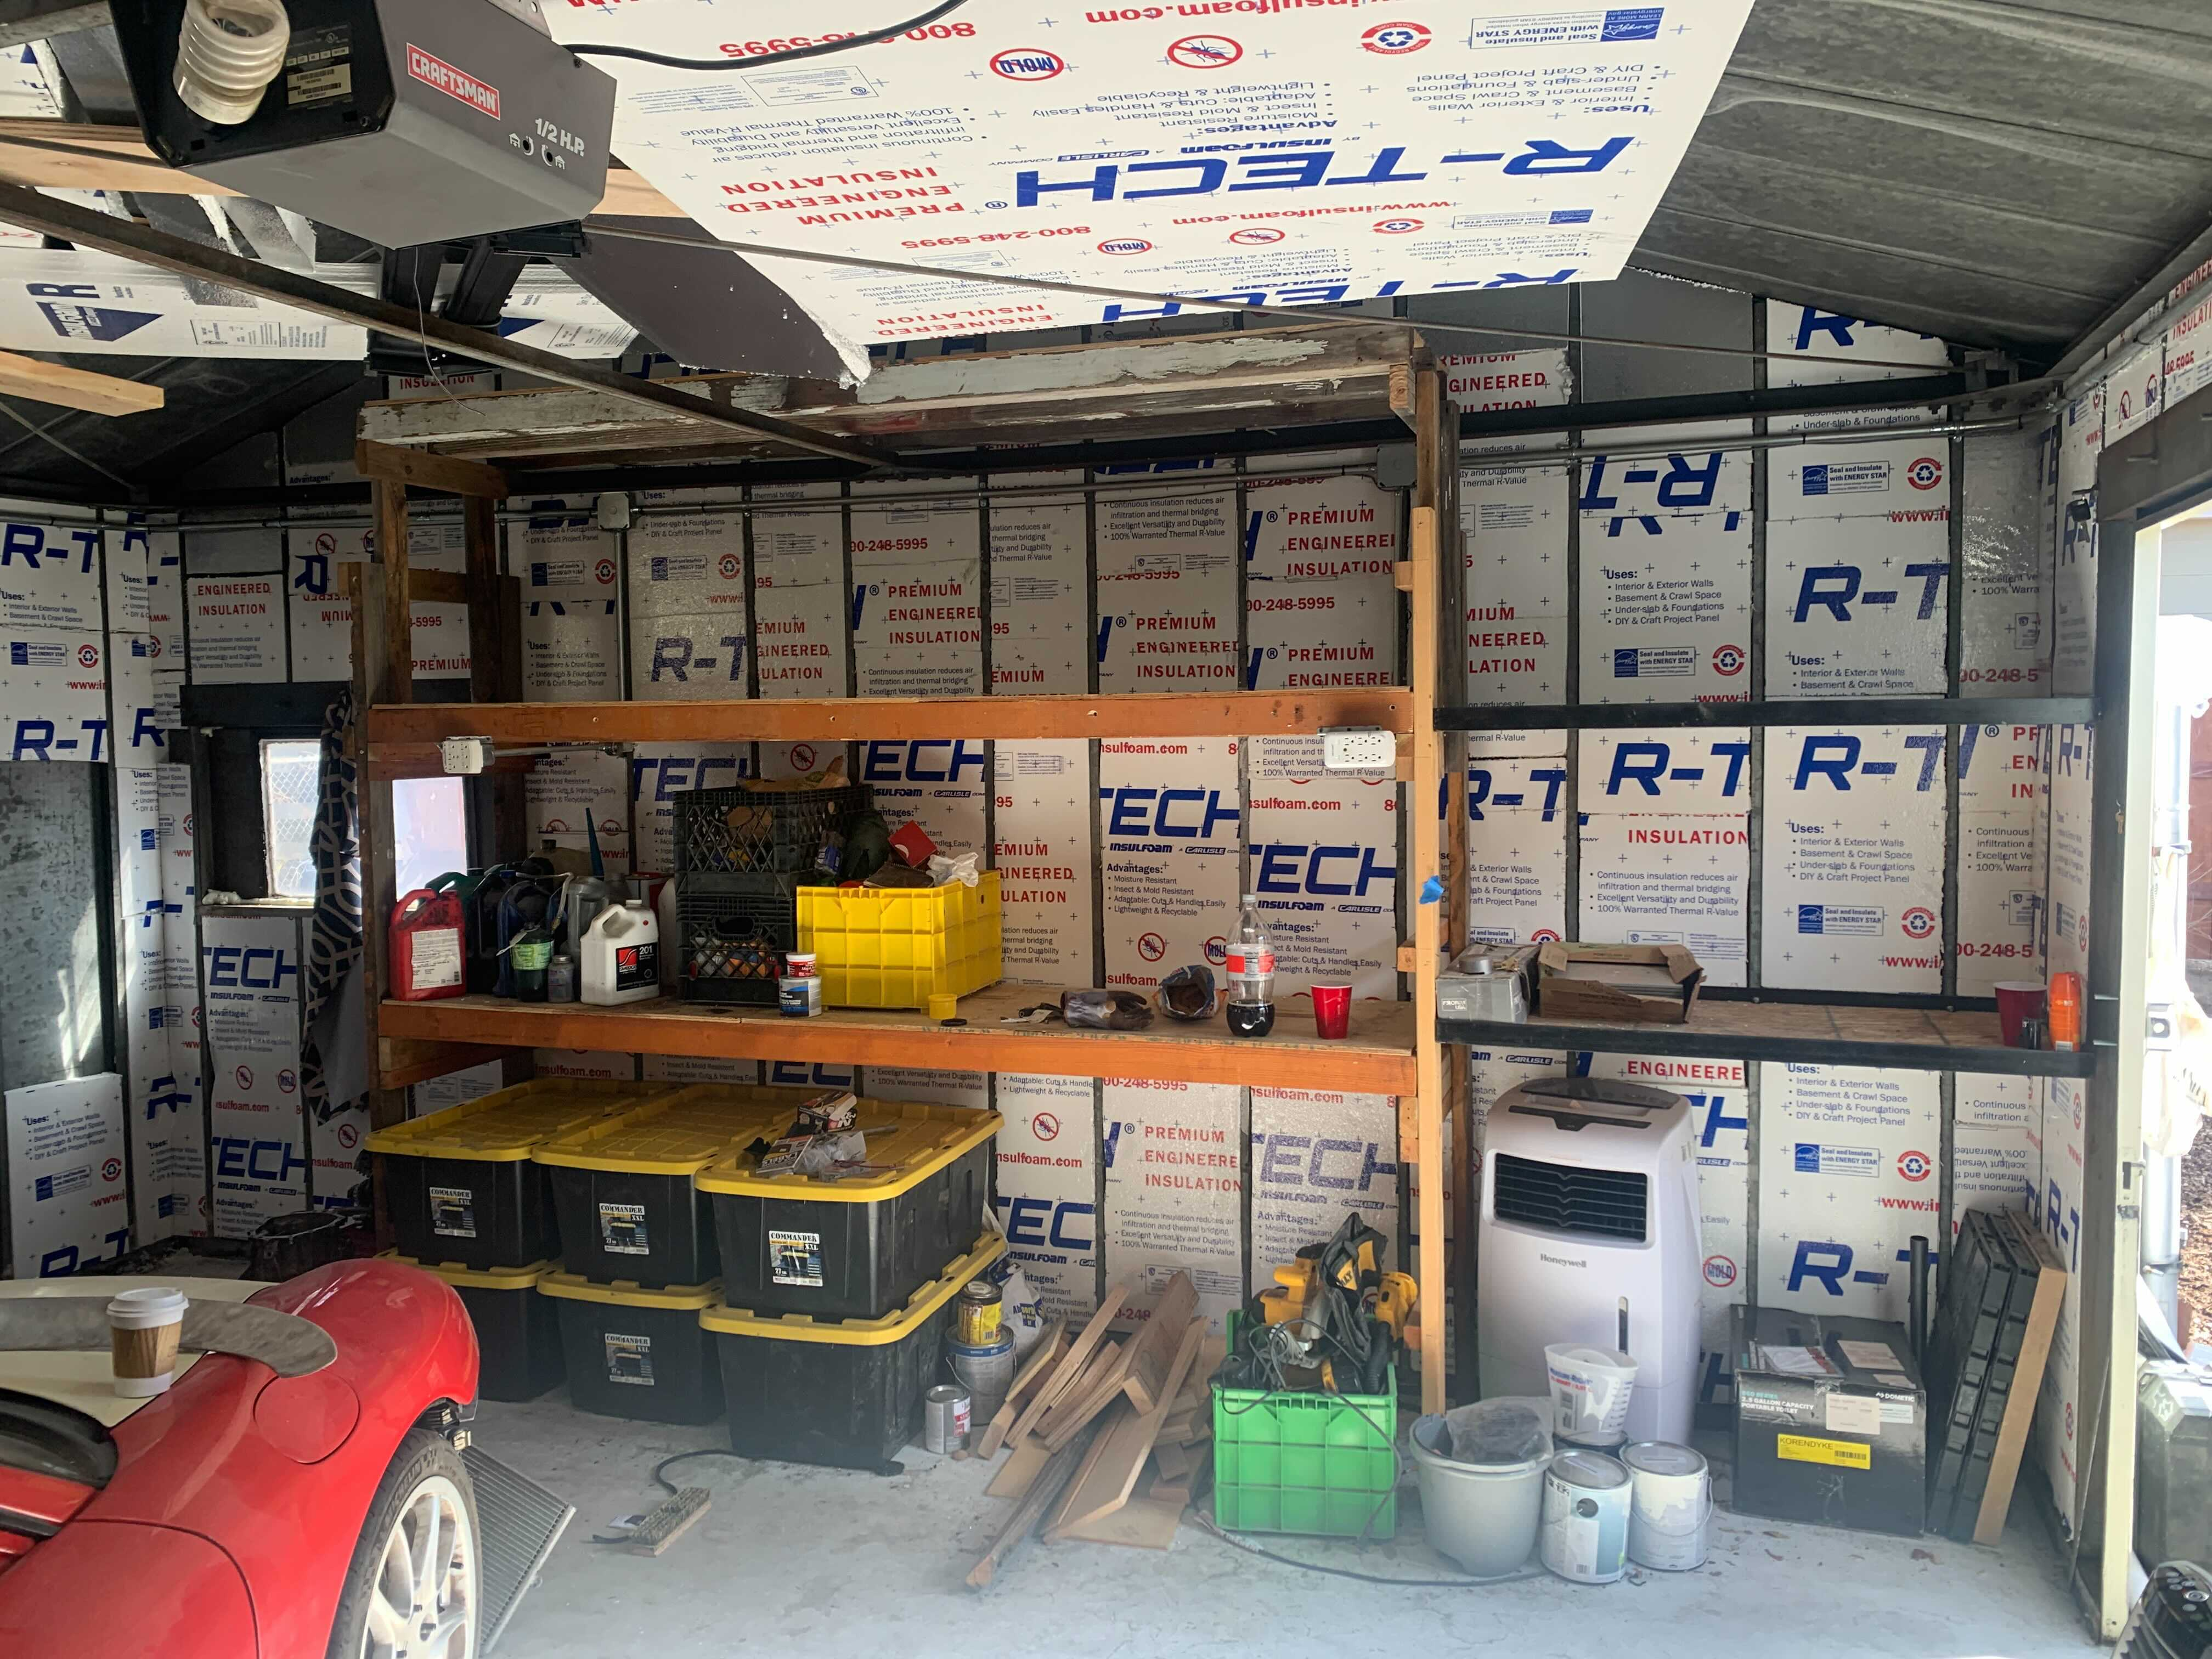
When we downsized from a 1400 sqft home in the suburbs to a 700 sqft 1930s steel home downtown, we got rid of a lot of stuff that we didn't know why we even had, but we still had accrued more stuff than could fit in the new place, and had to find a way to pack it all in. Some of it went in the shed, some of it was donated, and the leftovers overran the poorly-designed shelves of my garage.
When we moved in, the previous owners had assembled this haphazard shelving from leftovers and layabouts. Some steel, some hacked lumber, shelves too tall to be useful, and a mix of used hardware of varying efficacy all conspired to a storage area that didn't really want to be used. Add in that the massive 24" deep shelves meant I couldn't pull a car in without angling its bumpers at opposite corners, and walking around it involved shuffling sideways, and the old thing just had to go.
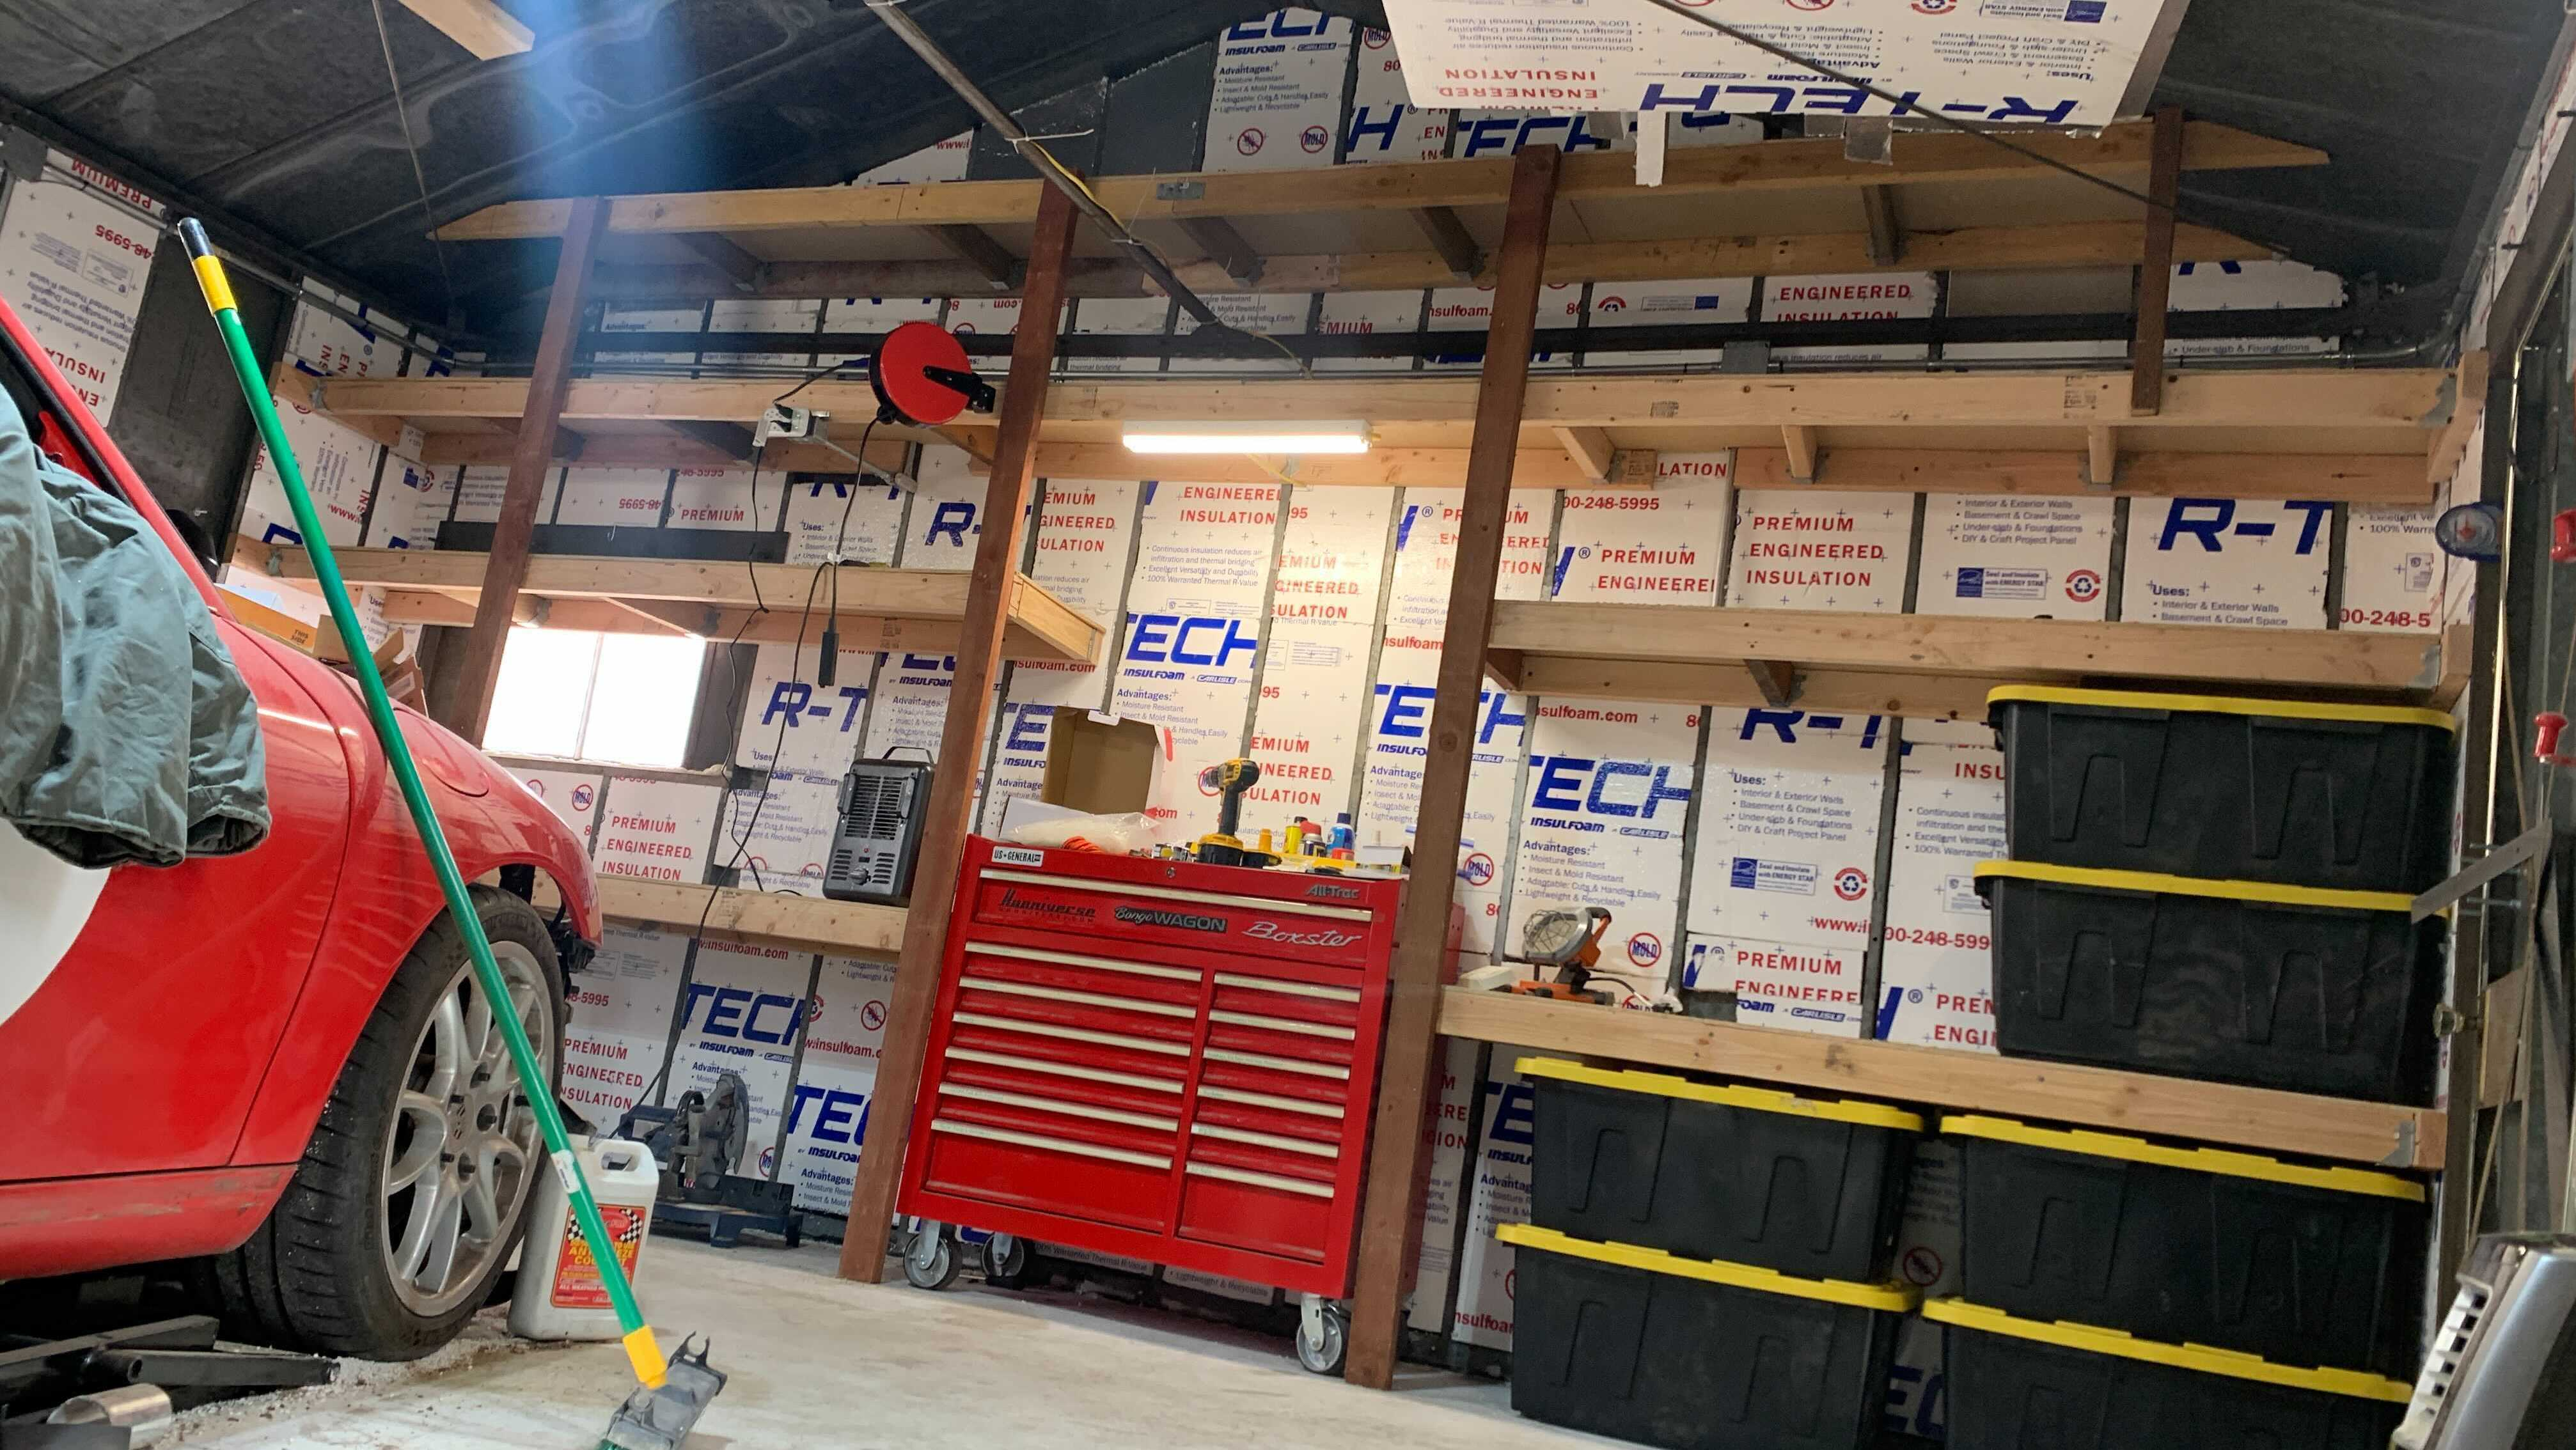
Over last weekend my wife and I decided to spend a romantic Valentine's Day weekend dismantling the old shelf and building a new more useful one. The project was multifaceted, as it would combine room for storage with a cleaner and brighter workspace extra room for tire storage, and better lighting for the garage. It took most of Saturday, Sunday, and Monday to get it done. Plus a little bit on Tuesday.
Obviously, in any sane person's garage the first step would be to remove the car sitting in the middle to gain some more room to work and not scratch the paint or drop a 4x4 beam on the damn thing. Unfortunately I removed the brake calipers from my Boxster project last week to send them out for rebuild, and the car is little more than a static art project. So... Be careful.
We began by tearing out the old shelf, which aside from having to use five different bits to remove the philips head, torx head, and square head screws of varying size, went fairly painlessly. We'd done all of the measuring and shelf design planning during the week, so by lunch on we were at Lowes to pick up some fresh lumber supplies and tote them home in a Uhaul rental trailer. The contents of the shelf were on the ground and the shelf itself was disassembled. Time to start the rejuvination.
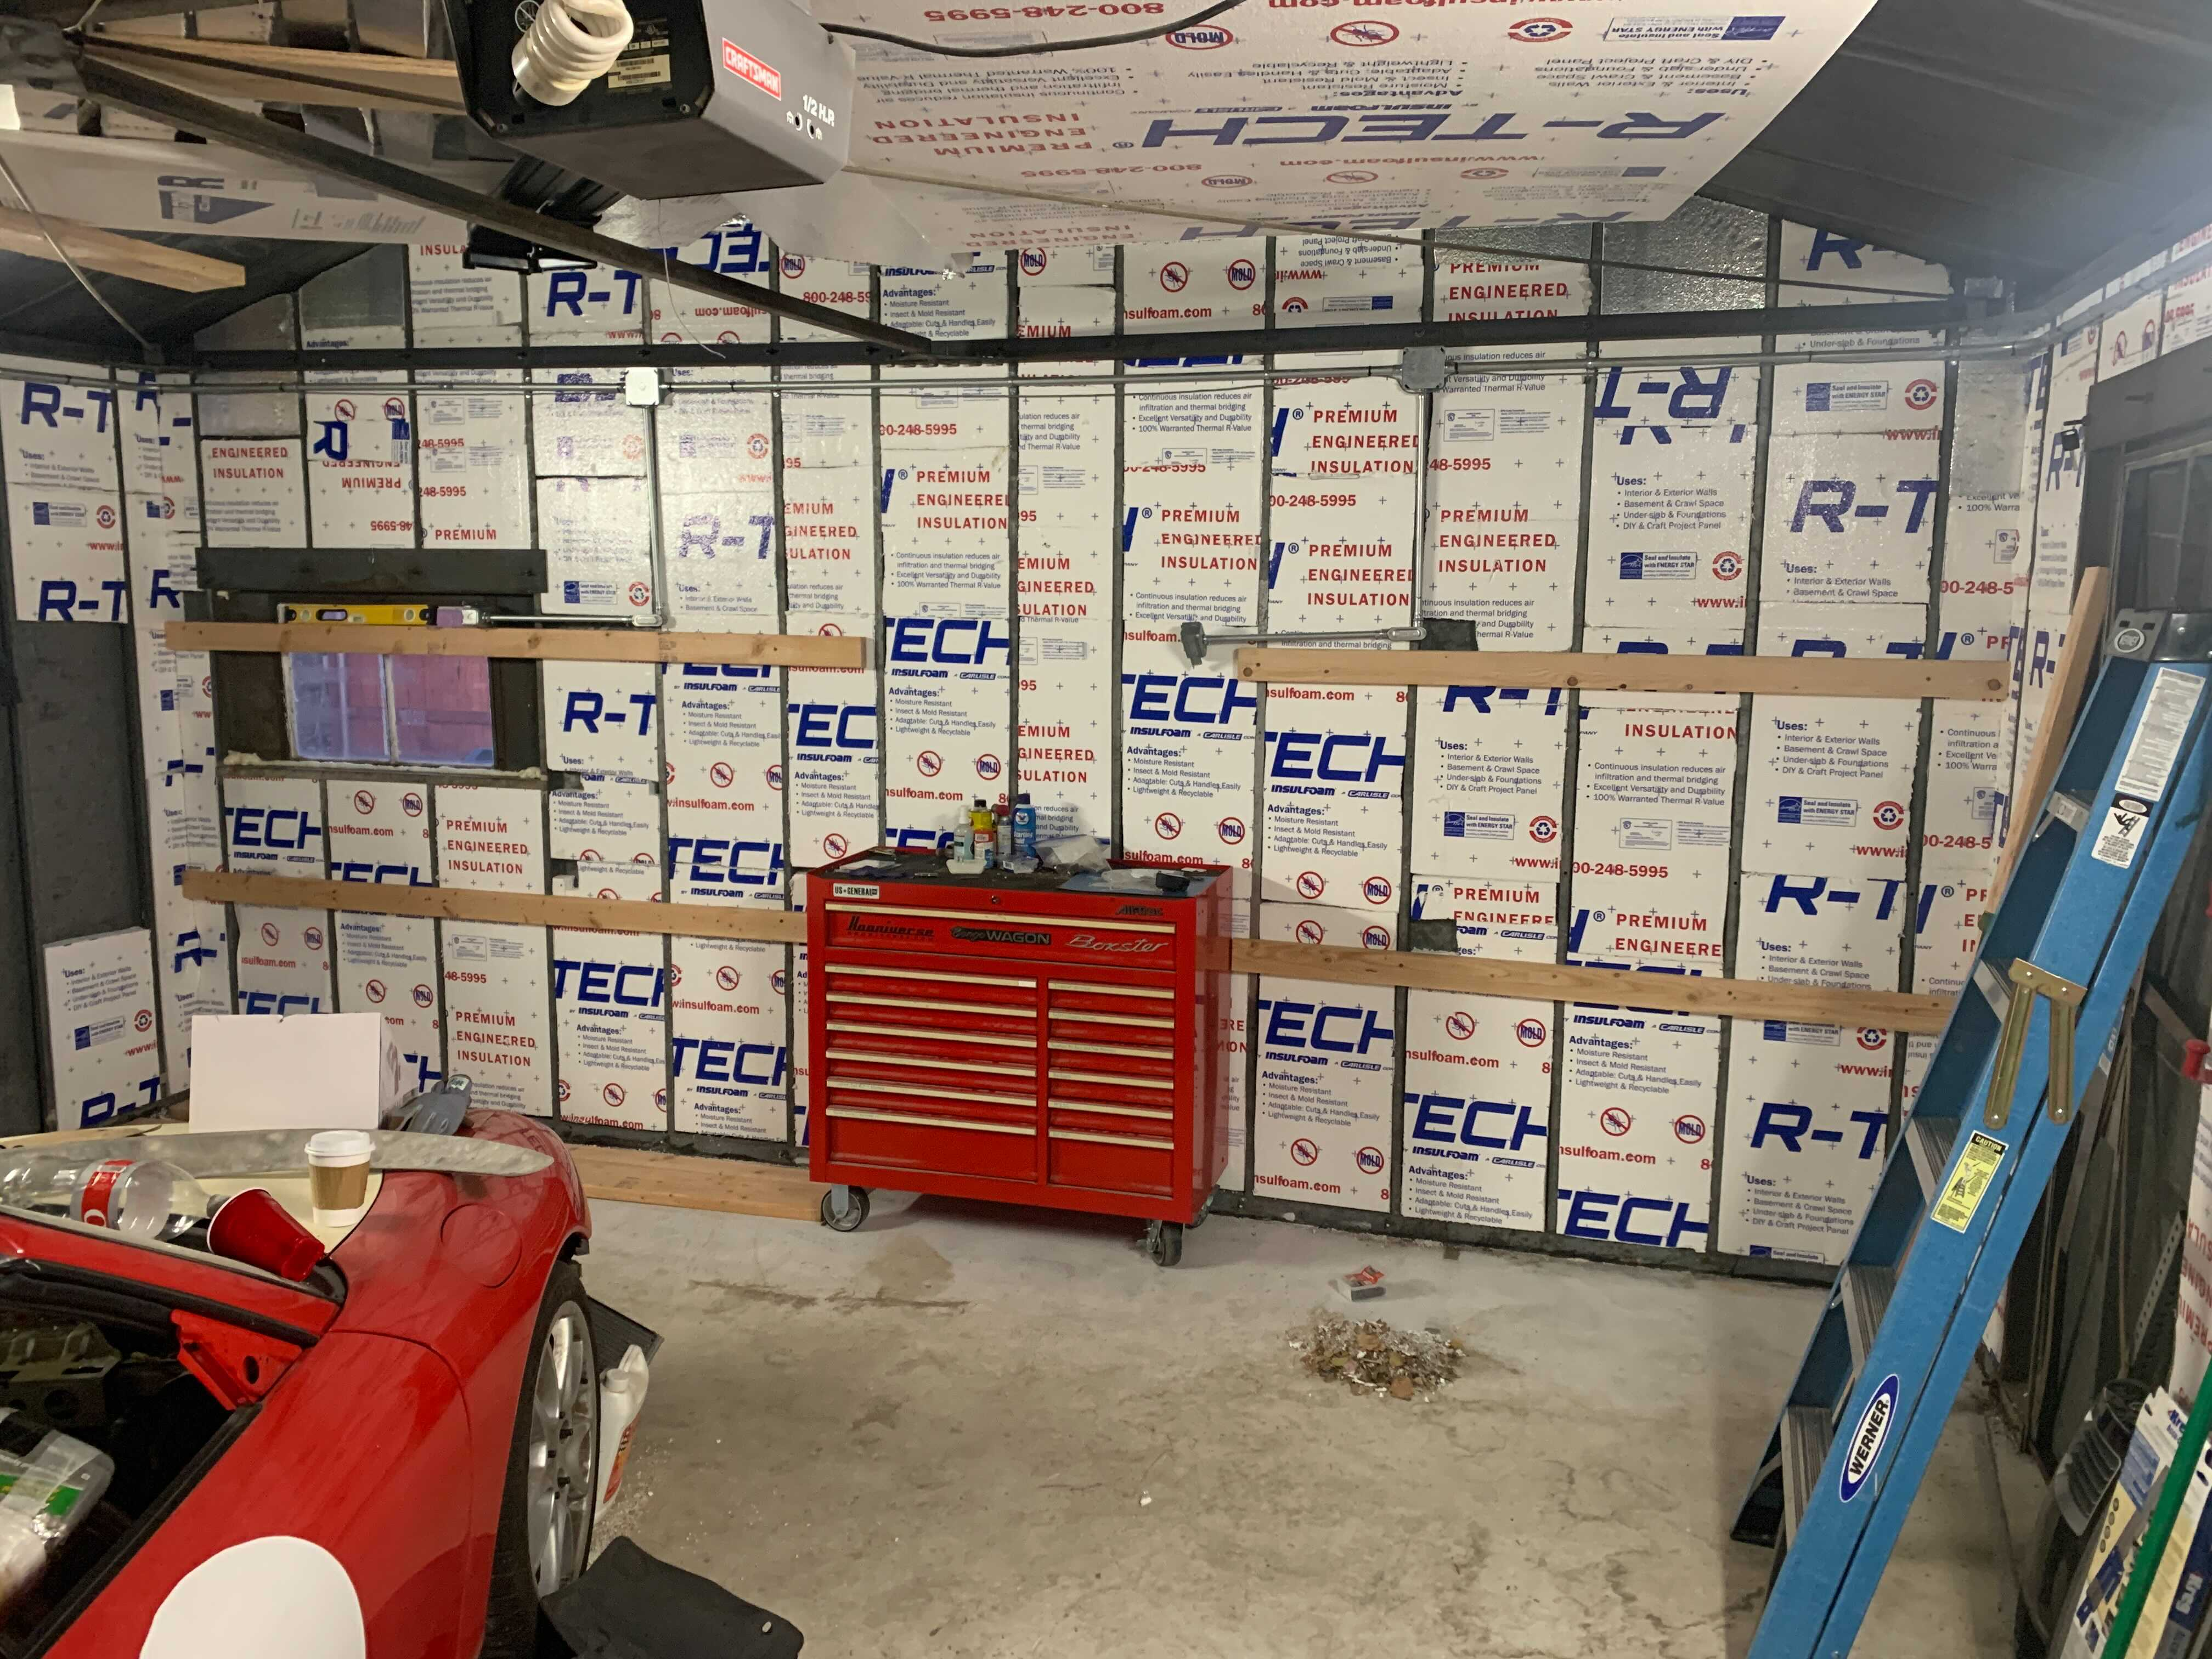
By shortening the bottom two shelves to be just tall enough to fit two stacked totes we managed to fit a fourth shelf in the mix. We ran a full-length eight-foot 2x4 on the left side, which offset the toolbox just to the right of center, meaning we wouldn't have to deal with the structural center beam interfering with our vertical beams. Then two more 2x4s were cut to length to fill the remaining wall on the right. All of these were fitted directly to the wall with three-inch wood-to-metal self-tapping screws.
We decided to run a board over the window on the left because all four walls of the garage have a window, and the extra width was more important than the ambient lighting. The window is so old it's basically frozen shut anyway, so no point in keeping it for summer air flow.
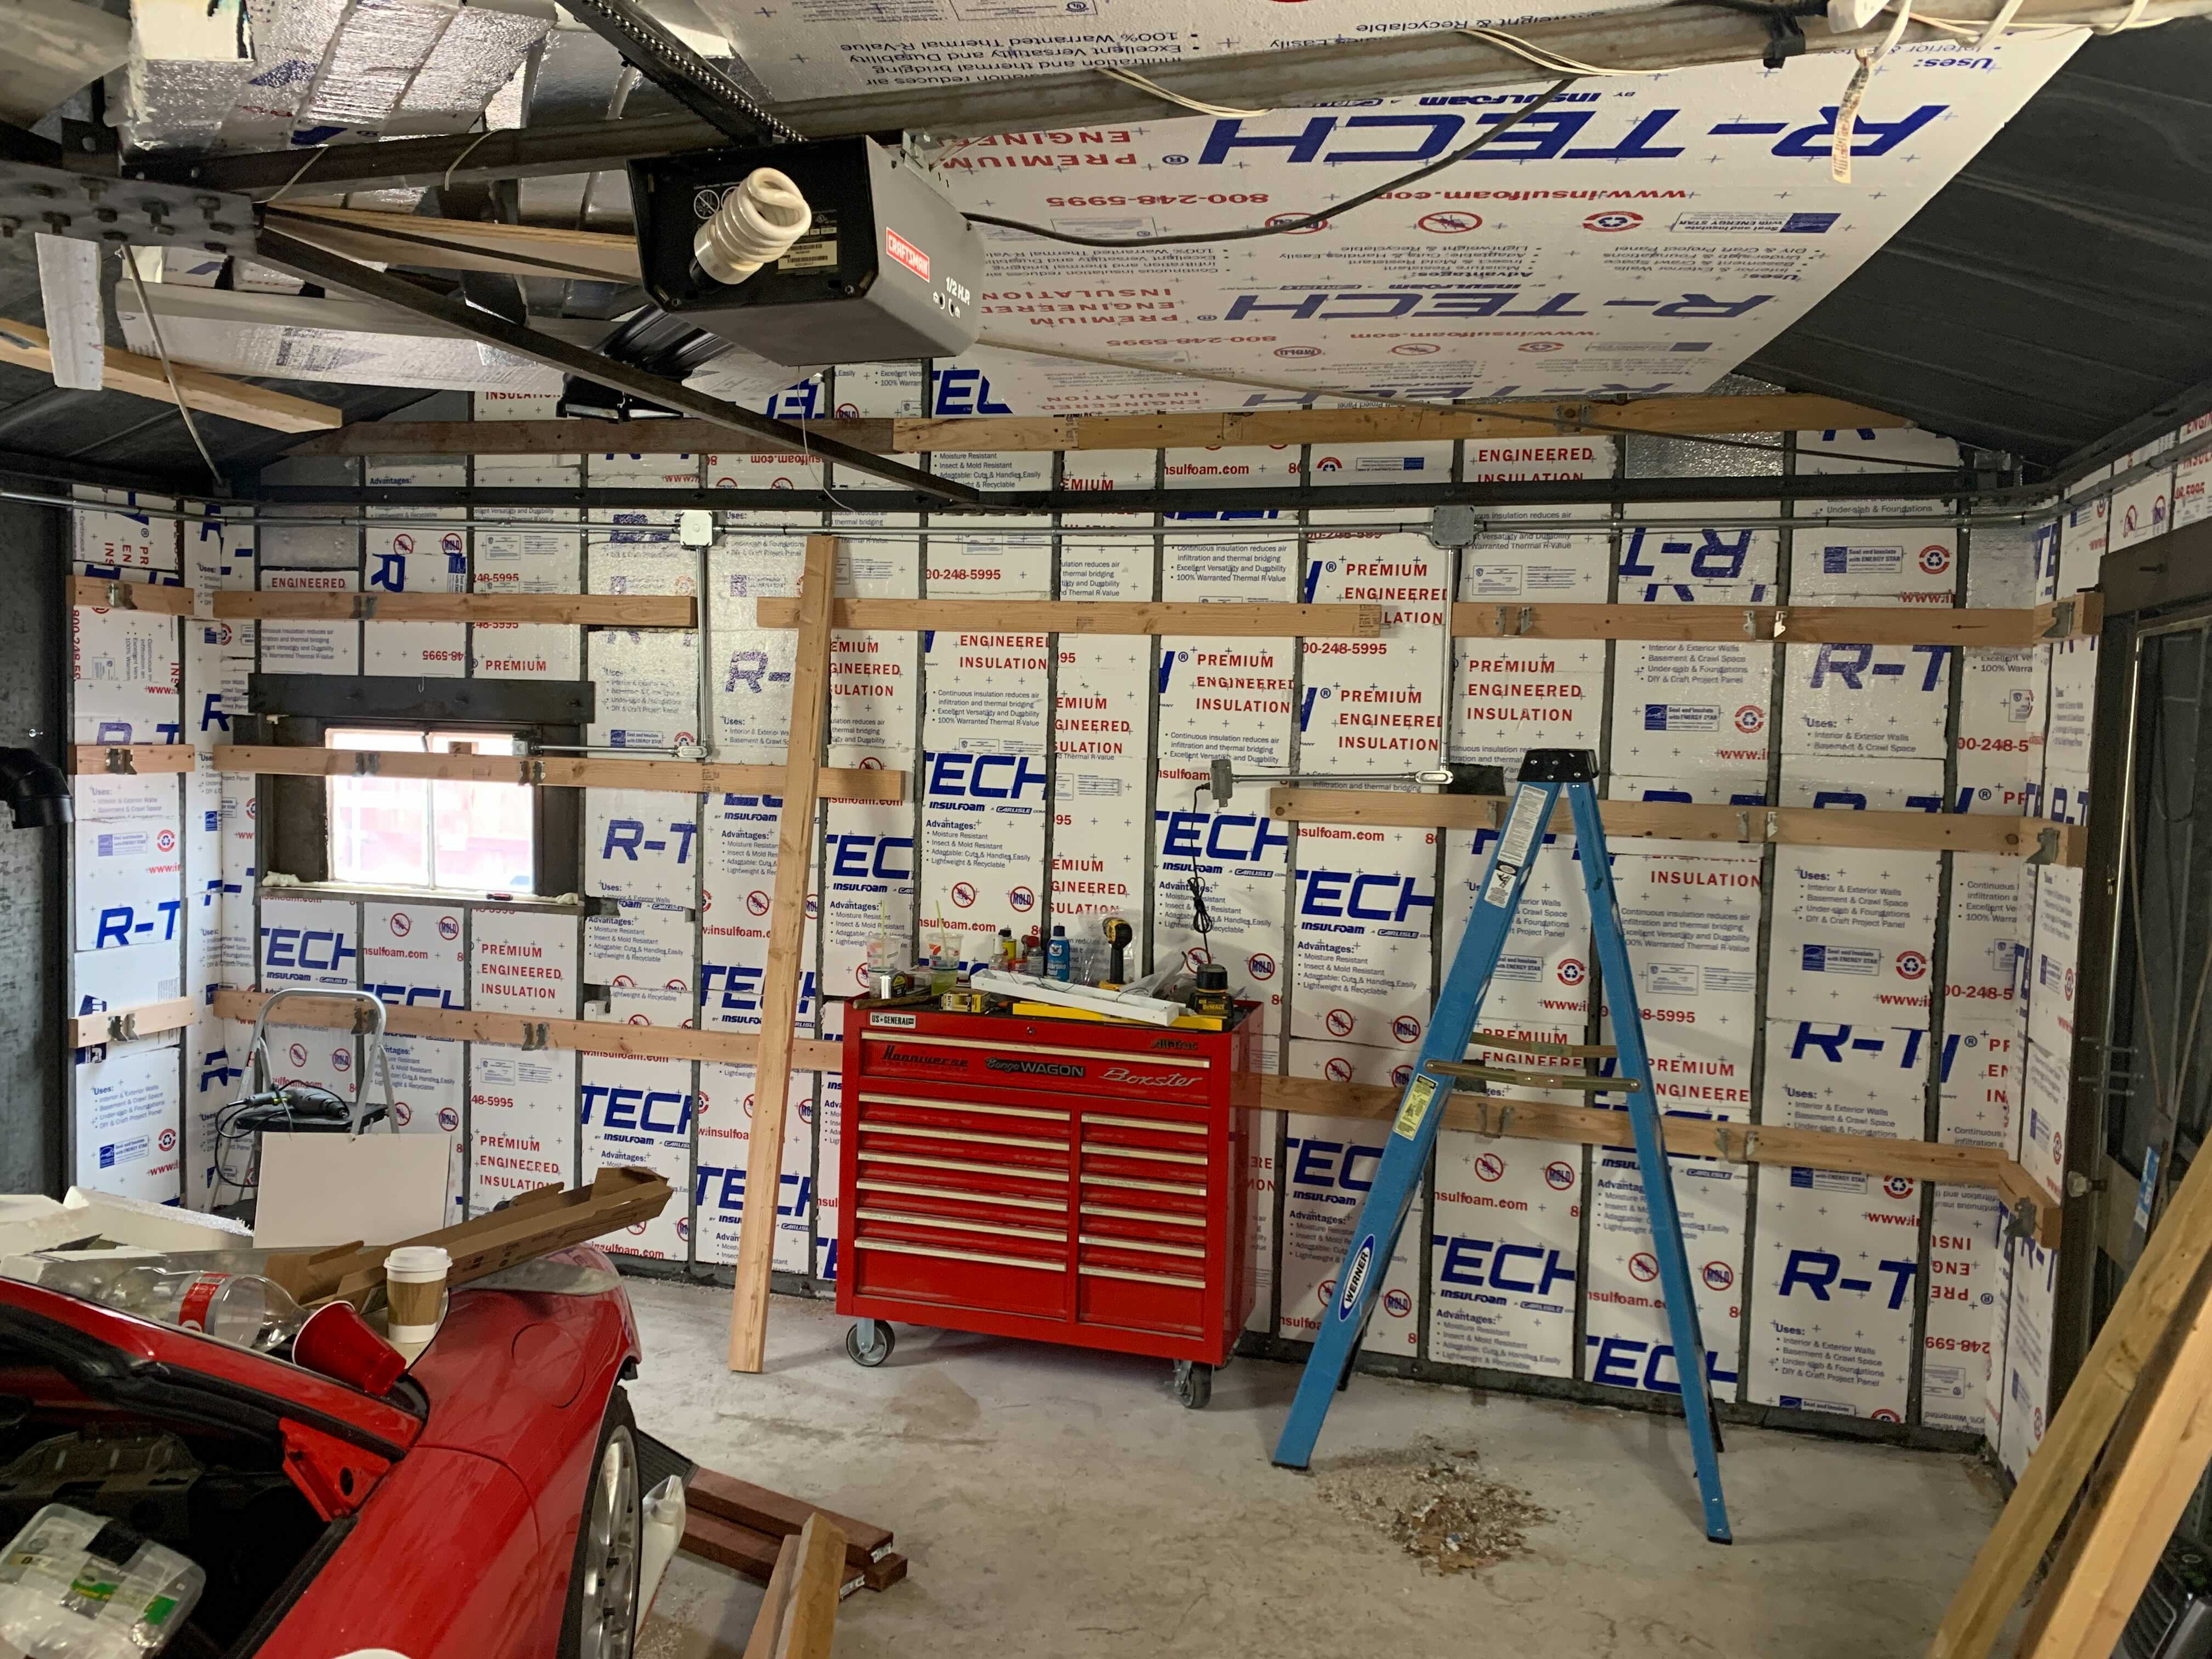
With all of the horizontal boards in place, going all the way up the wall and out from the wall to serve as supports for the pressboard shelf tops, we installed joist hangers every two feet along the back wall to hang 15-inch shelf supports. My wife was very concerned about the shelf's ability to hold the weight of our various items, including a few electric motors, gasoline motors, and the odd transmission or two, so I overbuilt the hell out of it. It's basically a vertical porch.
Because the old shelf was so big and unwieldy in this small workspace, we decided to build it a bit narrower, basically to match the depth of my toolbox. You wouldn't think that six inches is a lot (hah) but it makes a huge difference in a space like this. The new 18" shelves are still deep enough to hold our yellow-top bins sideways, crucially. Without moving the car, I have gained a significant amount of walking and work space at the front of the car. Because the tool box was also out floating around the garage, I also gained floor space from that by building it into the shelf.
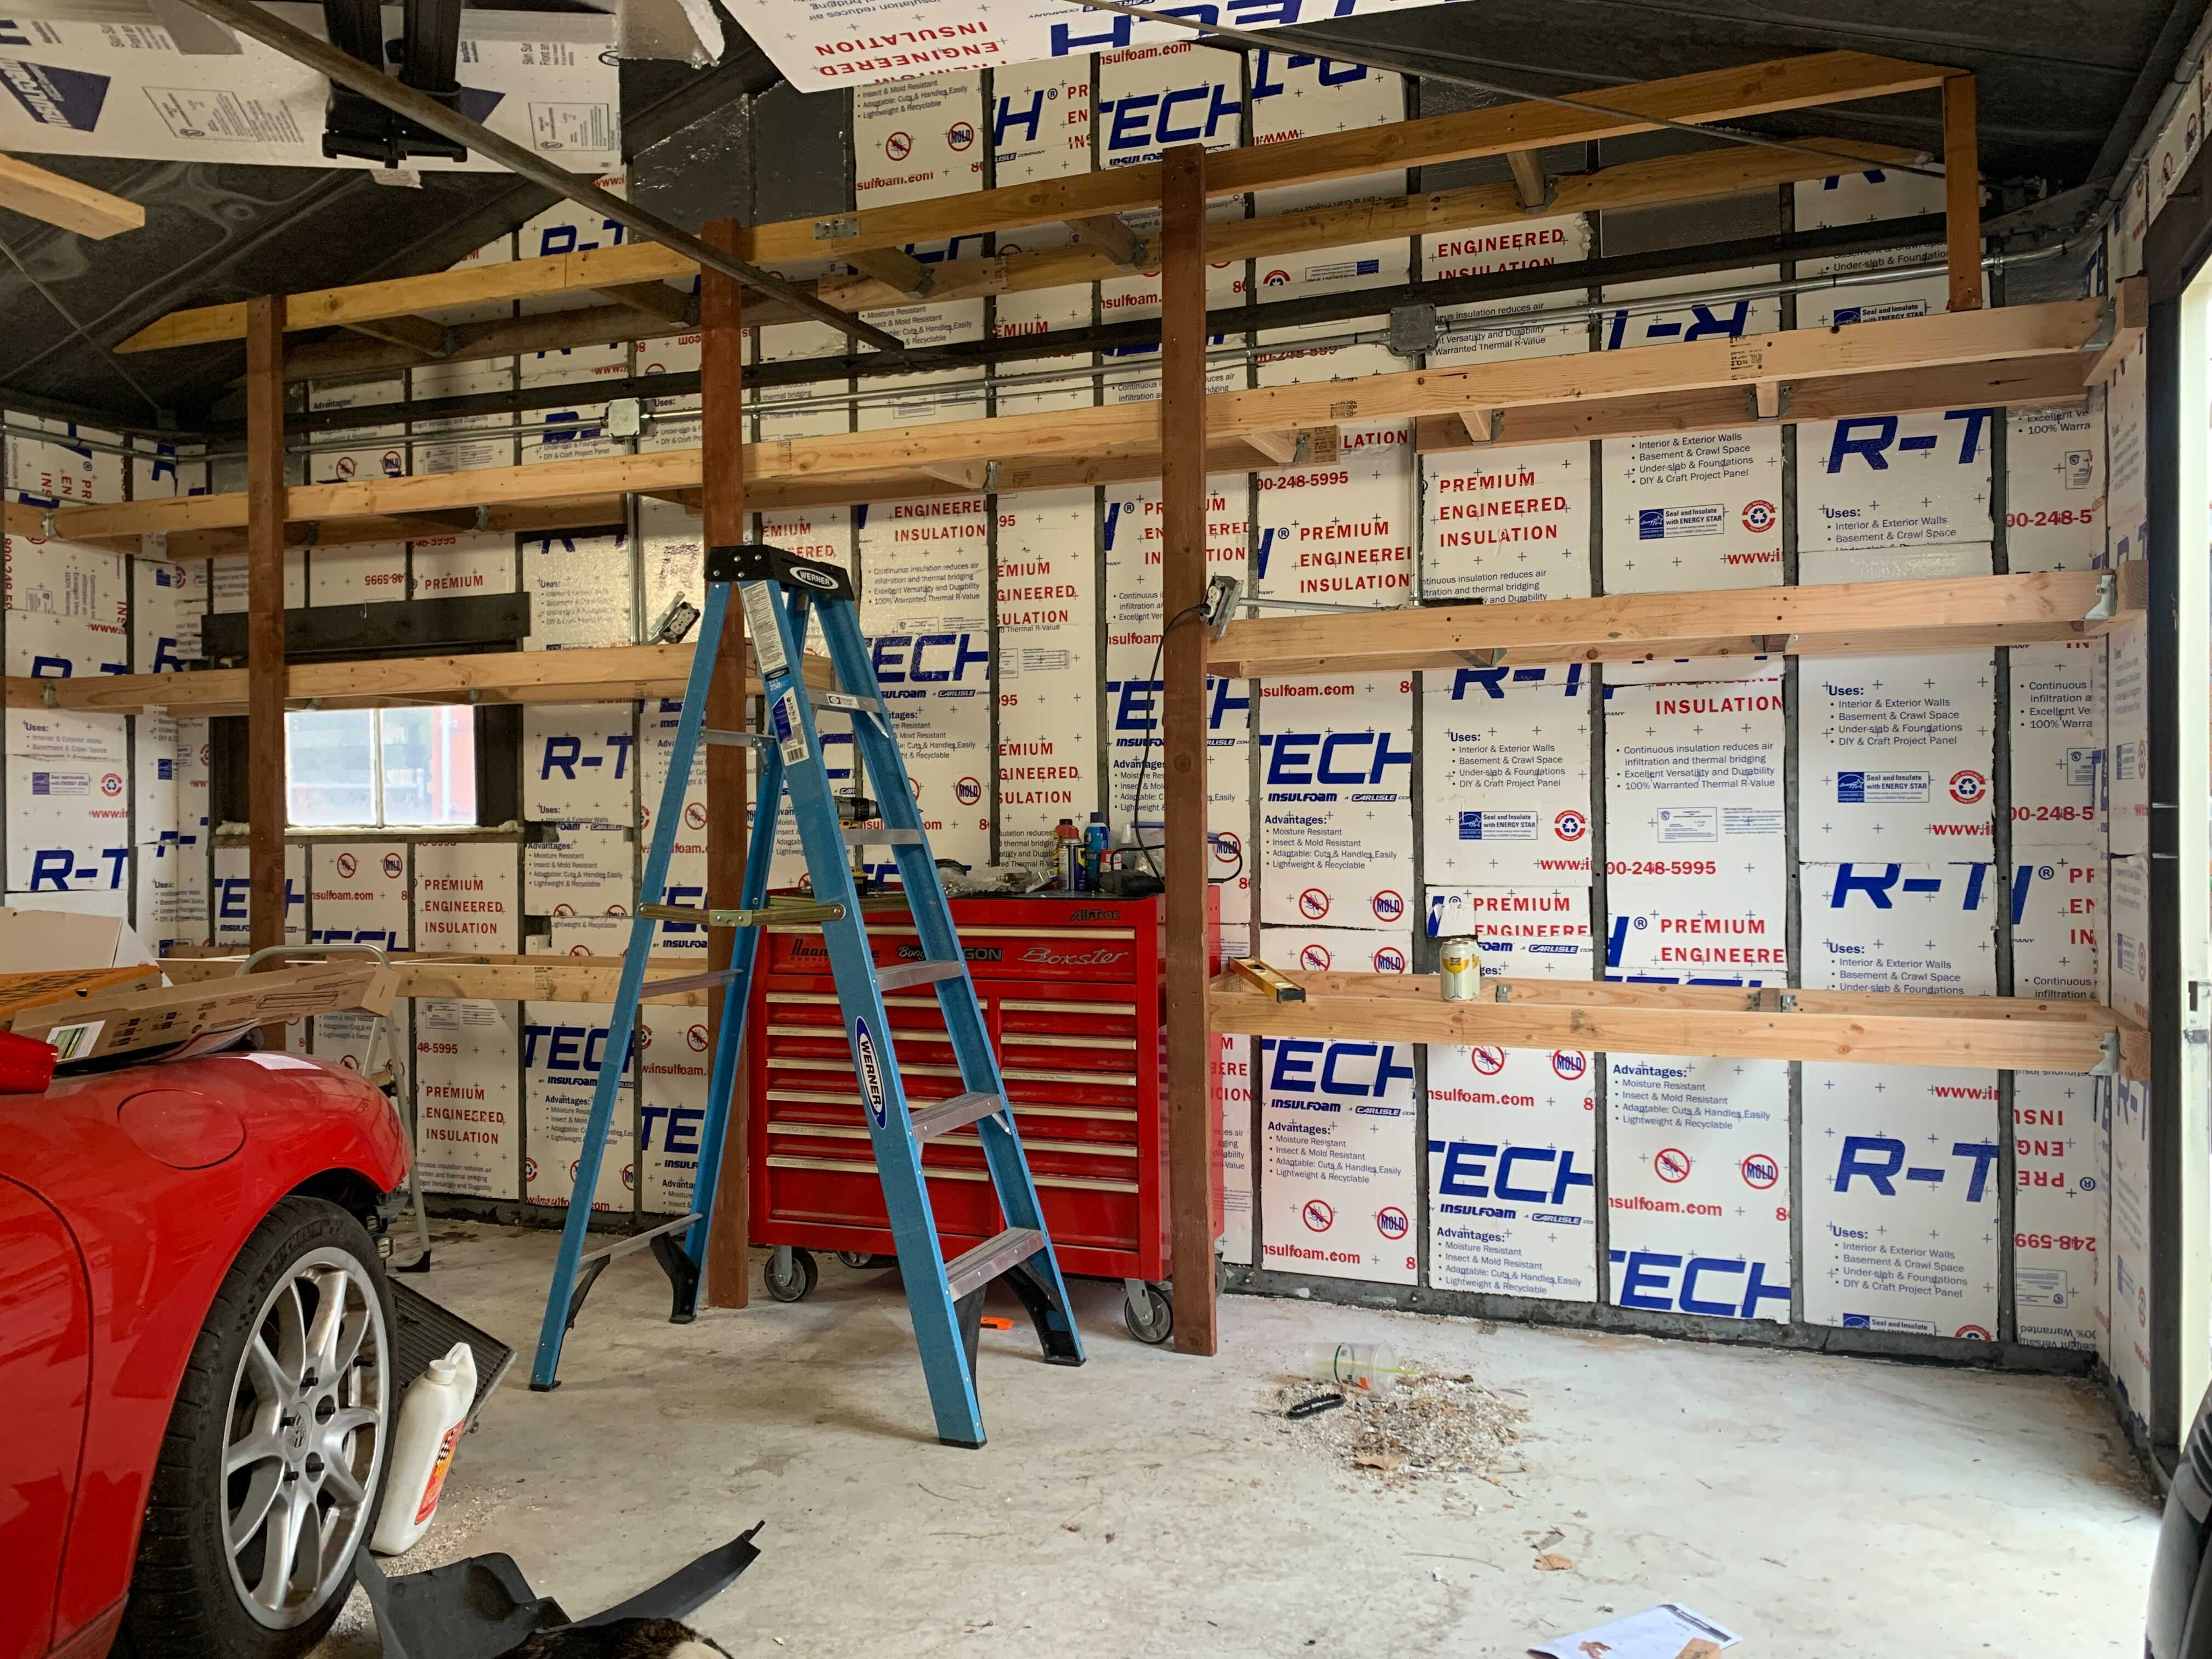
The vertical support sections of the build are 10-foot pressure-treated 2x4, which was the only thing Lowes had in the right length. They weren't cheap at about ten bucks per board, but that's what was in stock. The joist hangers connect the front facing boards to the wall at each end, and the vertical supports in the middle. Rather than use joist hangers on the front board, we chose to screw directly through the front board to the support board. How many times can I write board?
The hardest part of this stage was getting the angle of the pitch of the roof correct and measured out on the top shelf boards. It ended up being split pretty even in the middle with an 8-foot board on each end and a 20 degree slope to the roof cut into the ends. Another hitch in this project's giddy-up was that the right hand corner of the wall actually curves outward slightly, meaning we had to compensate for the bend in order to keep the shelf square. The pleasures of dealing with ancient metal construction.
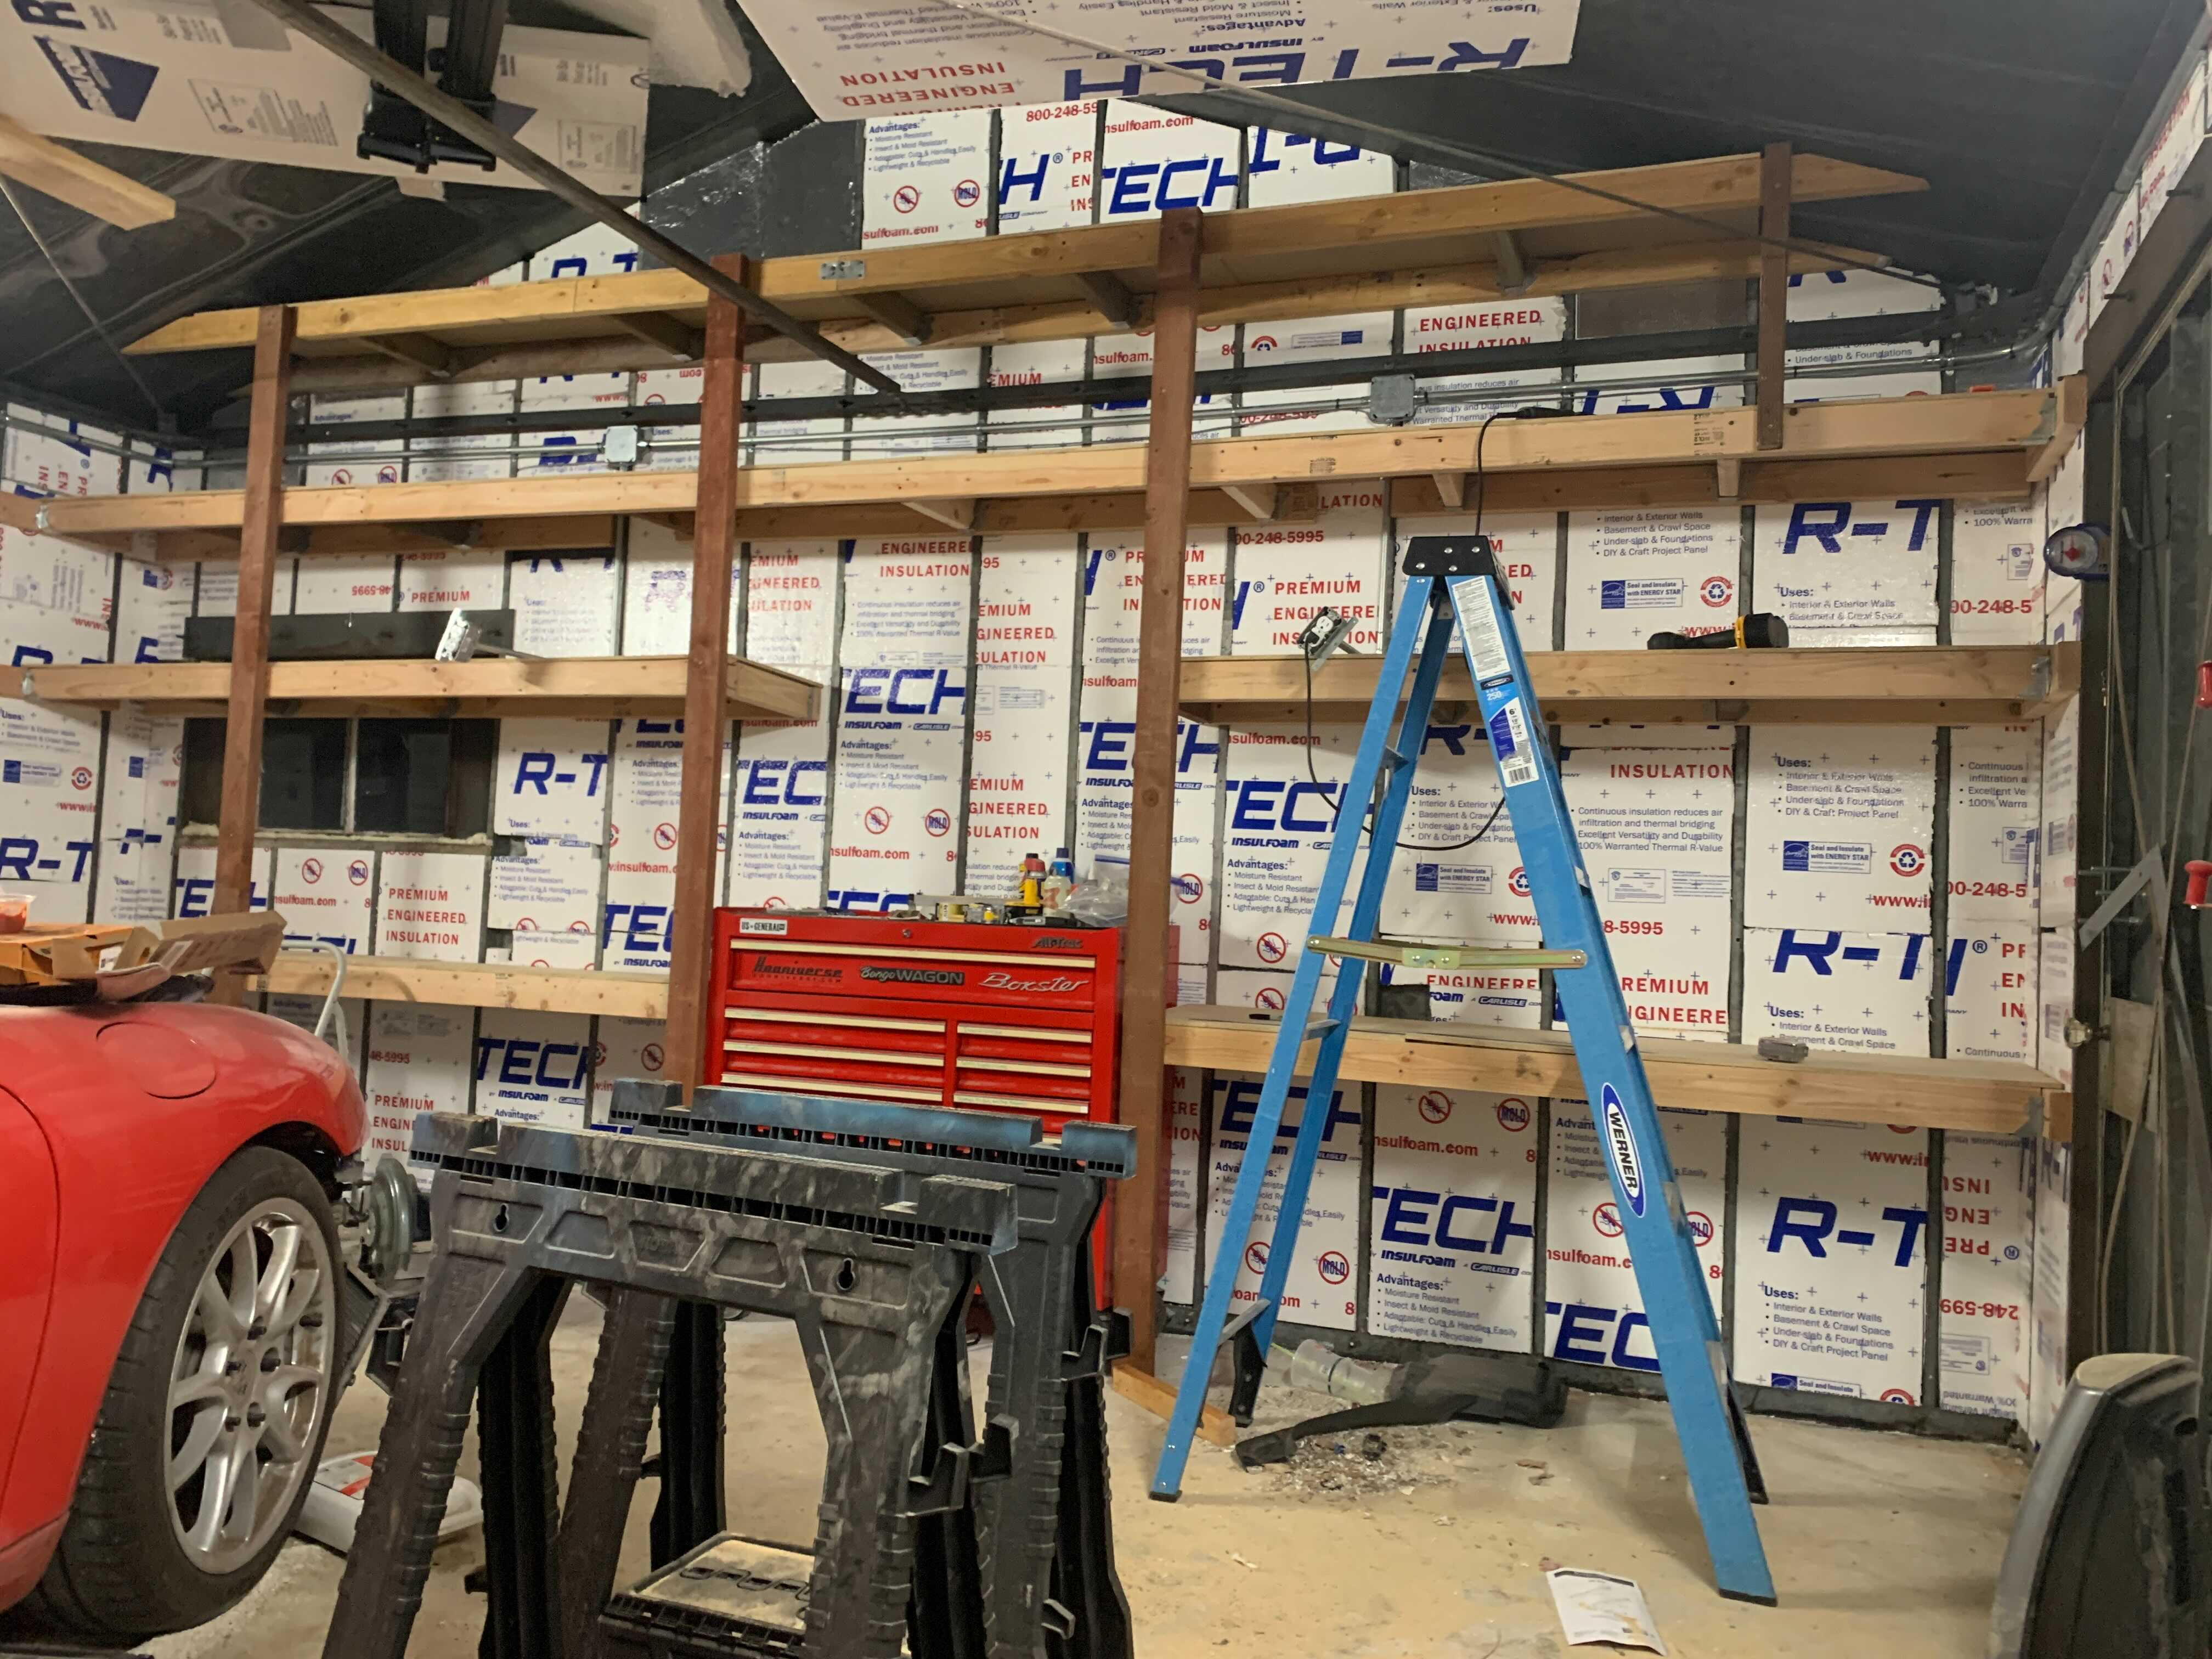
With the new shelf tops cut and installed by Sunday night, the project was looking close to the checkered flag. While the blog took Monday off to celebrate something or other, my wife still had to work, so I was on my own to button up this project on day three. The first part of the day was spent screwing in about 150 inch and a half screws to connect the shelf tops to the shelf supports. It went fairly smoothly, but was certainly time consuming.
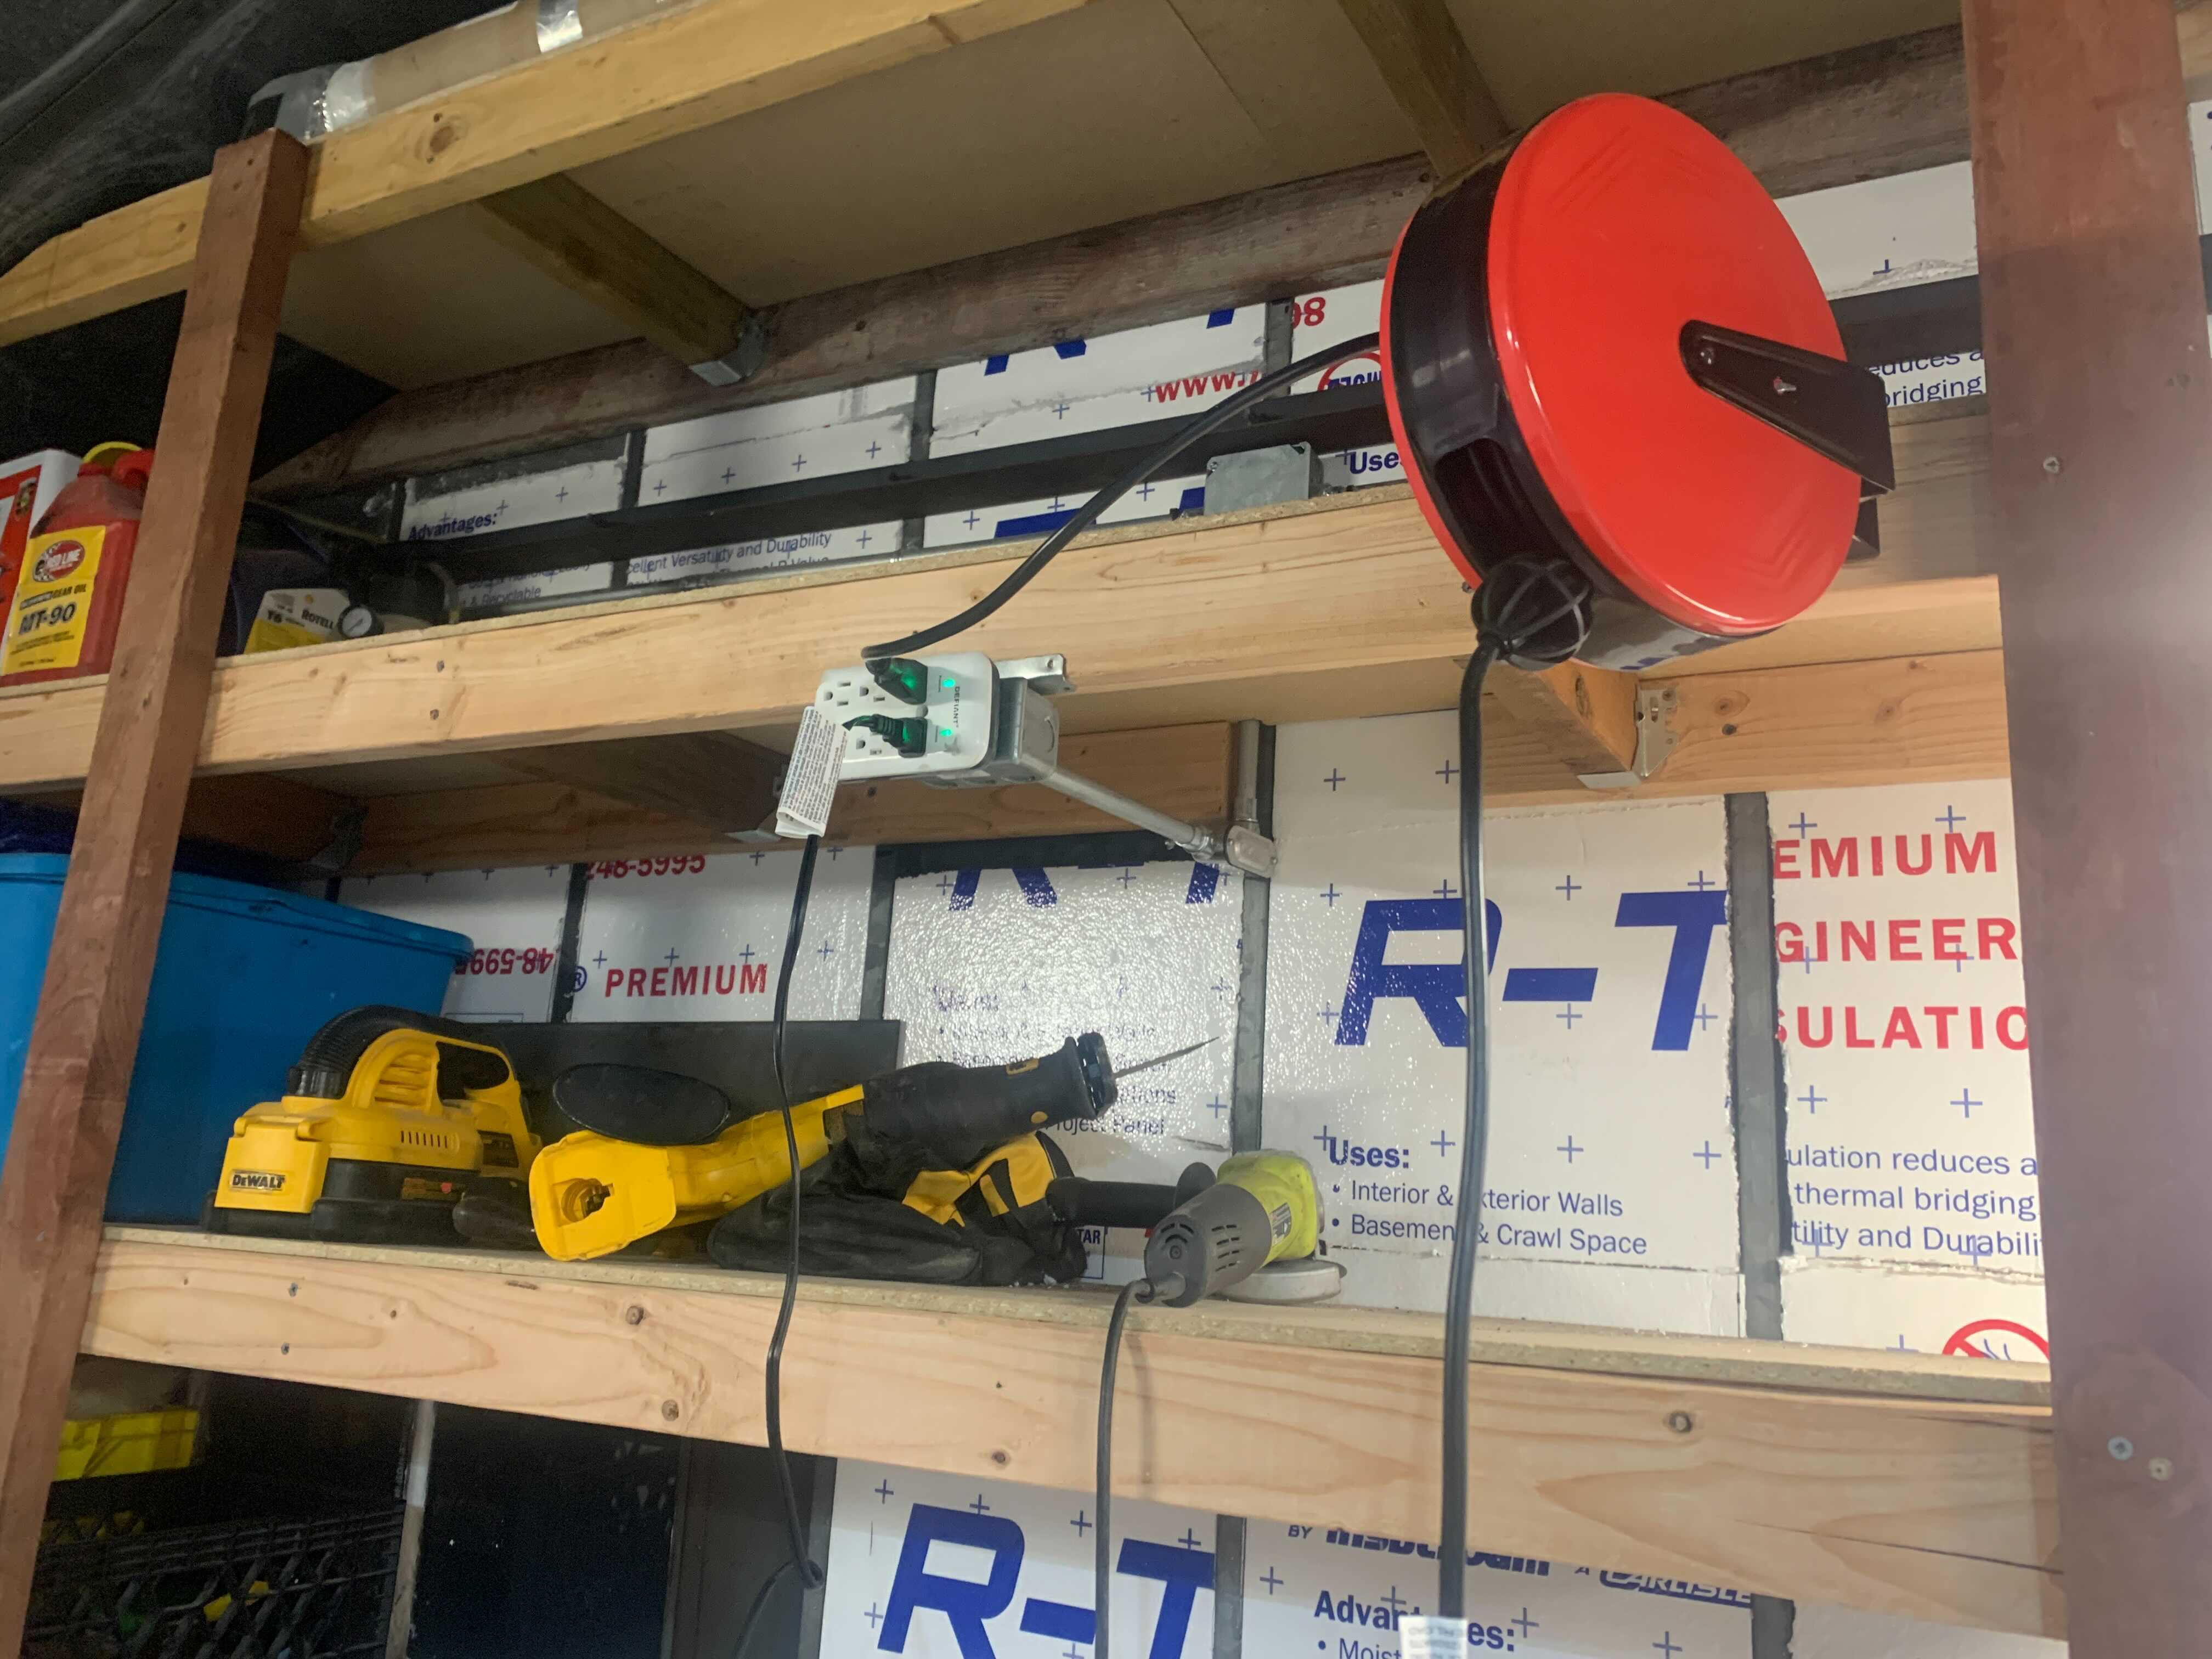
Once the shelves were installed, I needed to re-affix the electrical outlets to the now narrower shelf edges. The plug on the left needed both segments of conduit cut and the wire shortened. This work had to be done during the day as I had to shut off the power at the breaker box. I'd never actually done this job before, but it turned out to be easier than I imagined. A small $10 pipe cutter tool made the work super simple. Measure twice and cut once, obviously. The hard-mounted extension cord reel is something I've always wanted, so I picked up this 40 footer for thirty bucks. Bonus.
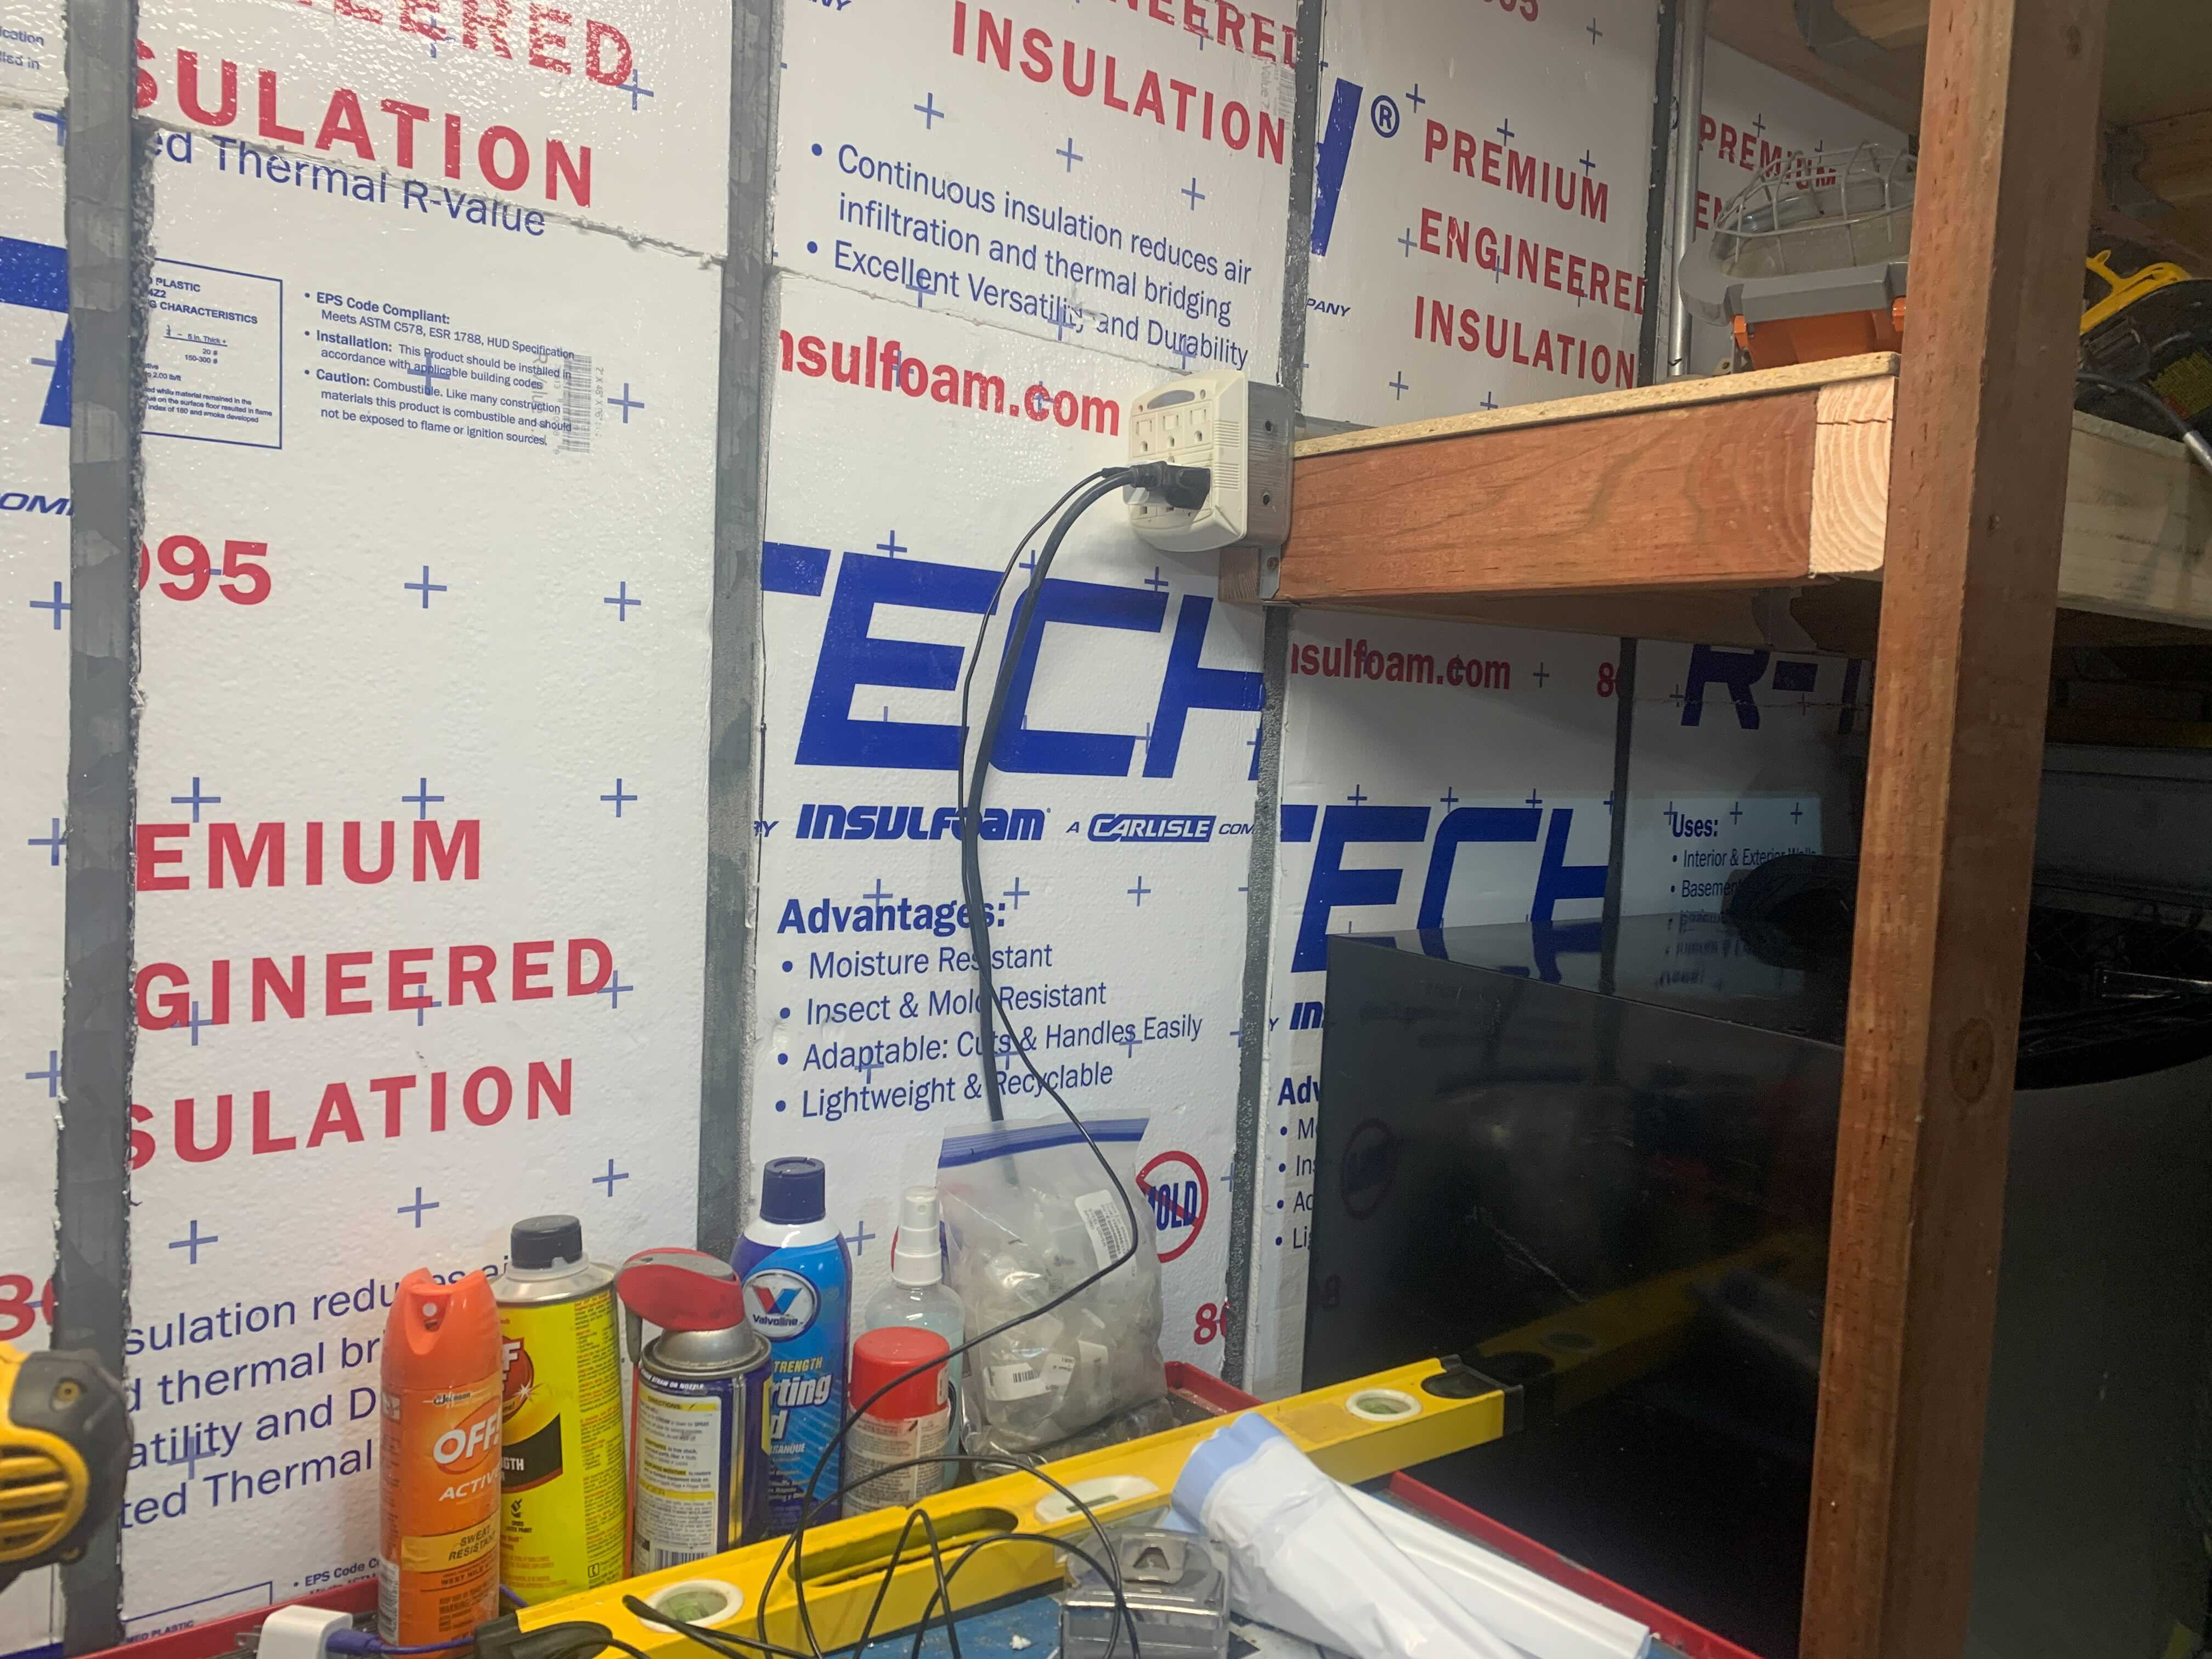
The electrical outlet on the right I decided to only cut in one dimension, but spin to the center to allow a nice electrical outlet at my toolbox. I shortened the horizontal conduit, and punched out the top hole in the electrical box, allowing me to screw the box directly to the shelf support. Easy peasy.
Alright, the plugs are sorted, let's add some light.
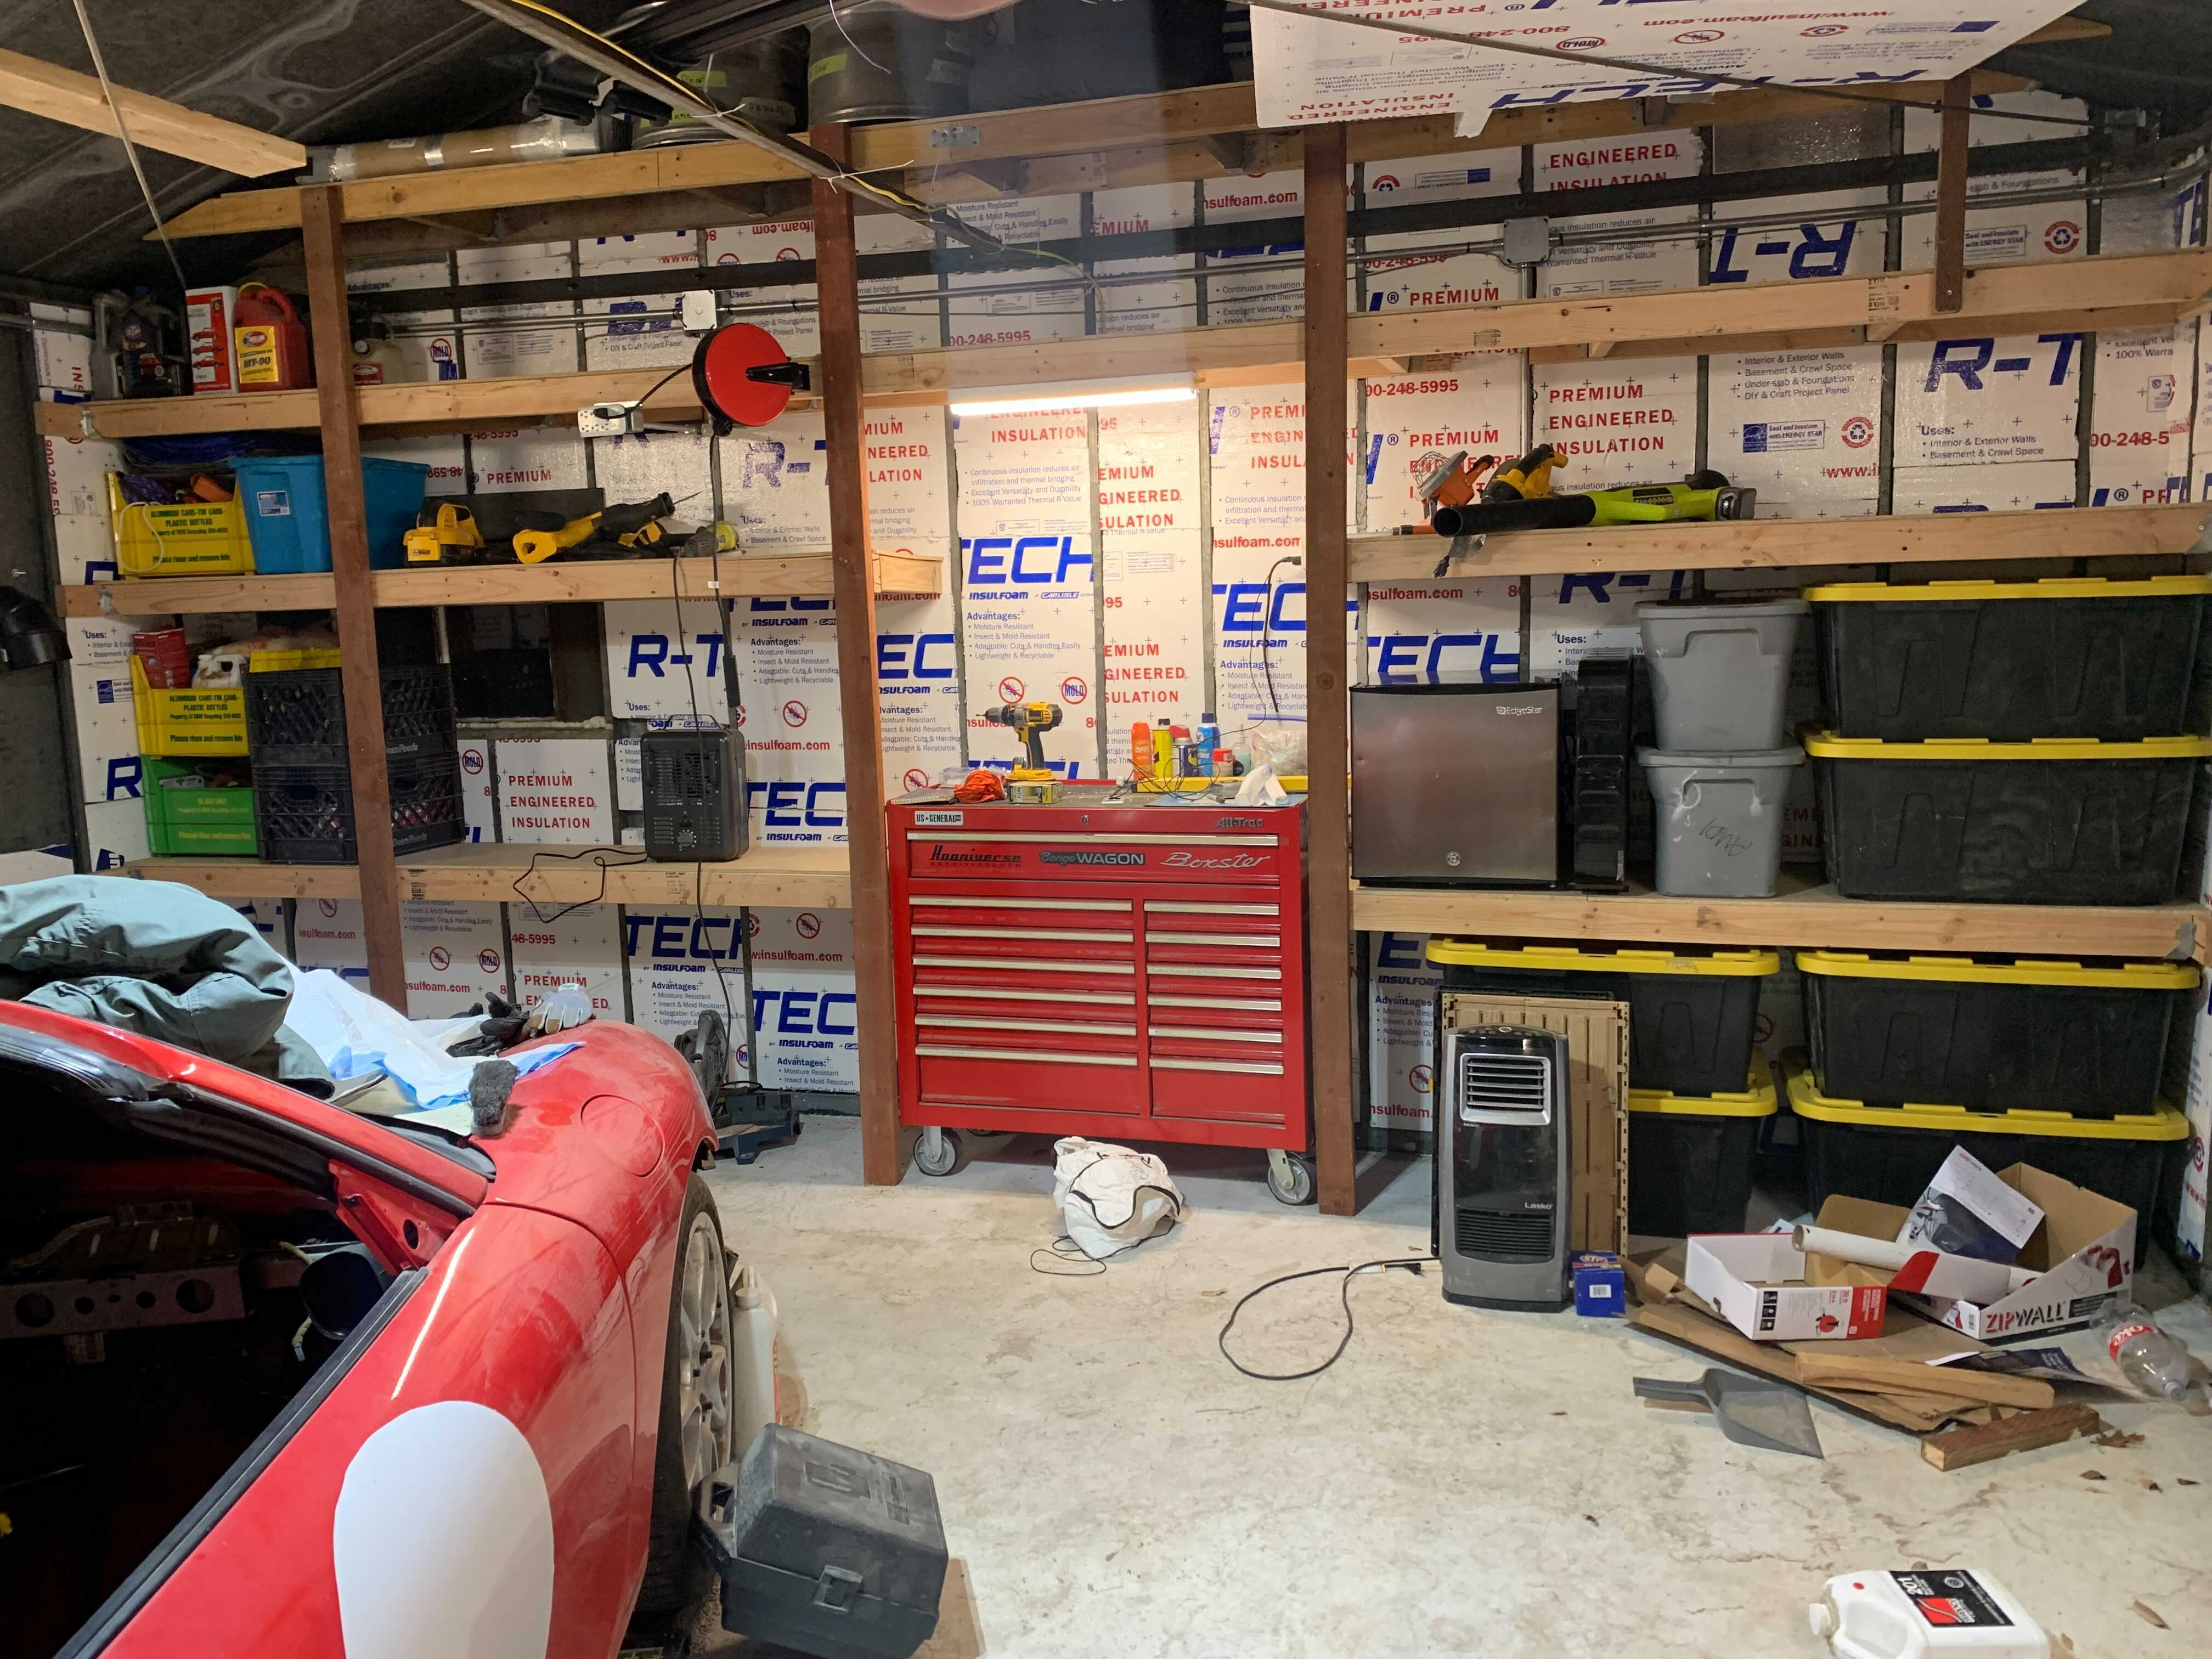
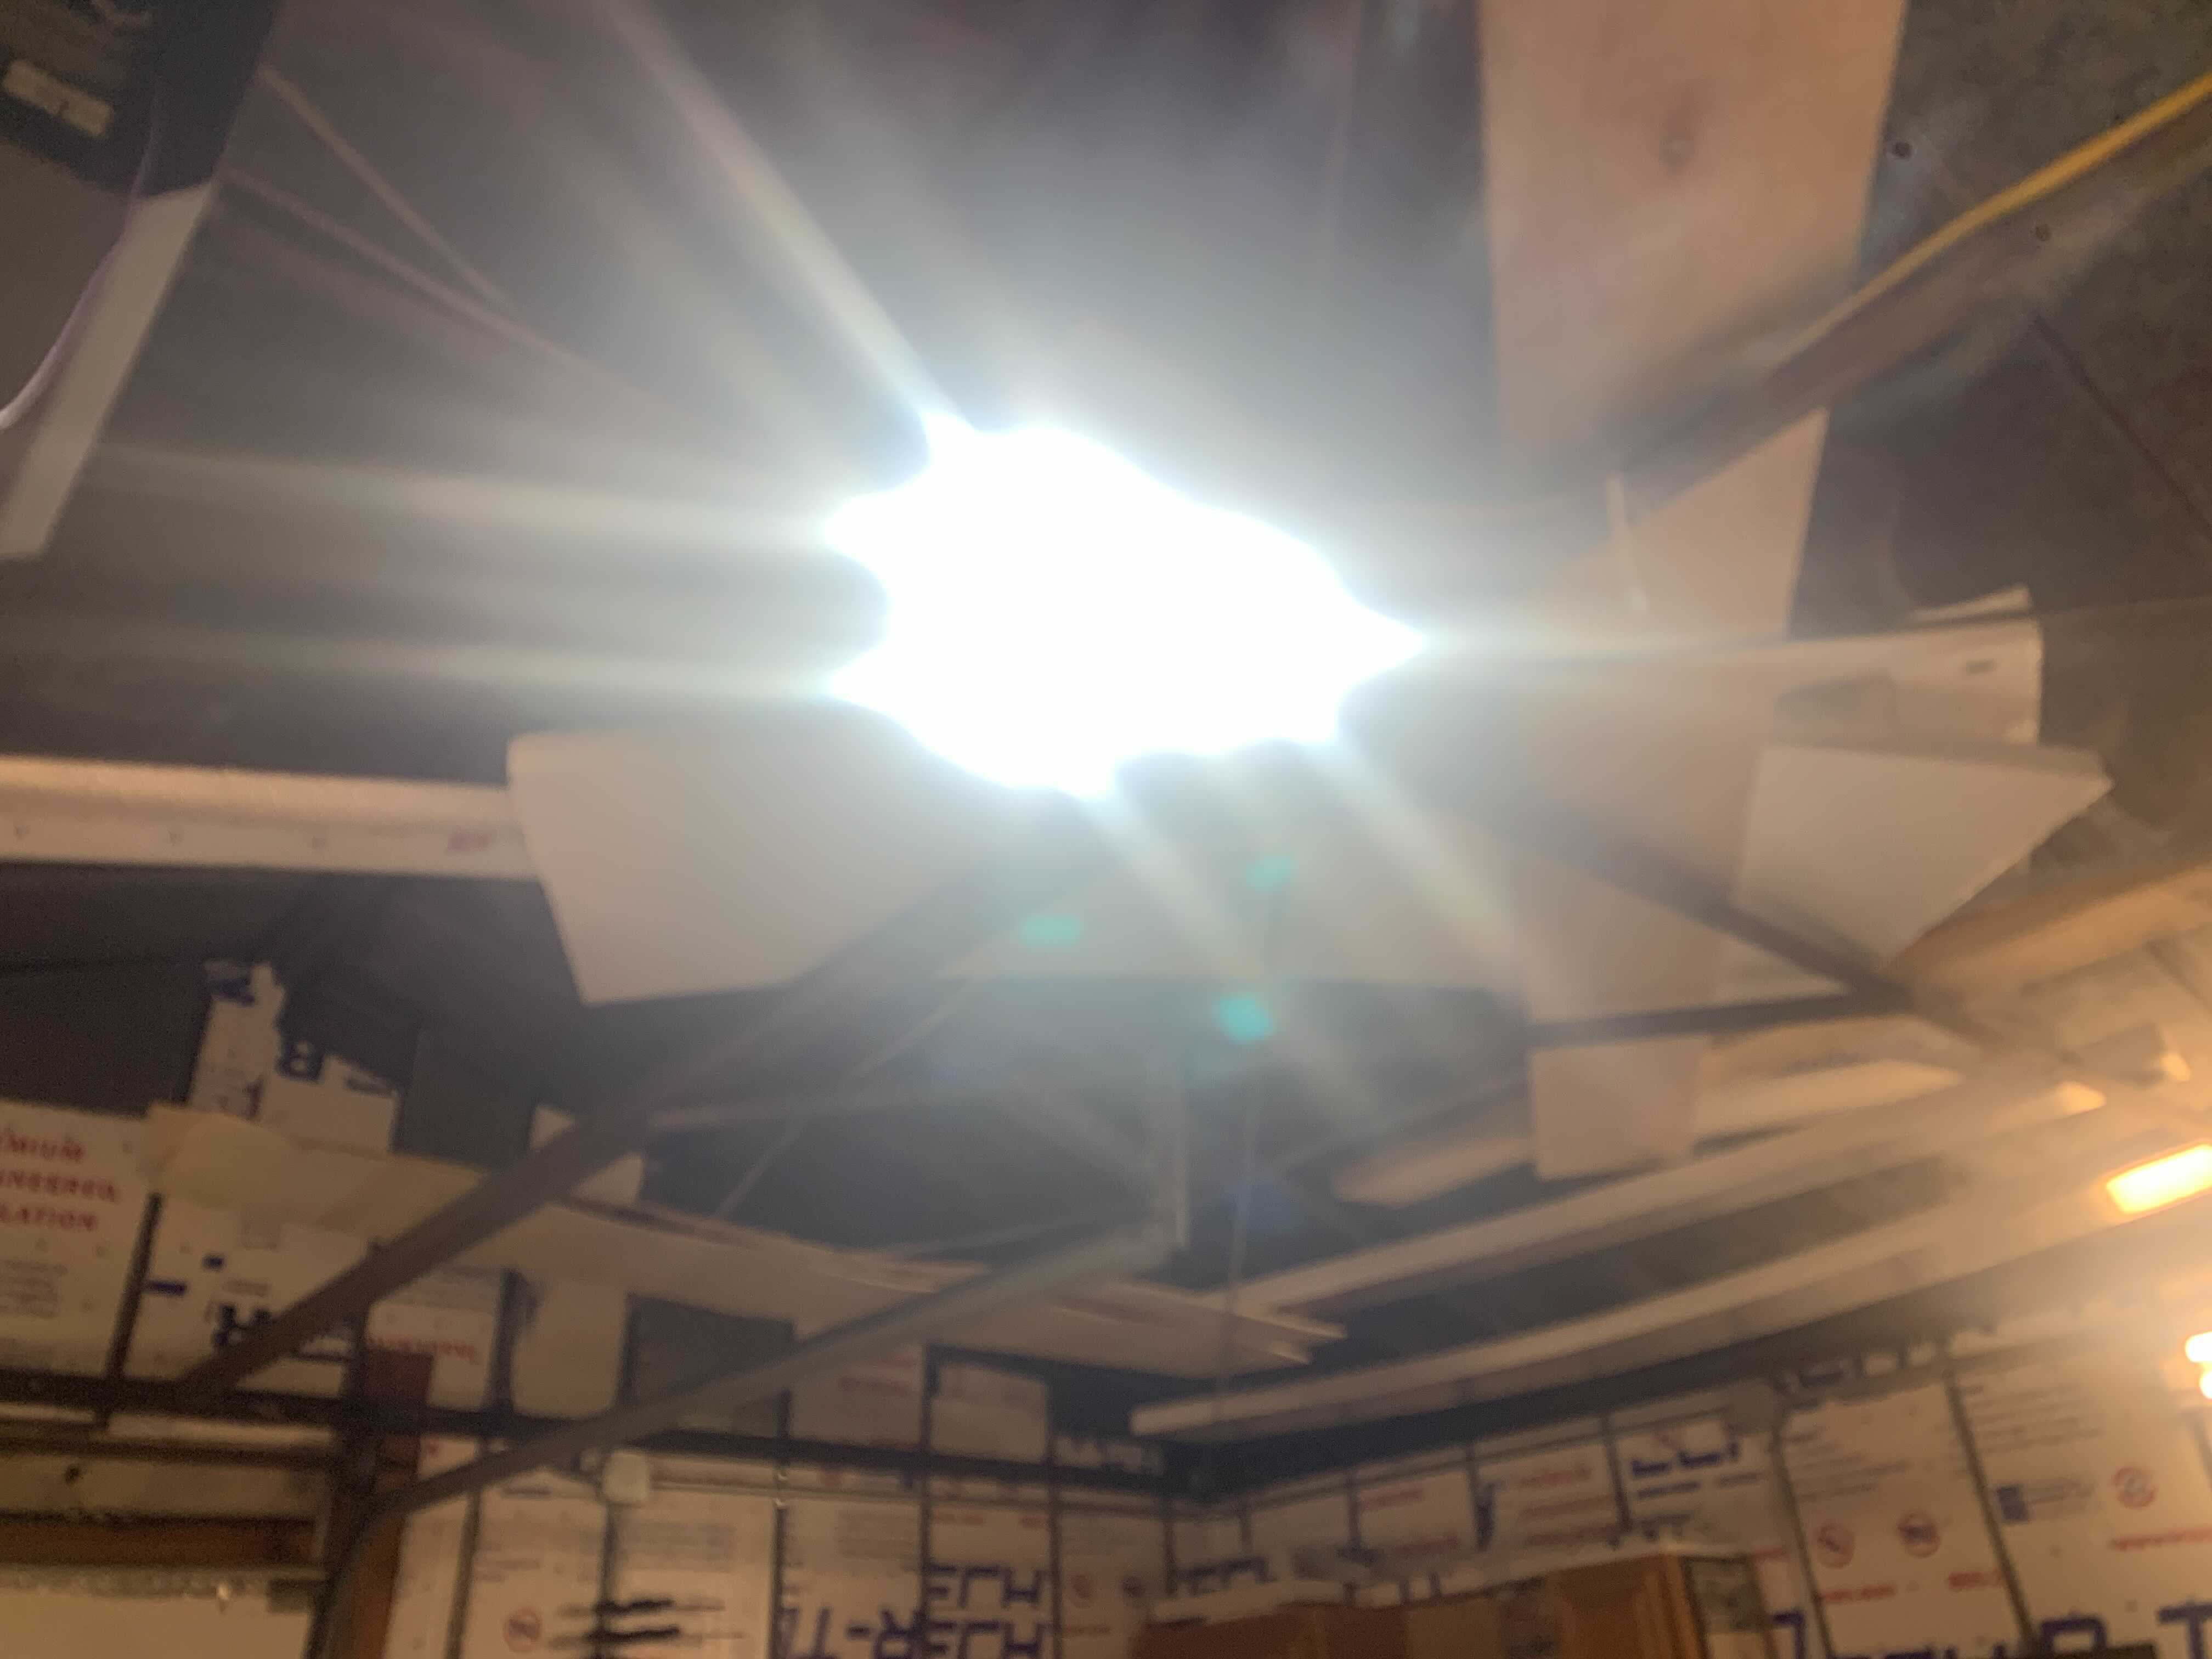
Prior to this project, the garage was lit by a pair of fluorescent tubes, one fixture on each wall. A few months ago I upgraded those tubes to LED tubes, and it helped tremendously, but I needed more to keep the garage from looking like a cave. I tapped into the crossover conduit connecting one fixture to the other, and branched off two cables. One cable went to a simple screw-in fixture in the center of the garage. In that I installed one of those three-prong LED screw-in jobs, which wields the power of Beelzebub himself to made night into day (below). The second cable was strung along the garage rafters to the shelf wall to power an LED fixture above the tool box. I won't show you any close-up wiring work, because I can almost guarantee it won't meet code. That'll be fixed eventually...
I thought this would be it for this project installment, but yesterday a surprise arrived in the mail. A rack for one of my sets of spare tires!
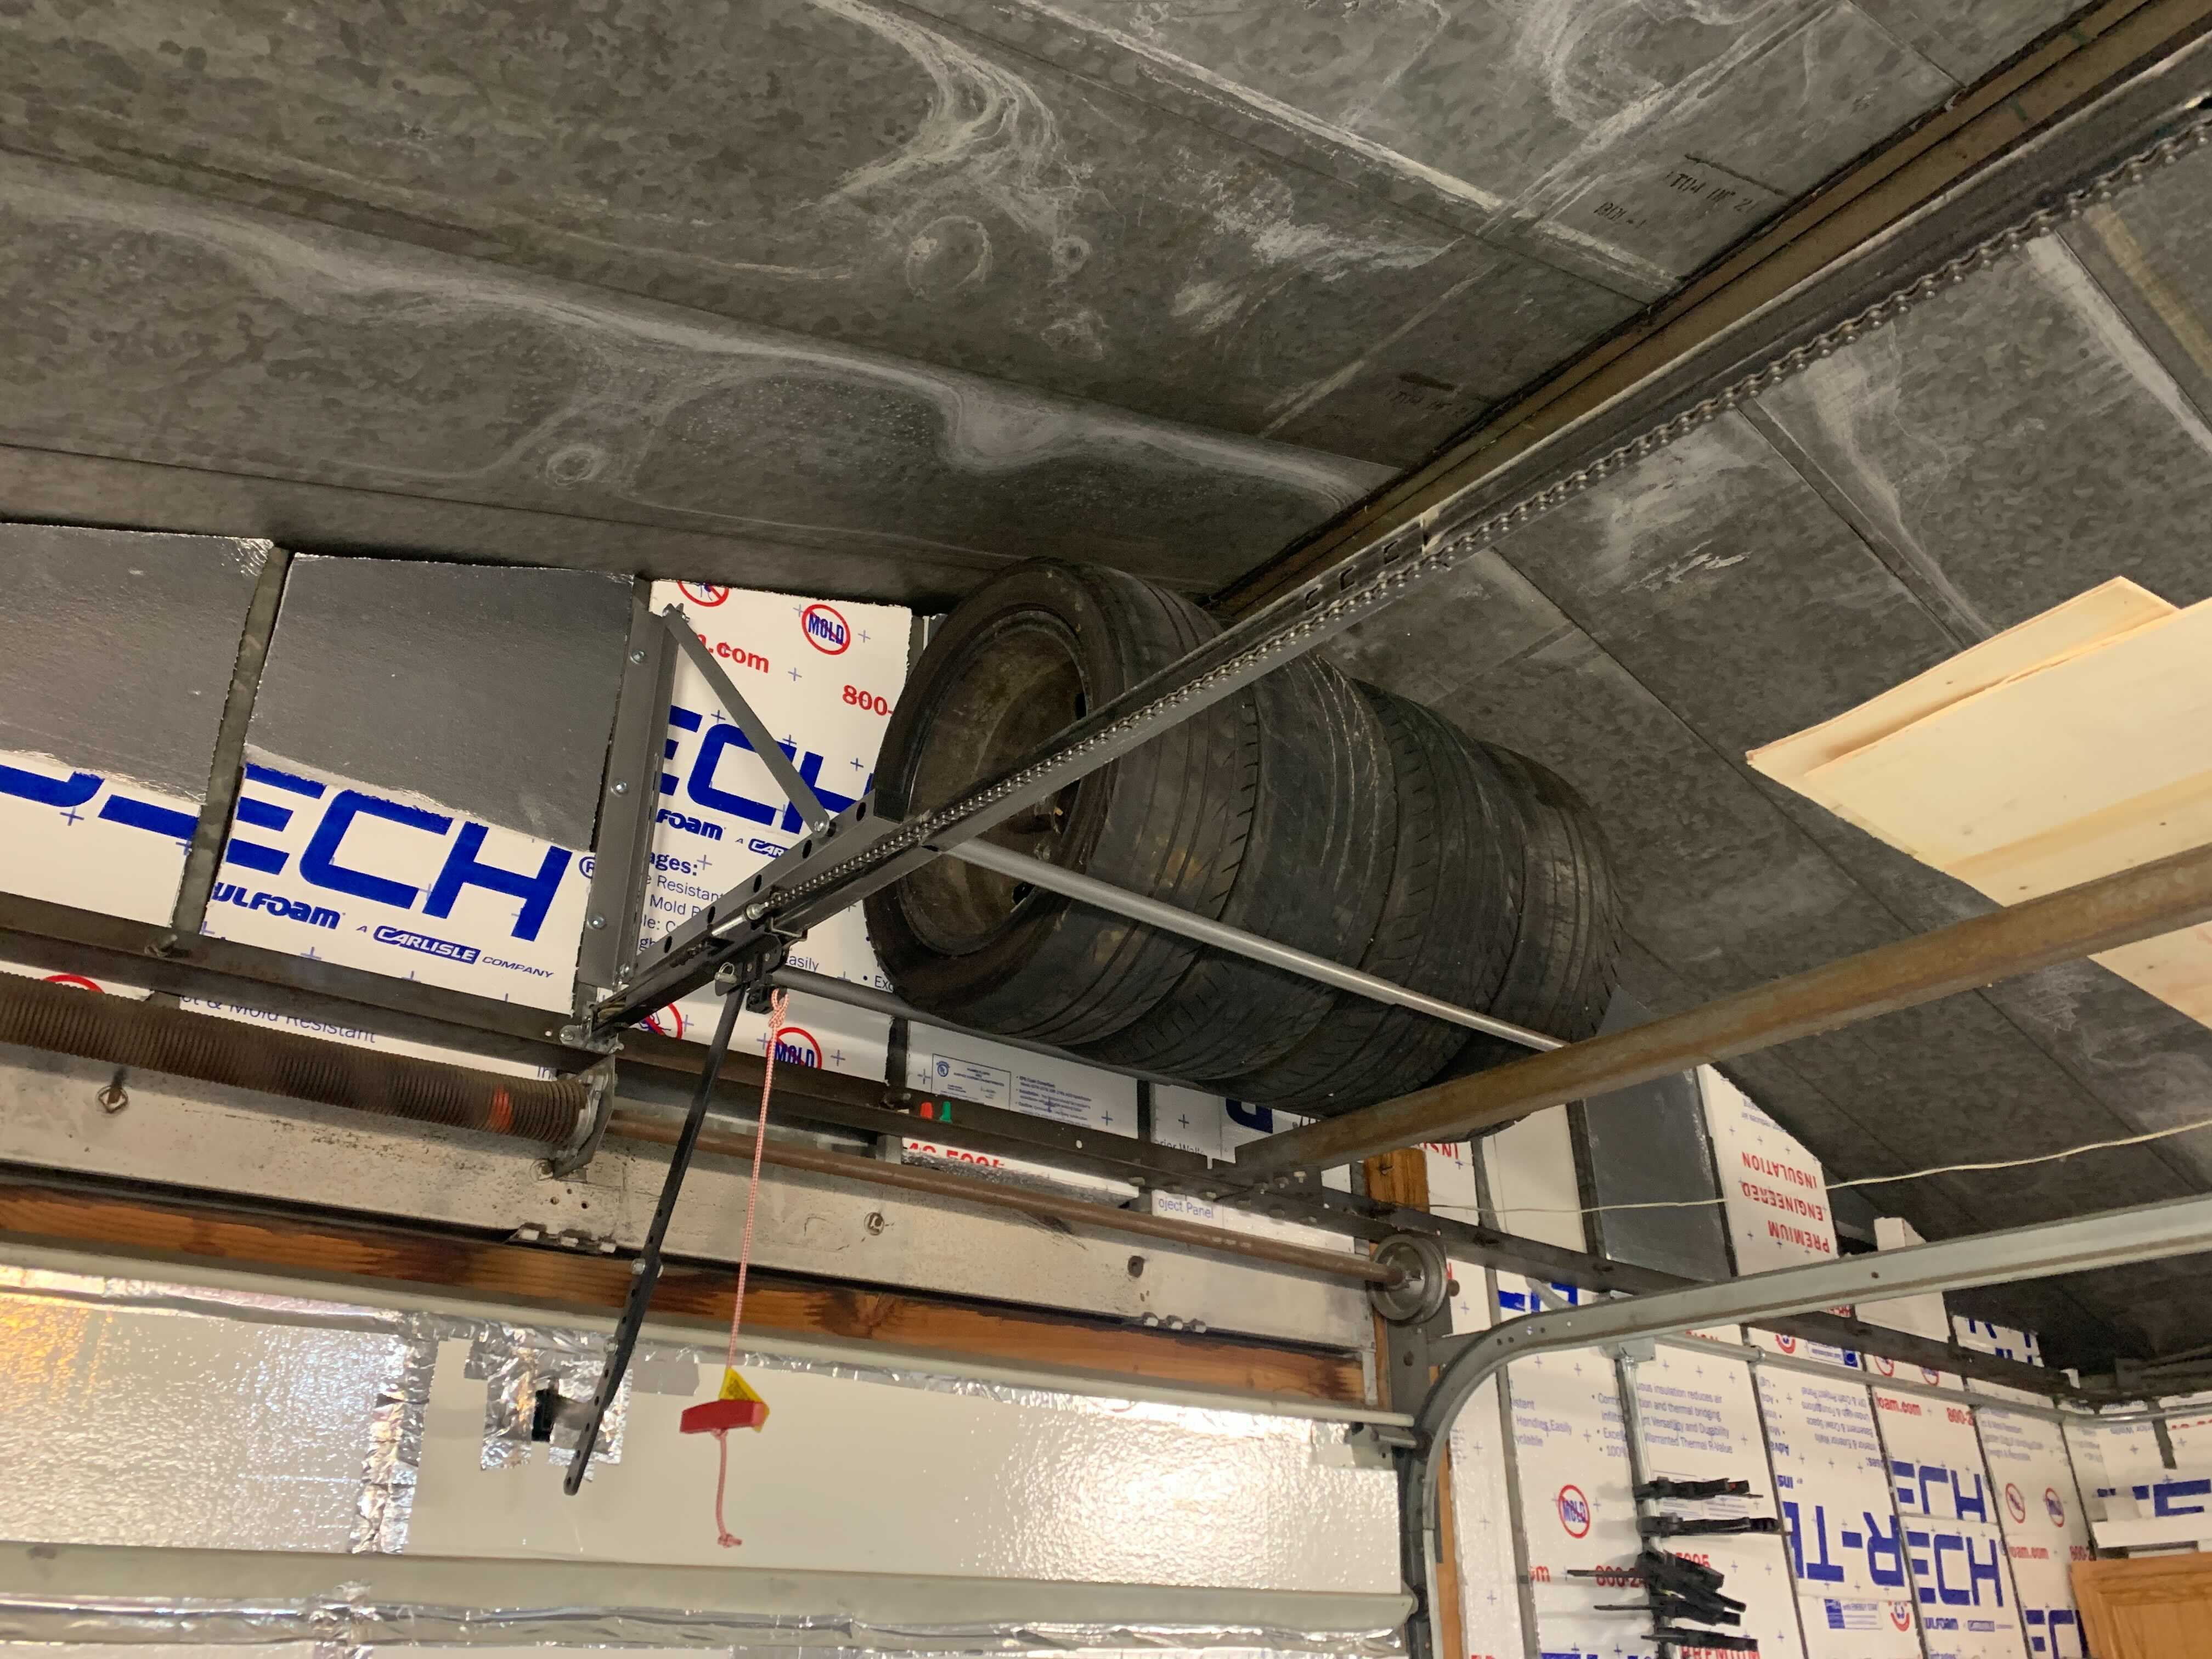
I have three further sets of tires in the shed which I need to get rid of (if anyone wants some 17 and 18 inch VW/Audi wheels, they're free if you come get them), but this spare set of Fuchs wheels for my 912E is going to stick around. Eventually I'll get them refinished in bright red and fitted with some 200 tread wear track tires, but for now they're in the way. This was a simple Tuesday-night project that took no more than 45 minutes from start to finish. Once the whole thing was assembled, I hauled it up into the rafters on the front side of the garage, where there is still some empty unused wall space. Three hefty self-tapping metal screws with hefty washers hold each side of the rack directly into the steel wall. I could do pullups from that bar, you know, if I could do pullups.
So how much did all of this cost me? If I total up everything from the wiring to the lumber, the tire rack to the light fixtures, top to bottom, it was about $350, three days of my life, and two minor arguments with my wife. I am so grateful for her help, and I'm so happy to have my garage space looking so much better already. There's still a lot of cleaning and organizing to do, but it already feels like a massive weight lifted off of my shoulders.
And that about does it for this installment of the garage renovation. It's getting better. Maybe someday soon I'll actually finish a project car in this space. LOL, probably not. Let's be realistic.
