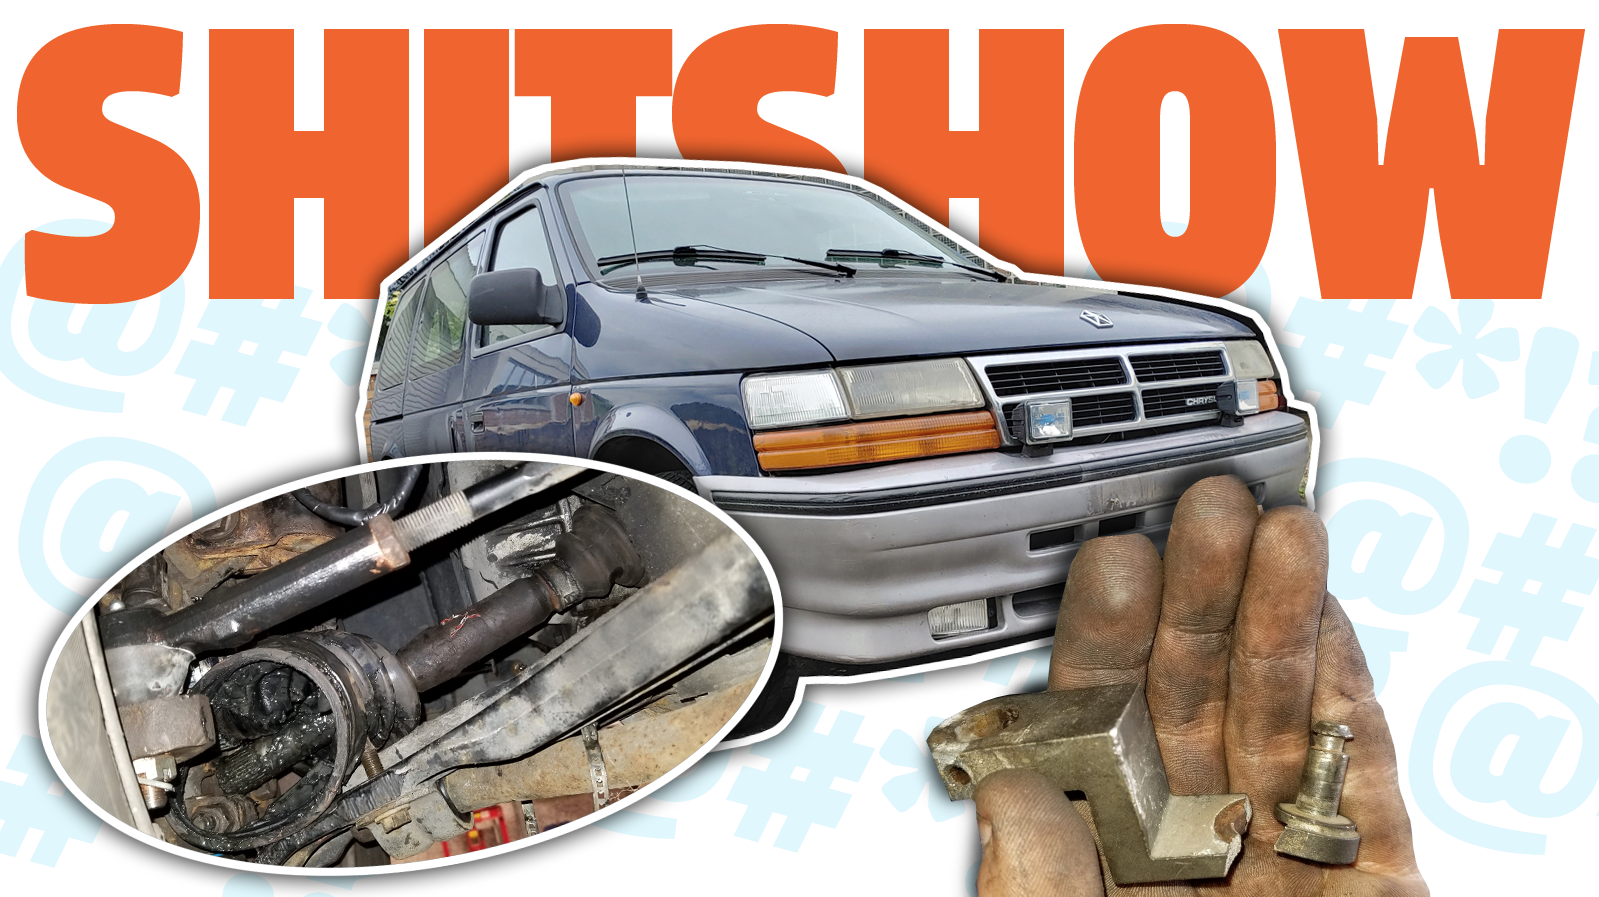
Why Last Weekend Was A Total Shitshow For My $600 Diesel Manual Chrysler Minivan
We may receive a commission on purchases made from links.
My own stupidity got the best of me this weekend. I made two foolish wrenching errors while fixing #Projectkrassler—the $600 diesel manual Chrysler minivan that I'm going to live in for a month as I road trip around Europe. Recovering from these mistakes set me back multiple days, so if you want to feel a bit better about your own auto repair skills, read this.
I've been fixing cars pretty much non-stop for the better part of a decade. Having repaired some of the rustiest hulks of iron on this earth, I have to say I'm fairly comfortable with my skills, though that doesn't stop me from making mistakes. No, I make foolish errors all the time, and I try to make it a point to share them with you, dear readers, if only to make you more comfortable with your own projects instead of fearing your own foolishness.
Don't fear it, embrace it.
I Broke A Nearly Unobtainable Part Of My Transmission
You may recall a few weeks back when I wrote about all the slop in my diesel Chrysler Voyager's five-speed manual transmission. I knew these old shifters had play in them from the factory, but there's no way second gear should feel like neutral. There were literally three inches of lateral play in gear. Something seemed afoot, and with a number of readers suggesting I pick up some new "Booger" bushings to fix the problem, I heeded that advice and set off to work.
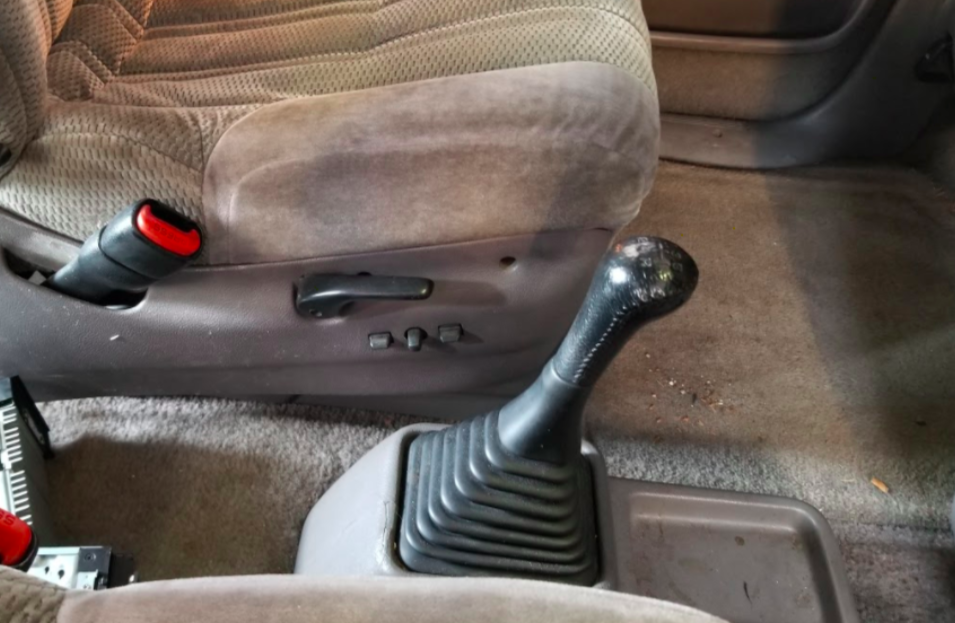
That work involved removing the small center console surrounding the shifter on the floor between the van's two front seats. I just yanked the rubber shift boot up and undid four Phillips screws. From there, I discovered my problem.
When you move that manual shifter shown above, you're pushing a bracket with a little nipple at its end. That nipple connects to a plastic piece, which ultimately attaches to some cables that hook up to the transmission. Normally, there is a rubber bushing between the nipple and the plastic piece that hook to the cables. One of my van's bushings literally didn't exist. It had disintegrated into a tiny pile of shredded plastic, so every time I shifted, the nipple at the end of the bracket just bounced around in the big hole in the plastic.
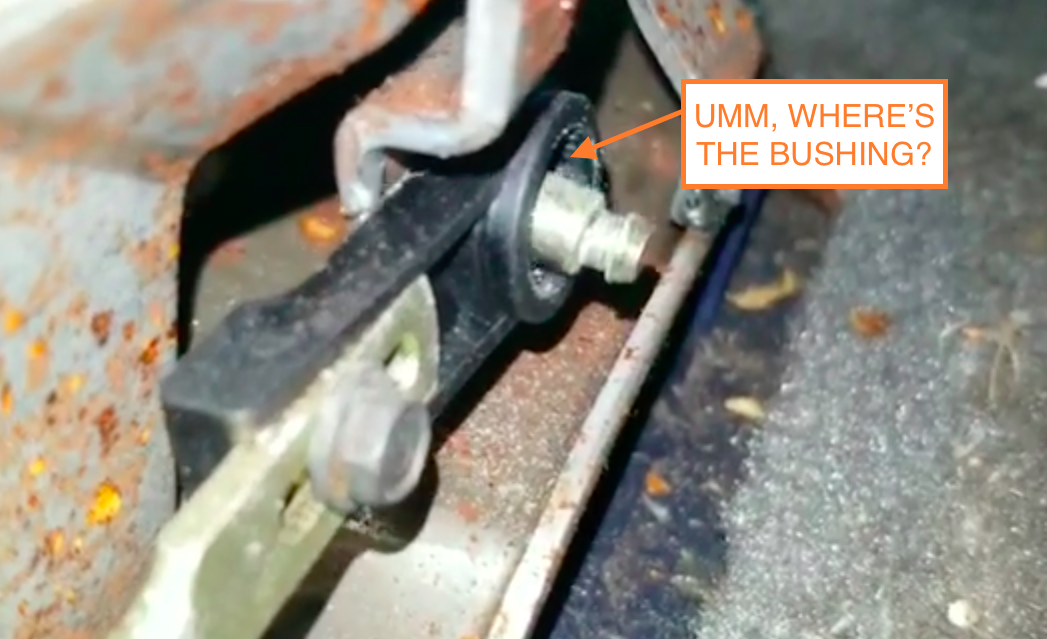
The replacement bushings (there were two inside the car) got rid of three-quarters of an inch of lateral slop in second gear—that's a 25 percent reduction in overall lateral play. Not bad!
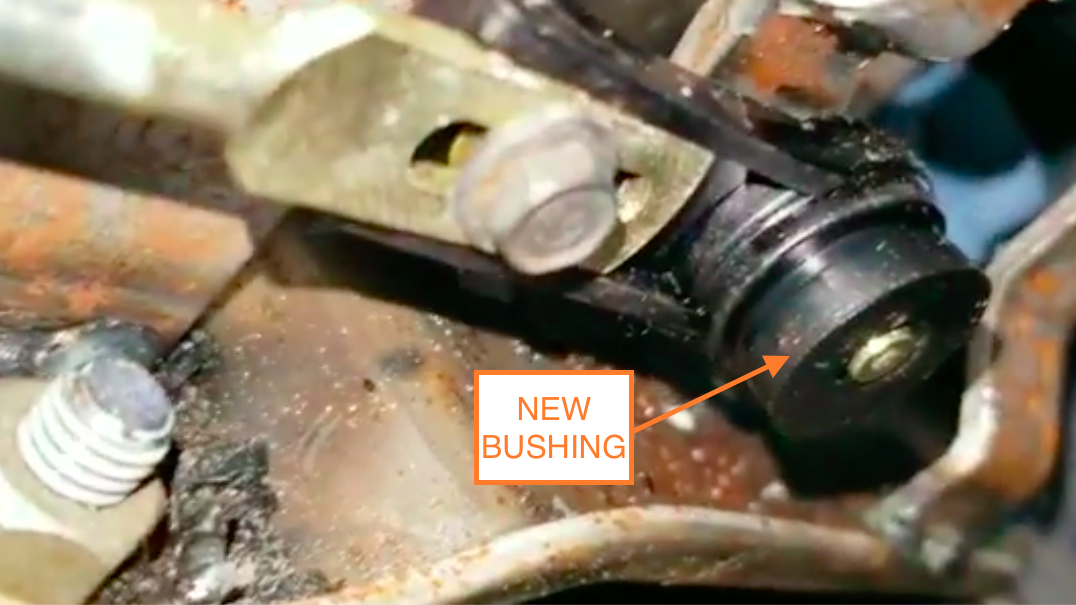
But I wanted to replace the two bushings on the transmission side of the shift cables, too, so I threw the van on the lift and went to work underneath the machine.
Unfortunately, someone had installed what looked like some sort of homemade retaining-washer to prevent the shift cable from slipping off the nipple (presumably because the bushing had disappeared), and getting the washer off was a bear. I pried on it with all of my might, but the thing just wouldn't budge. The result was a true heart-sinking moment: I broke the shift bracket connecting the shift cable coming from inside the car to the rod going into the transmission:
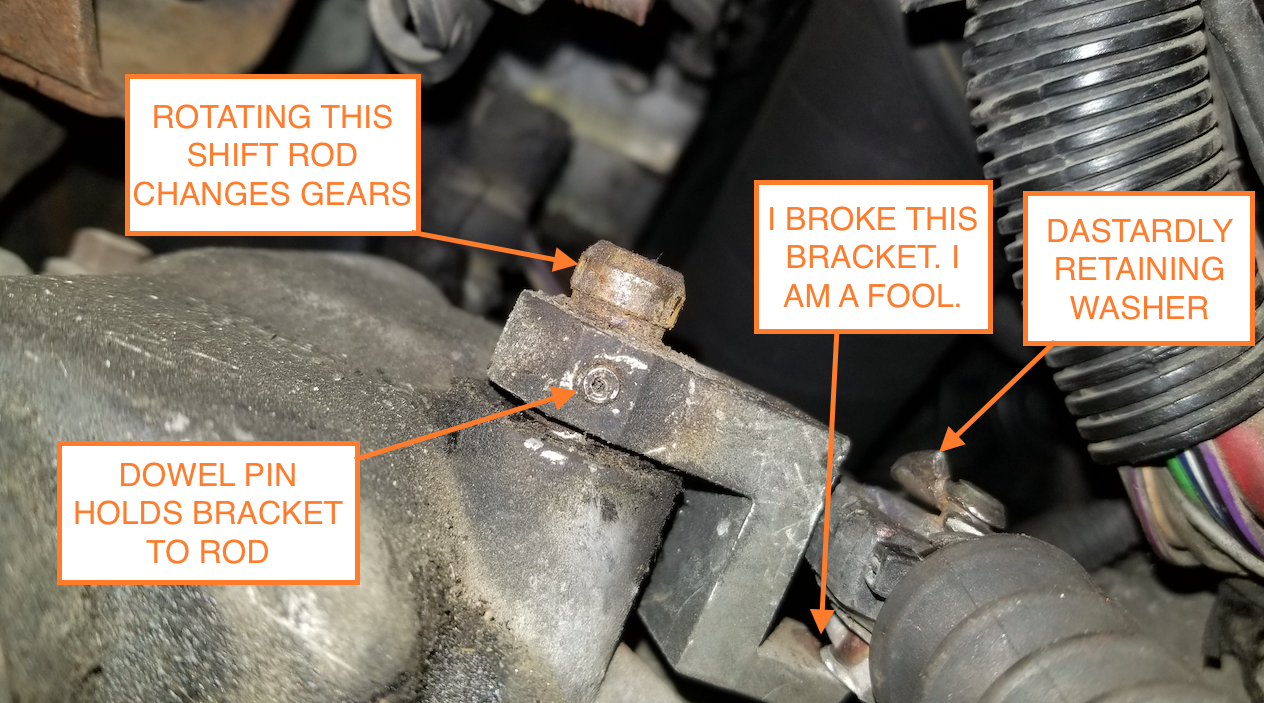
Here are some video clips of me realizing just how crappy the situation was:
I have to admit that, after a certain number of years working on crap cans, I've just gotten used to making errors. And though my heart does sink a bit each time, I don't panic anymore. That's because ever since I bought that $100 welder from Harbor Freight and started fabricating basic things like the frame, floor, and body mounts of my old POStal Jeep, I've begun feeling like I can mend pretty much anything. Including my own stupidity.
So sure, I was a bit bummed that I'd broken a part of a Chrysler transmission, and that—me being in Germany—there was no way in hell I was going to find this part easily. But where there's a welder, there's a way. So I drove to my nearby hardware store (Hornbach, it's called—incidentally, that's the name of one of the most talented cooling system engineers at Chrysler, in case you were curious) spent about $4 on a small bar of steel, and got to cutting.
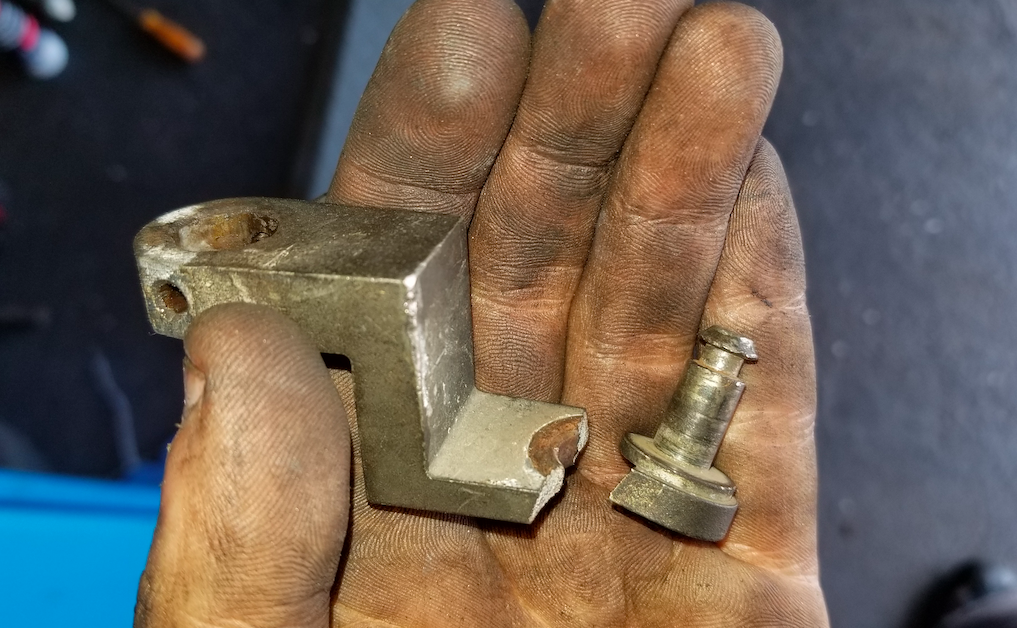
You can see in the image above that the part that I broke was cast aluminum, which is why I couldn't simply weld it up. And gluing it back together didn't seem like a good idea given the frequency with which this part will experience loads.
So my task was to use the little flat steel bar I'd bought to create a Z-shaped bracket with three holes in it. There had to be one hole for the transmission shift rod, one small hole for a dowel pin that goes through the bracket and shift rod and couples the two parts' rotation, and a third hole to hold the nipple for the shifter cable bushing. That nipple appeared to be pressed into the old bracket; my plan was to simply extract the nipple from the broken piece of the bracket, insert the nipple into the hole in my new steel part, and weld the backside of the nipple to the bracket.
In order to accommodate a hole for the small dowel pin, one of the three parts of the Z had to be fairly thick, so—after taking a few measurements—I welded two pieces of steel bar together, back to front. The other two sections of the Z could be made of a single piece of the bar, as the steel was almost certainly stronger than the original, thicker cast aluminum.
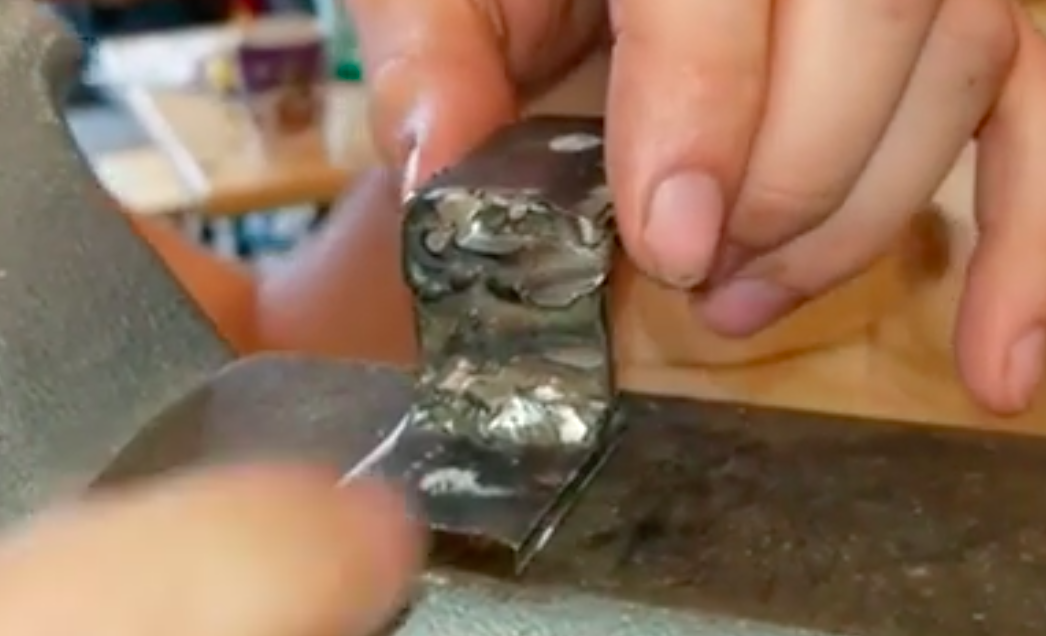
In short, I simply welded four pieces of flat steel together. Two pieces I welded back-to-front to get one thick rectangle. Then I welded that thick rectangle to two thinner rectangles and boom!: I had a Z.
Next, I had to drill the holes. This was an important task, because—even though there was some compliance in the rubber bushings and bendable shift rod—the holes pretty much had to be in the same relative position as the holes on the original bracket, otherwise the part just wasn't going to fit.
This is where Jacob came in.
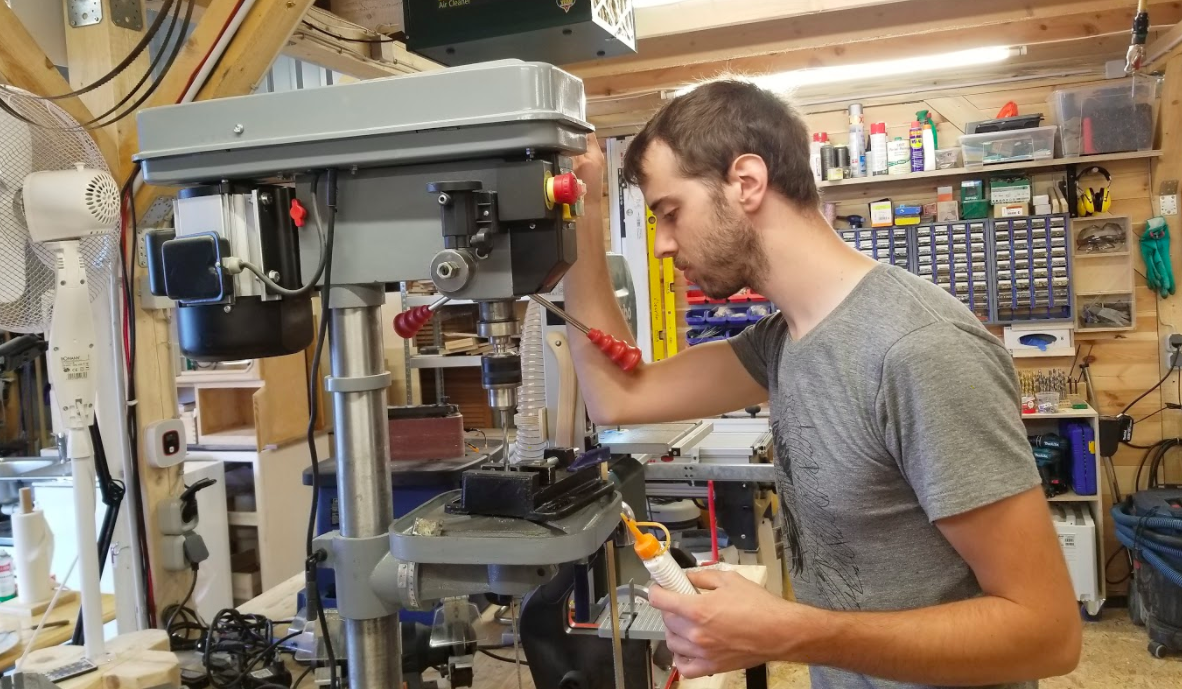
A medical student, he and his girlfriend (also in the medical field, and also a genius) are in the throes of a major restoration of the 1997 Land Rover Defender shown below.
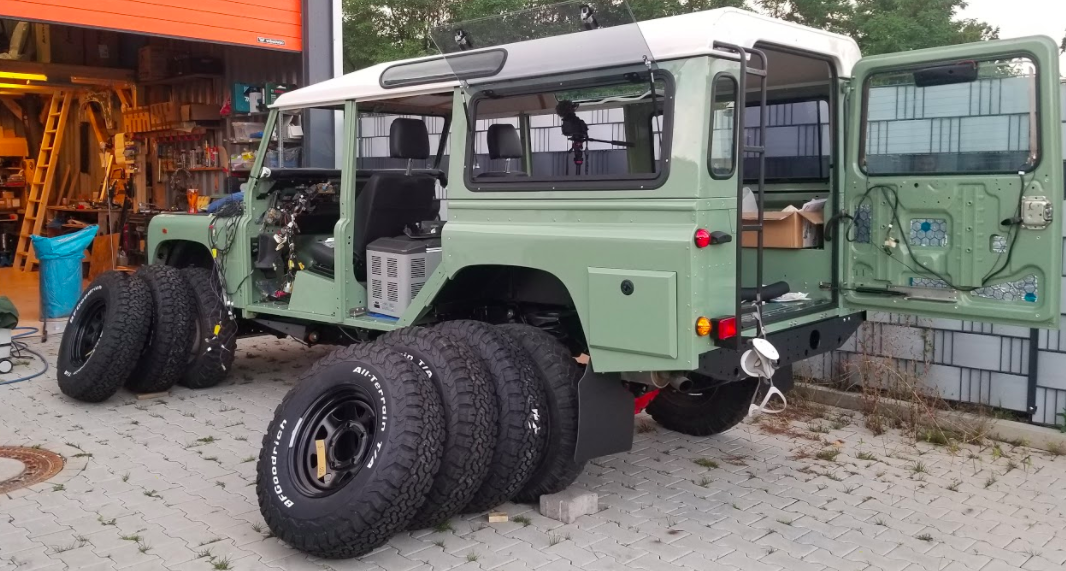
The meticulous nature of their operation is remarkable; I'll share more with you readers later. But the point is that having torn that vehicle down to its smallest constituents—and being quite German—he is a man of immense precision.
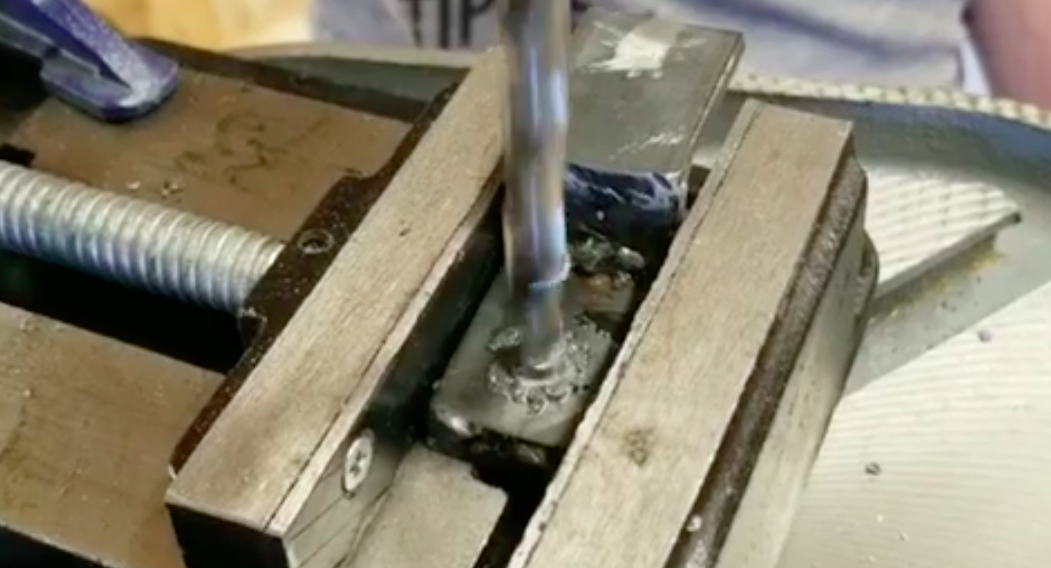
So he broke out the calipers, measured the holes, handed me the right drill bits, and let me go to work after he'd drilled the first hole using his drill press. Things got a bit nerve-wracking when I had to drill the hole for the dowel pin because the hole not only had to go directly through the center of the transmission rod hole, but it also had to be angled just right so that the bracket's angular position relative to the shift rod wasn't out of wack. If that position were off, I could push my car's shifter into a certain gear, but it wouldn't rotate the rod to the right position and the transmission wouldn't shift properly.
The dotted lines in the image below represent the dowel pin position that I was so afraid of getting wrong on my new part:
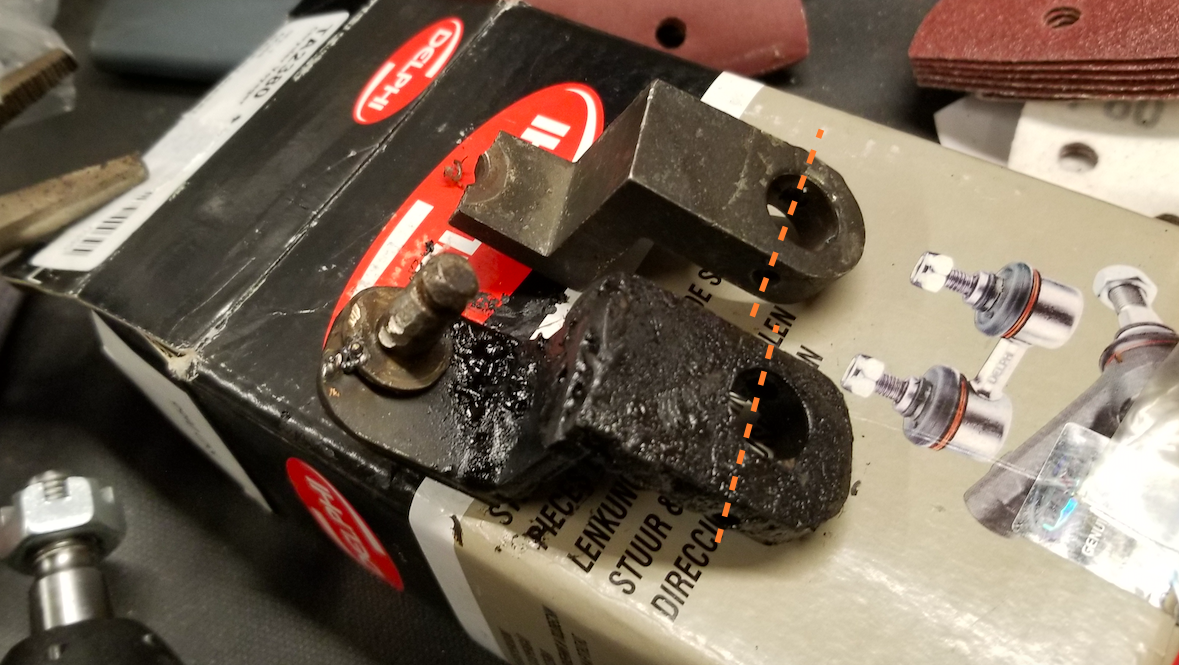
As you can see in the final part, it's hardly beautiful. I ground the backside of the nipple, then shoved it into the hole in my bracket, and welded the two pieces together. Then I hit the bracket with some black paint, which immediately boiled since I'd just welded.
The boiled paint plus the hideous (but strong) booger-welds definitely yielded a part with some aesthetic imperfections, to put it nicely:
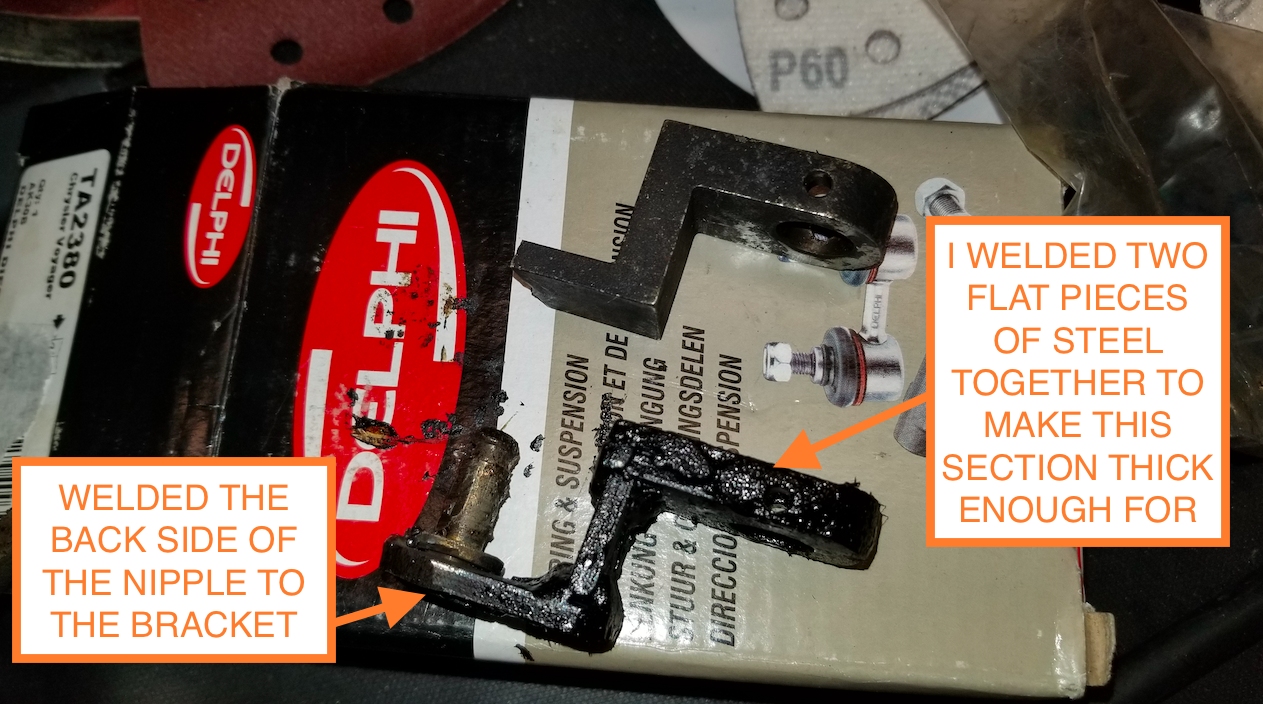
The good news is that I apparently drilled the dowel pin hole perfectly, as the pin went into the hole in the transmission shift rod quite tightly, though I slathered some RTV on it just in case to prevent it from vibrating out. Here's a look at the bracket installed onto the transmission shift rod, with the shift cable installed with a new bushing:
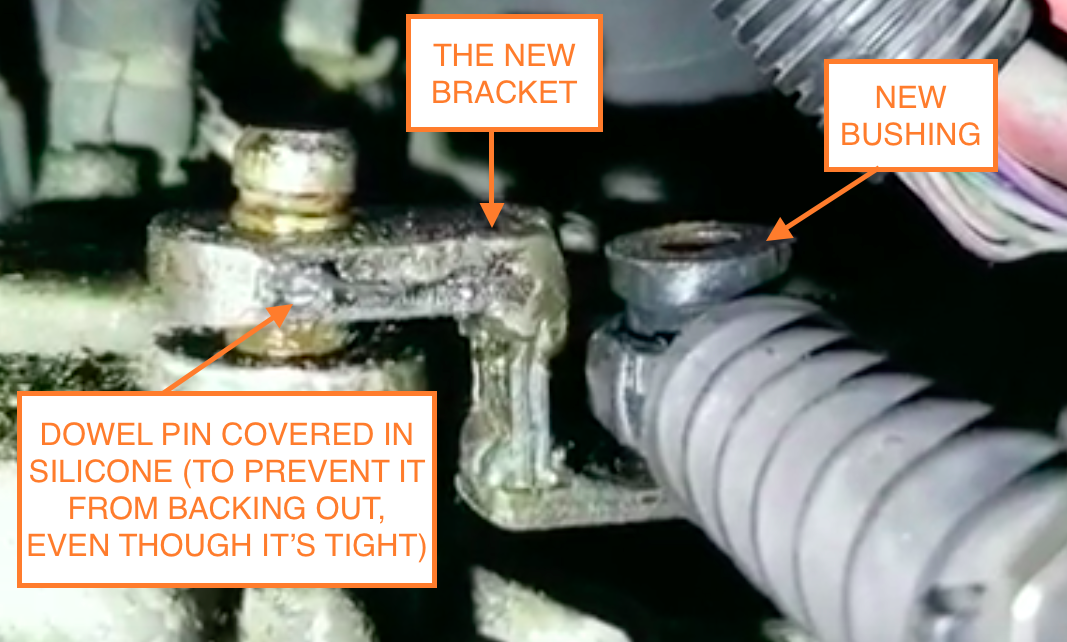
In the last video in the Instagram post below, you'll see me testing out the shifter. Not only does it go into all five gears (plus reverse), validating my bracket fabrication, but the new bushings on the transmission reduced lateral shifter slop by an attentional 25 percent. Lateral play in second gear is now only 1.5 inches instead of three, and the stick shift feels great!
So breaking this transmission bracket was definitely a setback, probably taking me roughly four to five hours to mend, but in the end, a welder, an angle grinder, and a friend with a drill press were all I needed.
But of course, breaking part of my transmission wasn't my only error. No, this past weekend was fraught with DT-dumbassery.
The Axles From Hell
After getting my van's engine up and running, I took the thing on an extremely anticlimactic test drive that was dampened by a bad CV joint on the driver's side axle. As a cheap bastard, I didn't buy an entire new axle for $80. Instead, I spent $40 on a new CV joint (actually, I bought two, since I figured the other side was probably on its way out, as well).
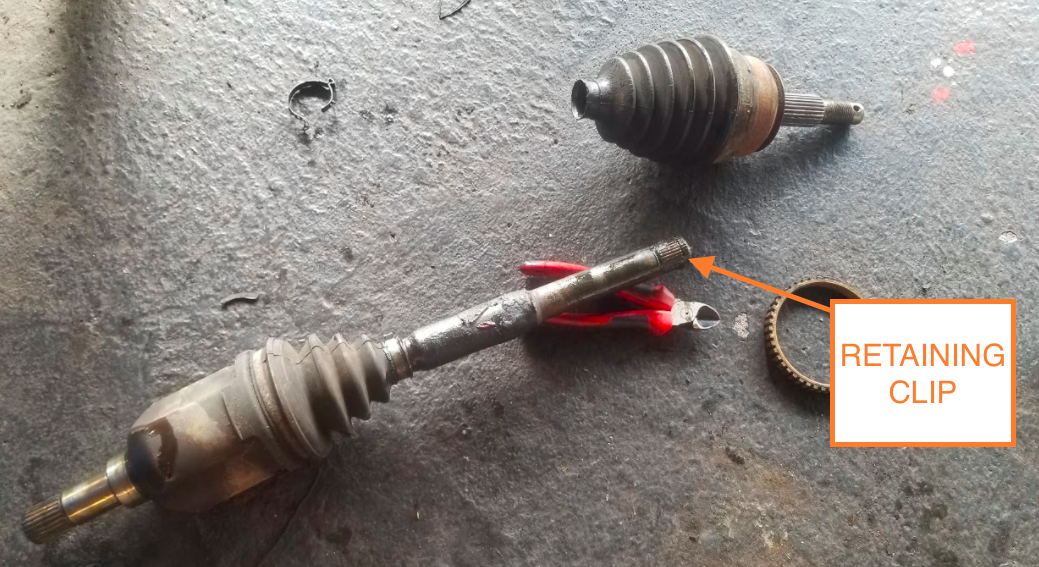
I won't say this was a mistake, but I will say that removing the old outer CV joint from the axle shaft was, at least on the passenger's side, the definition of hell. On the driver's side, things went well, as as you can see in the photo above. A couple of swift whacks of the CV joint, and the clip on the axle shaft released the joint. No problem.
But for reasons unknown, I couldn't bang the passenger's side CV joint off the axle shaft:
My friend Andreas (the bigger of the two Andreas' I've mentioned in this #Projectkrassler series, though both are relative giants compared to me) and I whaled on the CV joint with a huge three-foot sledgehammer, but the thing just wouldn't let go of the axle shaft. And every time we hit the joint, grease flew out of the rubber boot that we were actively destroying, covering our legs and shoes in black grime.
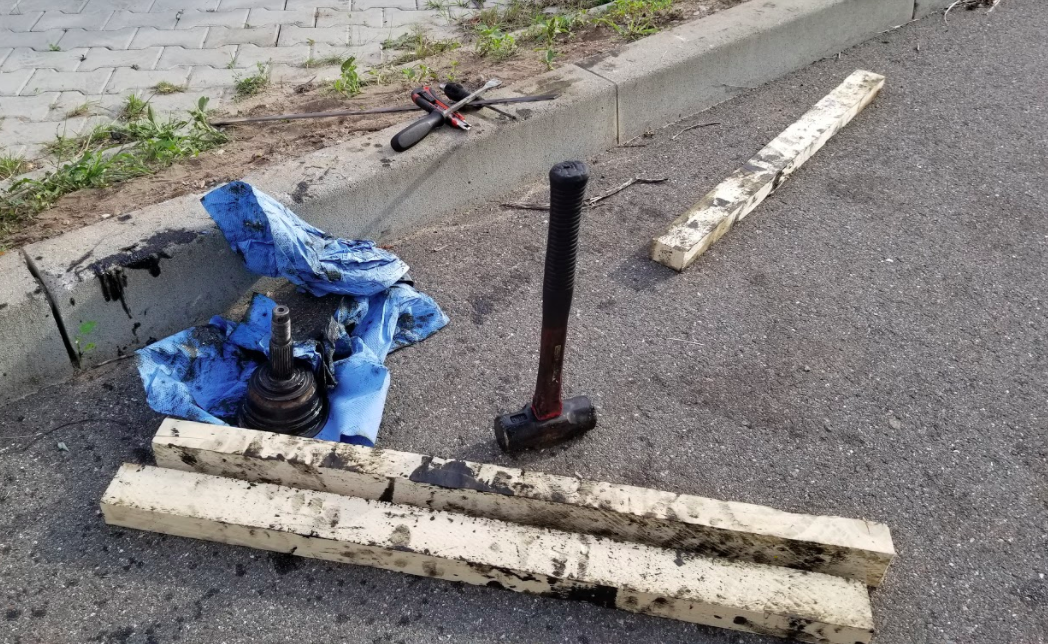
In the end, rather than extracting the CV joint from the shaft, we just destroyed it.
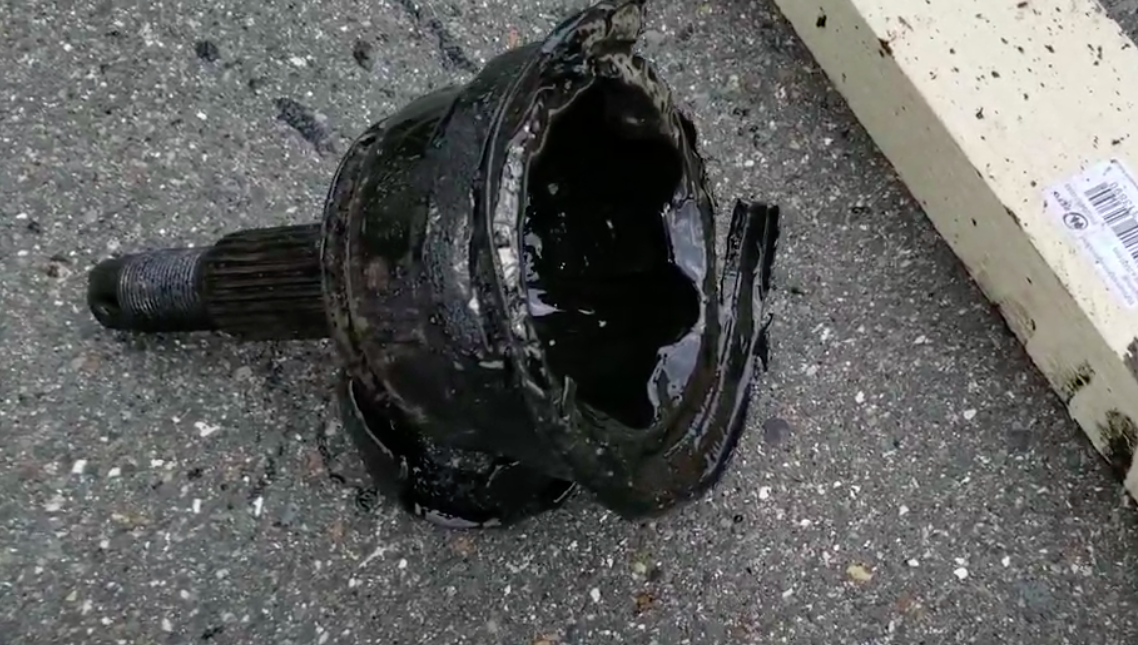
The star-shaped inner bearing race still refused to let go of the shaft, so we ended up having to use a hydraulic press.
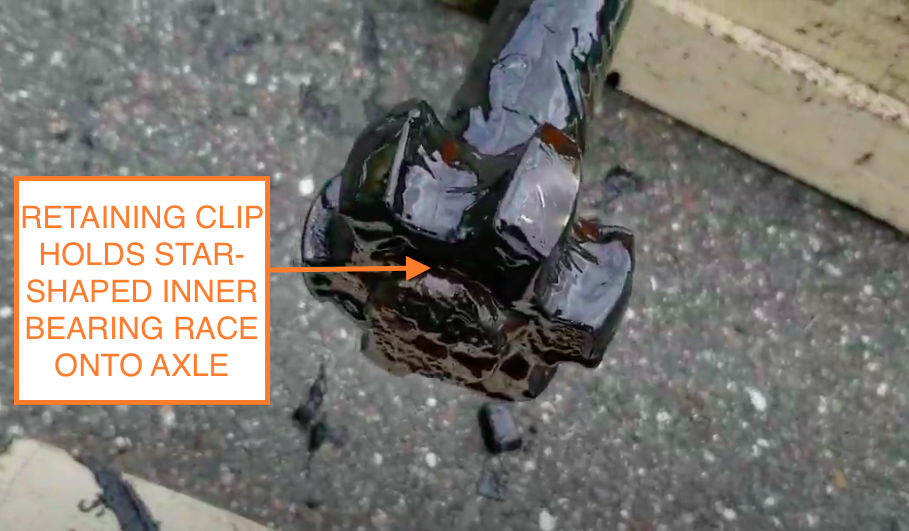
After struggling with the metal straps that hold the boot to the axle (the kit provided a wrong size clamp) we managed to get the new CV joint onto the axle, and installed into the van.
I also managed to buy my fifth and sixth wheel bearing hubs, which finally were the right size for the van. Plus, since I'd discovered tears in my ball joint and tie rod end boots, I replaced those, and luckily, faced no issues there. Jacob let me borrow a ball joint press, which dispatched my lower ball joints without issue (see last video in Instagram post below). While I was doing that, I swapped the brake pads.
So with new wheel bearings, CV joints, ball joints, tie rod ends, and brake pads, things were looking awesome. Now it was time for a test drive.
This went...poorly:
I drove just a few hundred yards to Jacob and his girlfriend Lisa's garage. Lisa hopped into the back of the van, the smaller of my two friends named Andreas jumped into the driver's seat, and I sat in the passenger's seat, eating a great raspberry cake that Andreas and his girlfriend Josi had brought me.
This should have been a glorious moment—three of us, excited to drive this van a substantial distance for the very first time, and a handful of friends watching from the outside. But no. Andreas went to turn the van around, and immediately something was afoot. He shifted the vehicle into reverse, let off the clutch, but Project Krassler refused to move. We could hear the drivetrain spinning, but there was no motion.
I'd experienced such a sensation before, and I knew immediately what the problem was. Something was up with a CV joint.
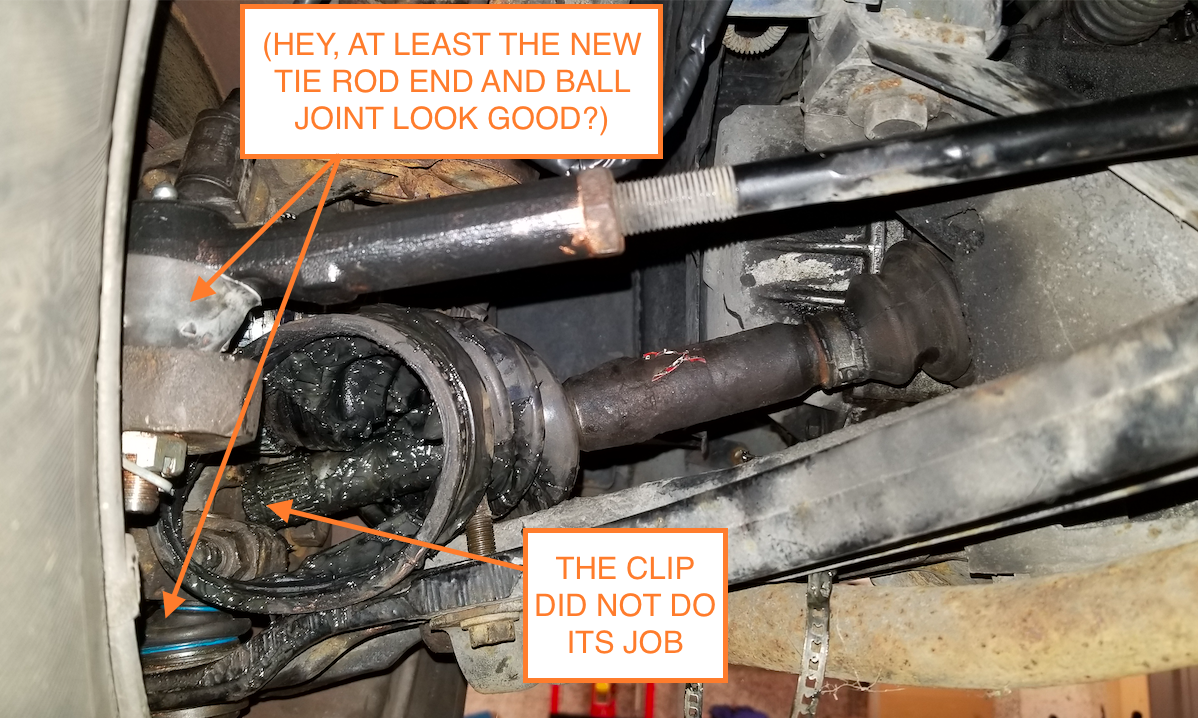
A quick glance under the front end confirmed my fear: The axle had slid out of the joint.
So in the same day, I managed to get my arse handed to me by both the axle clip on the passenger's side—which refused to let go of the CV joint—and the axle clip on the driver's side, which did the opposite, allowing the shaft to fall out of the joint, and just spin without transmitting power to the wheel.
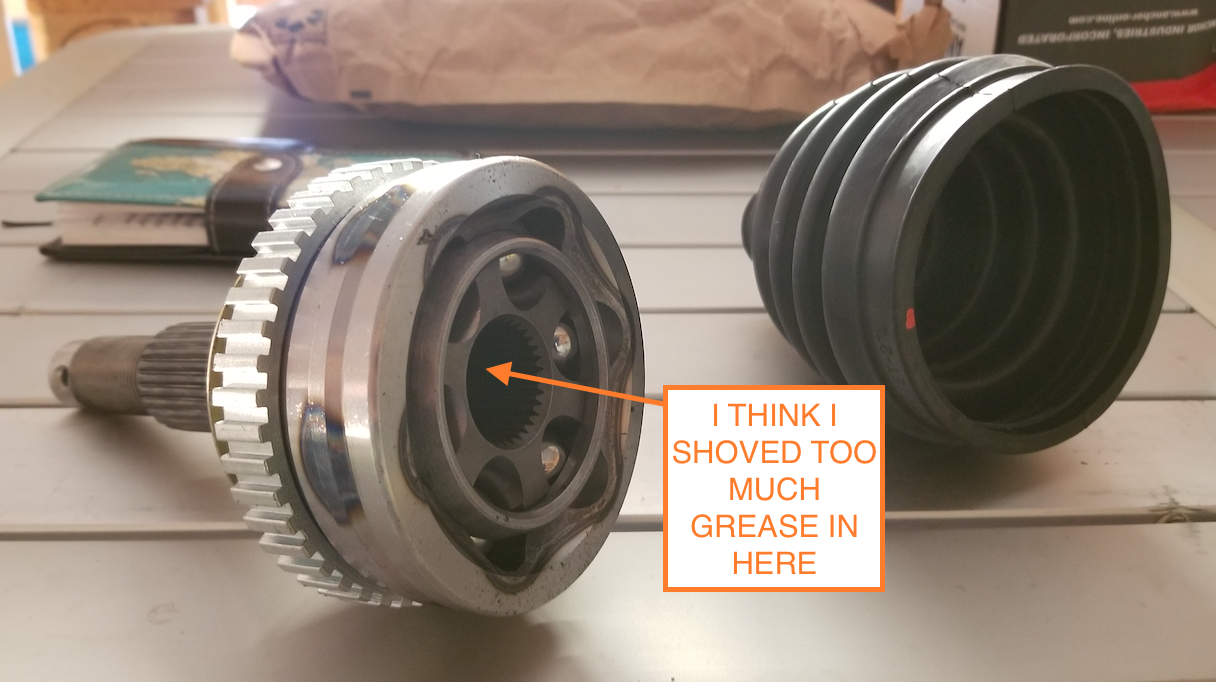
My theory is that I'd squirted too much CV axle grease into the spline of the new CV joint. This meant that, when I tried installing the axle, it basically hit a "wall" of grease that prevented the shaft from going all the way in and stopped the clip gripping the back side of the star-shaped inner bearing race.
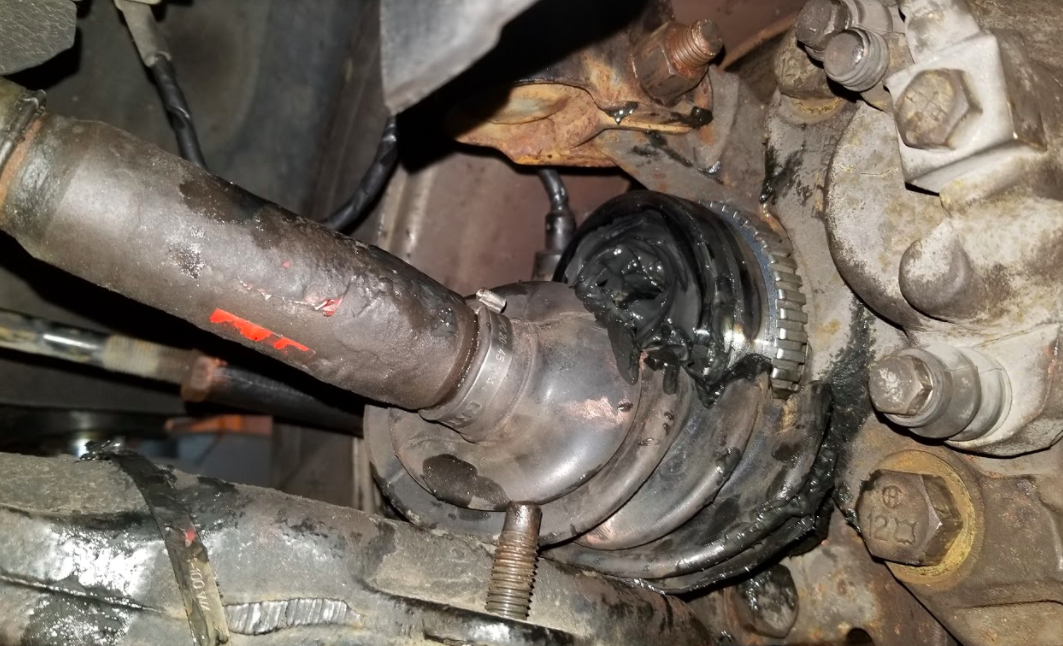
The good news is that the only thing that appears to be damaged is the rubber boot, for which I've already got a replacement here awaiting installation. I should be able to install the new boot without removing the axle or wheel hub, but we'll see. In any case, I'm fairly sure I'll finally have a proper test drive in this van in the coming days. This axle shaft is the last obstacle...that I know of.
Once I've shaken the van down a bit, I'll head over to my local church, sit in a confession booth with a priest, maybe recite a few rosaries, and then head over to the TÜV inspector. If I somehow manage to pass the rigorous test, I'll get the famous German bumper sticker: "Wir bleiben zusammen bis dass der TÜV uns scheidet."
It means: "We're staying together until Germany's rigorous car inspection does us part."
