What do you do if your headlights have gone foggy? Well, you Ask a Clean Person!
This month’s question comes from a reader looking for some light in their life. Headlight light, that is.
Is there a solution to restoring the clarity to hazy plastic headlights? I’ve tried a restoration kit, but the results were definitely not as advertised, and what little improvement quickly faded over the course of a few months. Is there a better solution? Replacement lenses/assemblies are over $200 each! Help!
Help is here, my friend! And not only is help here, you get to come on a kind of fun journey with me because headlight restoration is a thing I JUST DID IN MY OWN REAL LIFE and now I get to tell you about it. God, I love field research.
This story originally ran on May 23, 2018. We’re going to try bringing back some classic posts you may have missed. For more, check the Throwbacks section on the homepage.
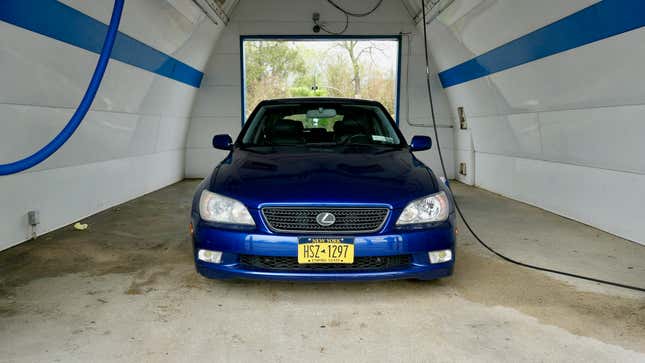
Okay lemme back up and tell you how this came to pass: A while back, our very own Michael Ballaban texted me in an absolute state because the headlights on his new-used Lexus were fogged and he wanted to know what to do about it. I was like, “Oh sure, you need rubbing compound, no problem.” Which turned out to be completely unhelpful, as far as advice goes, because Michael hadn’t the foggiest (heh) notion what rubbing compound was or what to do with it even if he could figure out what it was.
It also made me kind of happy, because it meant that if he didn’t know, lots of you wouldn’t know, and I could write a pretty basic explainer on how headlight restoration. It also meant that I had an actual set of headlights on which to work, so that my explainer would be even more informed, by dint of me actually, you know, doing the job with my own two hands. Theory is grand, but practice is :kisses fingers: Plus I really like working on cars, and I also really like Ballaban and we had a grand time indeed doing all sorts of things to his Lexus in addition to the headlight work.
But also, this was my first time actually doing this job and I didn’t want to fuck up! I mean, I was pretty confident I wasn’t going to fuck up but I have a nervous constitution sometimes and right. I think it’s good to admit these things.
Spoiler: I did not fuck up. In fact, the headlights look pretty darned fine, though there are some things I would do differently next time, which I’ll for sure talk about here. But! All in all it was an easy and satisfying job that no one should feel especially nervous about taking on themselves instead of outsourcing to a professional. Join me on this journey, won’t you?
Prepping the Headlights
Before you can get to the actual polishing of the headlights, some light prep is required. If you’re already planning to wash your car, great — just make sure the headlights get washed as part of the job. Also if you’re washing your car and not making sure the headlights get washed as part of the job we need to have a whole other conversation but also I’m pretty sure none of you are doing that, because you’re all fine people who were not raised by wolves. (I can say that because I was raised by wolves.) If you’re not performing a full washing of the car, go ahead and clean the headlights using Windex and paper towels.

Once the headlights are clean, it’s time to decide how ALL IN you’ll get with your headlight polishing jam: Are you going to play it safe and skip the sanding or are you going to be all NO FEAR and sand? You should sand! We didn’t sand and I’m full of regrets now.
Here’s the thing though: If you’re going to sand you must tape off the headlights using blue painters tape. If you’re not going to sand you can skip the blue painters tape or you can use the blue painters tape, your call. What you should NOT do however is use blue duct tape that you’ve mistaken for blue painters tape, which of course you would not ever do because you were not raised by wolves. (I, on the other hand … well, we’ll talk about it another time.)
Sanding, If You’re Doing That
Sanding the headlight before you polish it is going to do two things: Level off the plastic and remove a lot of the oxidation that’s causing the fogging. For this, you’ll want 1000 grit automotive sandpaper and a spray bottle filled with water. Spray the headlights with the water and then use the sandpaper to, you know, sand. Keep the headlight wet as you work, sanding in a circular motion. It should only take about a minute or so of sanding before it’s compound time. When you’re done sanding, spray the headlight with more water and use a microfiber cloth to wipe the surface clean.
Finally, It’s Compound Time!
There are two types of compound that can be used on headlights, rubbing compound and polishing compound. The difference between the two is, essentially, grittiness; the polishing compound is finer and more gentle than the rubbing compound. We took the conservative route and started with the polishing compound, took stock of things and decided we wanted to use rubbing compound to get a better result. Knowing what I know now, next time I would for sure start with the rubbing compound, but also I think it’s A-OK if you want to tread lightly and try the gentler compound on your own headlights first. Like I said, it’s okay to feel nervous and exercise some caution. Also if you need a hug or a light petting because all of this is very stressful I’m here for you, some of us are just more nervous than others, okay?!?

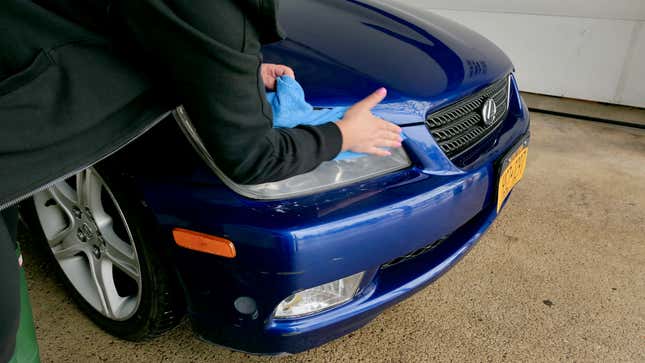
Using rubbing and polishing compound is incredibly straightforward — if you’ve ever polished a pair of shoes you already have the required skillset for the job. Here’s what to do: Put some of the compound on a clean microfiber cloth, i.e. not the one you used after sanding, and apply it to the headlight, working in a circular motion. That’s literally all there is to it! The catch is, however, that you want to rub and rub and rub and rub and rub. For, like, a pretty long time. Several minutes! Which doesn’t sound like a long time when you read it here but when you’re actually doing it is a pretty long time. (We kept stopping and wiping away the compound to check our progress and clap excitedly but that’s because we’re overeager dorks in addition to being pretty nervous people.) One thing that would have made the job easier is if I’d upended our washing bucket and sat on it instead of sort of crouching in front of the headlight. Music would have helped too.
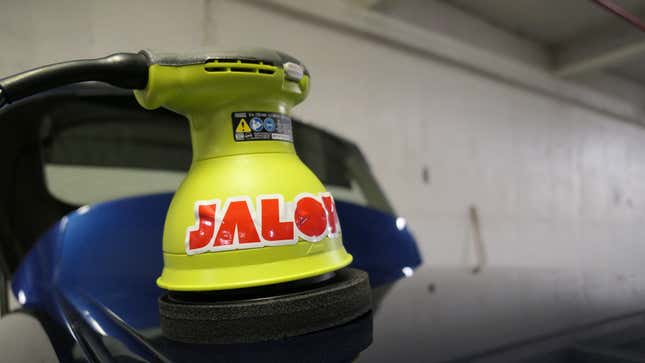
On a lark, because by this point we were feeling much more confident about things, we also turned an orbital buffer on the headlights, to compare using the power of machinery to the manual method. What I would say about that is this: The buffer absolutely made the job faster and a bit more effective, but not so much that I’d send you out to buy one just for this task. I do think you should buy one but, like the blue duct tape, that’s another conversation for another day. However! If you own a power drill, definitely consider getting a buffer pad attachment or set of attachments, which will run you about anywhere from $7-$30. Also remember how I compared polishing headlights to polishing shoes? You can use the buffer attachments to polish shoes, which is absurd and unnecessary and is a thing you should 10,000% do.

With the polishing complete, go over the headlight with a clean microfiber to buff the headlight and wipe any stray compound off the paint. And that’s all she wrote!
Except for this one last thing: I suspect the reason that the LW’s results didn’t last is that he skipped applying a UV headlight protectant to the lenses after they were polished. We also didn’t do that and I’ve lost sleep to my failings but the good news is that Ballaban and I are planning to take a second pass at his headlights in the upcoming weeks and I SHALL NOT FAIL HIM AGAIN.