11 Cheap Ways To Dress Up Your Engine Bay
We may receive a commission on purchases made from links.
Everyone likes a bit of attention, and it's real easy to get carried away with mods that catch the eyes of passersby — wings, wheels, tint, decals, and whatever else piques the curiosity of the person next to you at the stoplight. But honestly, when was the last time you gave your engine compartment the same amount of love?
Admittedly, it's not as fun as fender flares or wheel spacers, but nobody wants to be the guy with multiple families of spiders living amongst their vacuum hoses, especially if the exterior of your car is decked out in ostentatious elements. And between us, most modifications are bound to decrease your car's resale value anyway. So, in the spirit of tasteful modification and revisiting your neglected engine bay, we're looking at inexpensive ways you can spruce up your under-hood area; all of which you can do at home with a few cheap tools and some good old-fashioned patience.
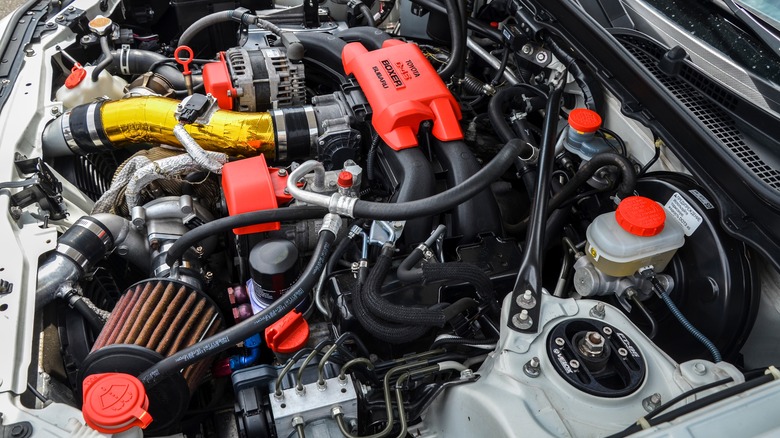
A proper deep cleaning
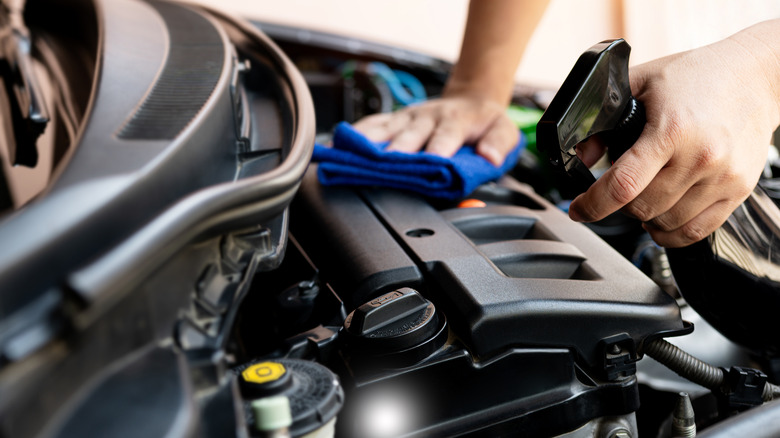
You can spend all the time in the world curating a gussied-up engine compartment, but if its backdrop is an oil-slathered, rodent poop-infested canvas, well, that defeats the purpose. That's why the first step should always be a deep cleaning. We have a more thorough guide on how to deep clean without breaking your engine, but stay tuned to see the cost breakdown.
For a simple deep clean, you'll want to start by finding a degreaser. These come in many forms, but the cheapest and easiest will be an aerosol can. For reference, choose something like Engine Brite's Gunk Degreaser. It costs about $15 and is safe to use on just about everything under the hood. To scrub, buy a cheap set of small detailing brushes as well as some clean shop towels, if you don't already have some.
Mask off the sensitive electrical stuff, give it a rinse, degrease, scrub, and clean until you're satisfied; rinsing again afterward. Funny enough, this is often the hardest part. If you live in an apartment with no hose available and your local, self-serve car wash doesn't allow the use of things like degreaser, find a friend with a hose to ensure you can rinse that engine bay clean. At the end, you shouldn't have to spend more than $25 in materials.
Tidy up your wiring
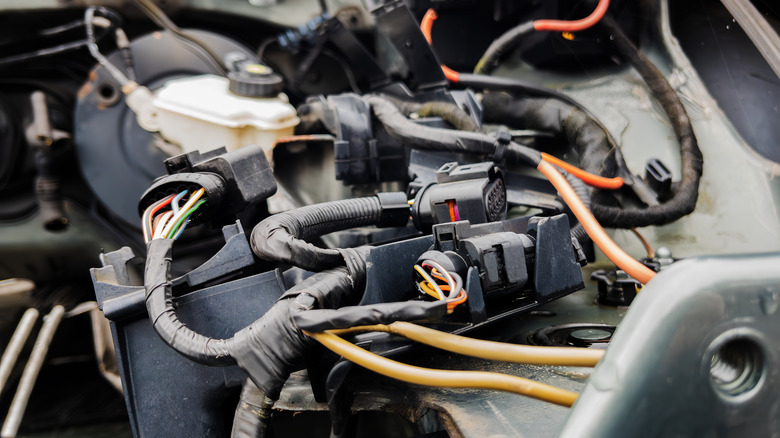
We're willing to bet that most 20+ year-old cars have an electrical maze or two in need of some TLC, but of course, this project will depend on the severity of your mess. First, let's say all you need is to organize that nest of wires — in this case, spring for a set of wire separators or looms plus zip ties for good measure.
A spark plug wire separator can be incredibly cheap if you don't need a specific part. If it's smaller wires you're dealing with, a loom or sleeve is what you want — prices will vary depending on the material quality, . To secure the looms or individual wires, go for a cheap pack of zipties; These shouldn't cost more than $5 to $10, depending on the size.
If it's replacing wires, stripping, and creating new connections you need, then your tools should include a wire stripper, electrical tape, and shrink/crimp connectors. Make sure you know how to handle car wiring first, but if you have $40, you can make sure your electricals look neat while avoiding hot surfaces.
Replace worn-out hardware
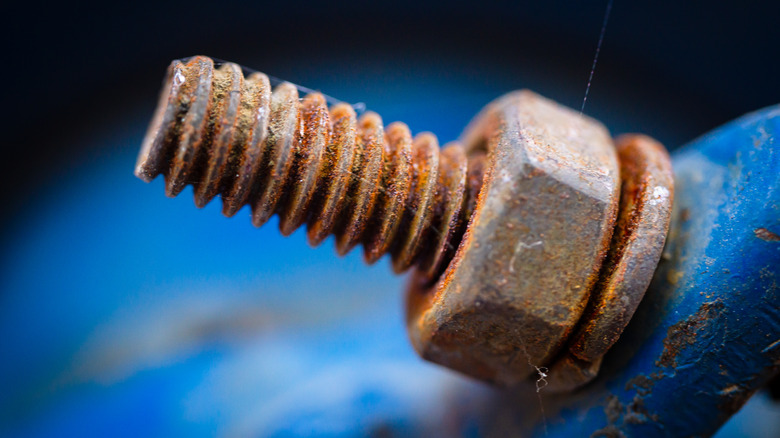
We promise it's not all boring replacements like this, but before you start with the fun stuff, it's important to have the little things in order. And one of those little things ought to be hardware. We're talking about your shock tower bolts, radiator mount fixtures, and bracket fasteners, among others. If you have an older car, especially, bolts might be missing or heavily rusted, making further modification and maintenance more difficult.
Luckily, hardware like this is pretty cheap. Using that shock tower example, we can get a ballpark idea of how much it would cost based on your car. If you own a classic American car like a first-gen Mustang, a set of shock tower mounting bolts should only run you $15. On the other hand, if you have something like a newer BMW, parts are harder to come by, more expensive, and will likely be sold individually.
That does add up, but in general there will almost always be generic alternatives for non-engine-related bolts which you can pick up at the hardware store. Plus, if you already have the tools to remove and replace these bolts, the hardware itself is the only cost you'll incur. As always, though, cost will depend on what you're replacing and how many items you need to buy.
Strut bars
If you've done all the previous steps, it's time to throw yourself a bone. So why not a strut bar? They usually come in the form of a metal rod which stretches from one shock tower over the engine to connect with the other tower, strengthening the lateral rigidity of the front end of your car. It's a mod that looks cool, serves a genuine purpose, and won't cost an arm and a leg (depending on how baller you want to go).
To talk about pricing, let's use an entry-level sports car like the first-gen Subaru BRZ as an example. If you want a decent quality, low budget strut bar, you should be able to find something that will do the job for less than $80 (price and product vary by vehicle model, so look closely when purchasing). If you have more money to spend but still want to stay reasonable, mid-range strut bars will often reach upwards of $150. Of course, once you get into the specialized stuff, they go way up from there.
If you want the absolute stingiest option, you can fabricate your own with spare metal and custom brackets for a fraction of what you'd spend on an aftermarket part. To do that, however, you'd need to own a welder or have a friend who does.
Spark plug wires
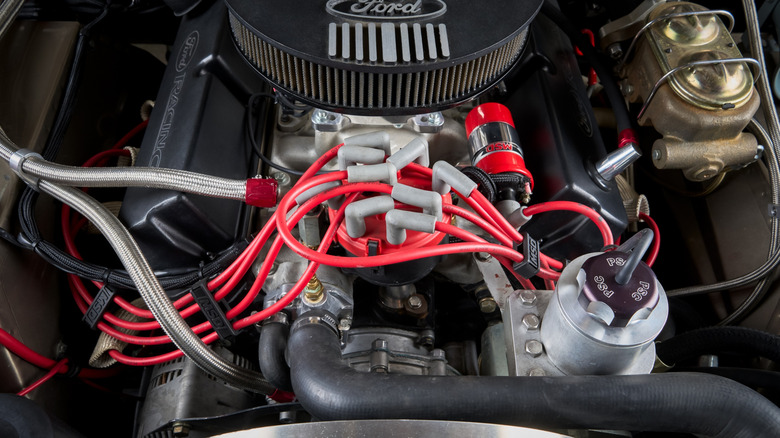
For those with old-timey points or HEI distributors, this one's tailor-made for you. In our opinion, a set of new spark plug wires is one of the absolute best ways to bring a subtle pop of color to your engine bay. And not just that, installing spark plug wires is probably the easiest job in the history of mankind — you only need your hands (maybe a pair of gloves) and the physical ability to plug and unplug a thick wire. The hardest part is deciding which set suits your needs best.
Now, unless you're building a street machine and want ultra-premium plug wires that can handle your beefy ignition system, there are plenty of affordable options out there. For example, this set for Chevrolet SBC and BBC engines sells for just $30.
There are some caveats to keep in mind, though. Firstly, many plug wire sets are sold unassembled. If you don't trust yourself to crimp the boots yourself, just go ahead and buy a pre-assembled set. Secondly, don't get your wires crossed (literally). Replace one at a time to ensure it's on the correct cylinder and distributor terminal, lest you accidentally induce a nasty timing issue.
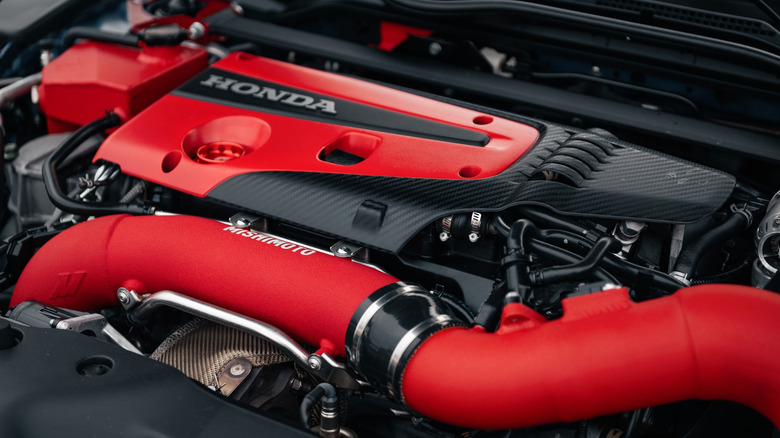
Aftermarket cold air intake system
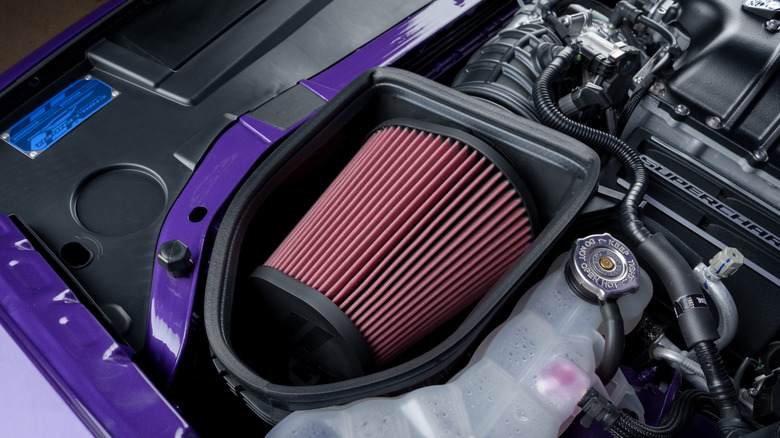
Look, the designers and engineers did the best they could with the factory air intake system while working within the strict confines of building a reliable production car, but that doesn't mean you can't upgrade it yourself for a slicker look and better performance, all for a decent price. As with many of these larger additions (like strut bars and spark plug wires), it can blur the line of what we would consider "budget." In light of that, it's worth looking into what options you have. First would be a full cold air intake kit: box, piping, filter, and all. These options are going to cost more: upwards of $200. Up from there, we have K&N cold air intake systems that will run you $350 or more.
If those satisfy your definition of affordable, by all means, pull the trigger (lord knows there are intake systems far more expensive than that). But if $200 to $350 is too much for you to deem "cheap" (which we would likely agree), let us suggest buying a universal air filter without the rest of the kit, something that sits closer to $40. There are both pros and cons of having a cold air intake. But for the average Joe, they look sweet and provide a jumping-off point for performance mods in the future.
Subtle lighting
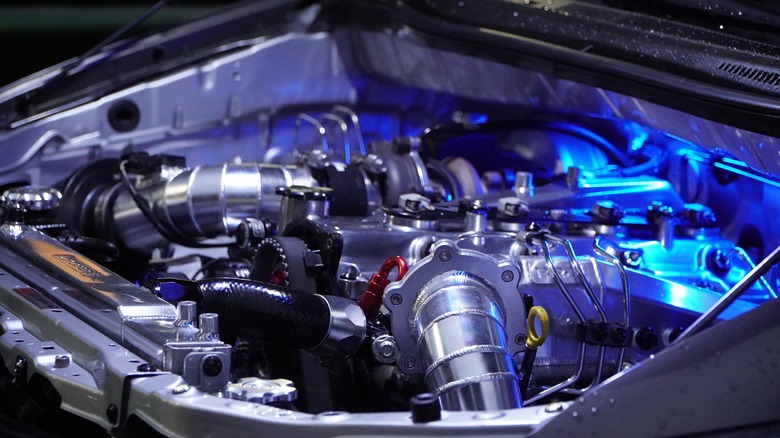
Aftermarket lighting can be a slippery slope. In general, unless it's a tasteful interior ambient light or fog lights on a rally car, it's usually best to stay away from them altogether. After all, there's a reason why you don't see underglow anymore. But lights under the hood? That's something many people forget about.
If it were us, a simple automotive-grade LED light strip would be enough to execute several different ideas for an affordable price. Consider the AURA engine bay lighting kit which sells for $50. It can change to any color you want via remote, for one; though in the name of subtlety, we'd personally tuck the lights in a dark nook and keep them on the soft yellow setting. If you want something more bare bones (one color, smaller strips), this under-hood LED light kit is only $21.
This sort of dress-up is more about appearances than anything else, but when placed cleverly this upgrade can be a huge help for those who work on their car outside or in a dark garage and need some extra light in the engine compartment. Importantly, try to look for LEDs made for automotive applications. Your run-of-the-mill home LED strip might work just as well, but it won't come with the extra hardware to hook up, and even worse, it might not be heat-resistant enough to withstand under-hood temperatures.
Small painted accents
We think it's obvious, but we'll say it anyway: Just like LED lighting, it's easy to overdo it with painting virtually anything. Ultimately, it is your car — paint the engine bay like a rainbow if you want, or color-match those out-of-place pieces to fit a stock look. The world's your oyster. Regardless of what style you're going for, the items you'll need are all the same and fairly affordable.
The first item on the docket is, unsurprisingly, paint. Make sure to choose automotive paint that can handle high temperatures. Next, get something to cover your overspray as well as a pack of sandpaper. We'd recommend removing the parts you'd like to paint before spraying them. That way, you don't have to mask every crevice of your engine and risk spraying paint on unwanted areas. Scuff the parts with sandpaper, wipe them clean, use that masking film as a backdrop (or mask surrounding items you don't want to get paint on), and spray. All said and done, you'll have the parts reinstalled with your chosen color for about $30.
Heat shielding wrap
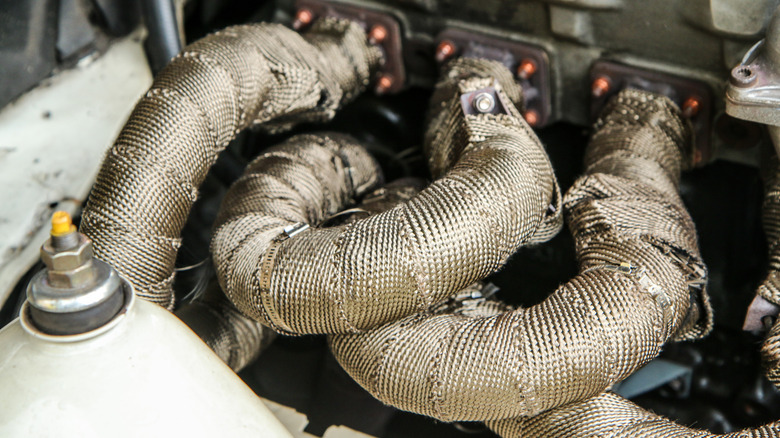
Your engine bay is designed to avoid burning itself to the ground, but there's always a reason for additional safety. Maybe you have aftermarket parts that sit too close to the hot exhaust manifold, or your exhaust manifold itself is aftermarket and nearly touches some wires. Either way, heat shielding wrap looks great and provides some additional peace of mind.
For this, you only need two items: your choice of heat shielding wrap and hose clamps to secure it at each end. Once you have your materials, it's time for installation. Similar to the painting process we just covered, you can technically do this with the parts still fixed to your car, but removing them before wrapping and securing will make for a more precise, snug fit. And if all goes well, you'll have spent less than an hour removing your headers or piping, with no more than $65 spent for the parts.
Hood insulation replacement
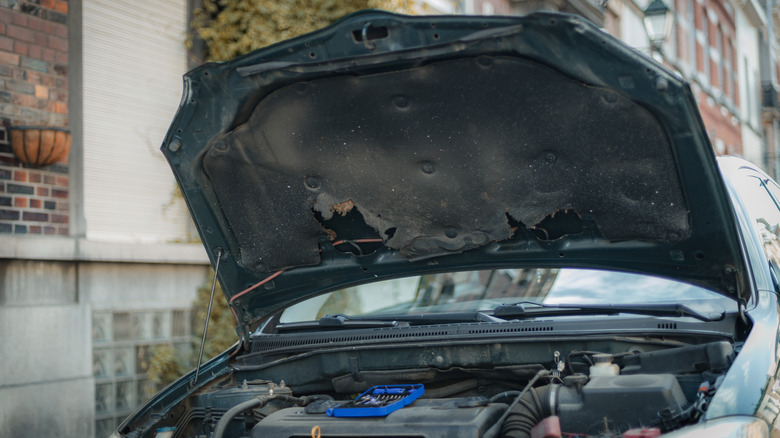
If you're not wrenching on your car every weekend, you may have never taken a good look at that big piece of fabric insulation attached to the underside of your hood. In fact, we bet you can't even remember what it looks like. Odds are, it's stained in gross oil vapors or has been completely ripped off at some point. Whichever scenario it is, here's how to address the matter.
This under-hood piece's main function is sound dampening, so in reality, you can carefully remove it and touch up the area behind it for a clean, color-matched look that costs no more than $0 and a bit of elbow grease. But if you enjoy the extra muffling it provides, there are several sizes and shapes out there that you can find for various prices. A simple roll of car hood insulation material doesn't have to cost you more than $25, but there are other options.
Depending on the rarity of your vehicle, finding a hood insulator curated for your exact car is sometimes possible and it won't necessarily break the bank. For example, this LMSPVXP heat-sound insulation built specifically for late model Mazda 3s costs less than $100. Compared to our previous suggestions, these glorified cloths are not the sexiest under-hood mod, but for some, it could make all the difference.
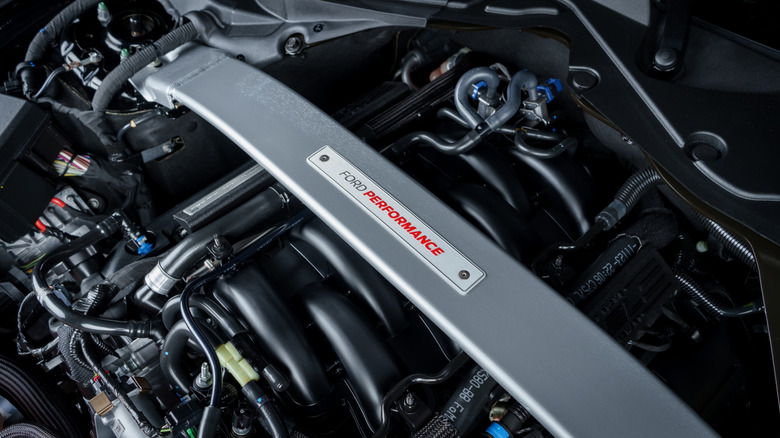
Refresh or replace under-hood badges
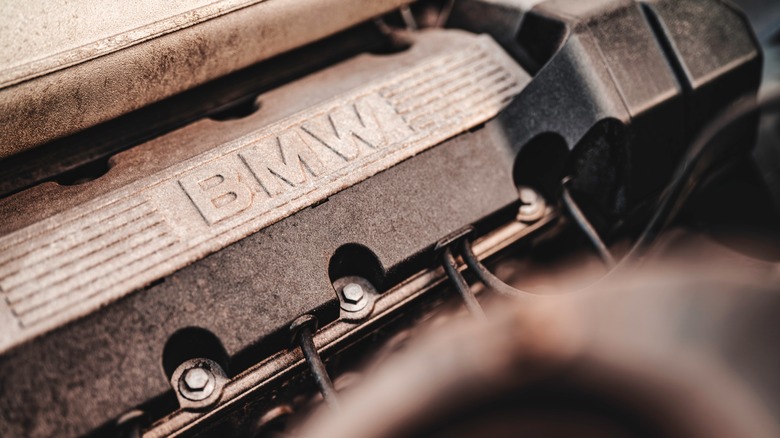
Factory badges are an essential part of a car's character. That's why the old guys at Sunday car shows are polishing them with microfiber towels 15 times an hour. You can bank on the fact that they've thoroughly cleaned the ones under the hood, too. Say what you will, they know how to keep an engine bay clean.
For engraved areas (like the one pictured above), we'd recommend something like Scotch Brite scouring pads to scuff and polish the metal badge. Follow up with a wet towel or water spray bottle to rinse and then wipe it clean with a microfiber towel. Of course, if the engraving is painted, avoid harsh materials by using a soft brush to refresh the area.
Plastic engine covers and their badges are even easier. Simply use an all-purpose cleaner, rinse, and wipe with one of those microfiber towels. In literal minutes, and for about $50, you'll have shiny badges and cleaning materials you can use for months to come.